Lower Abs Shred Routine for women over 40

Science-backed lower abs routine designed for women over 40. Get a complete 15-minute home workout with realistic timelines, hormonal insights, and proven exercises that actually work.
Let’s be honest—that stubborn lower belly pooch doesn’t care that you’ve been doing crunches for years. And after 40, it seems even more determined to stick around, doesn’t it?
I remember standing in front of my mirror at 43, after completing what felt like my thousandth plank challenge, wondering why my lower abs still looked soft despite all the work I was putting in.
I was frustrated, confused, and ready to believe that maybe visible lower abs just weren’t in the cards for women my age.
That’s when I stopped following generic fitness advice and started researching what actually happens to our bodies after 40—and more importantly, what works despite those changes.
Here’s what you need to understand: your body isn’t broken, and you’re not doing anything wrong. The hormonal shifts happening after 40 fundamentally change how and where your body stores fat, how quickly you build muscle, and how your metabolism responds to exercise.
But here’s the empowering part—once you understand these changes, you can work *with* your body instead of against it.
In this guide, you’ll learn exactly why lower abs are harder to tone after 40 and what to do about it. I’ll walk you through the exact exercises that target stubborn lower belly fat, give you a complete 15-minute routine you can do at home without any equipment, share nutrition strategies that support your results, and provide realistic timelines for visible transformation.
No hype, no impossible promises—just proven strategies that acknowledge your body’s reality while refusing to accept limitations that don’t actually exist.
The best part? You don’t need a gym membership, fancy equipment, or hours of free time. What you need is the right information, a strategic approach, and the willingness to be consistent with something that actually works.
Why Lower Abs Are Different After 40 (And Why That’s Okay)

The Hormonal Reality: How Menopause Affects Your Midsection
When estrogen levels begin declining during perimenopause and menopause—typically starting in your 40s—your body fundamentally changes its fat storage patterns.
Research consistently shows that this hormonal shift causes fat to redistribute from your hips and thighs to your midsection, particularly the lower belly and visceral areas around your organs. This isn’t about willpower or effort; it’s biochemistry.
But here’s where it gets more complex: declining estrogen also affects insulin sensitivity, making your body more likely to store calories as fat rather than burn them for energy.
Add in elevated cortisol levels from the stress of juggling career, family, and the physical changes you’re experiencing, and you’ve got a perfect storm for stubborn lower belly accumulation. Cortisol literally signals your body to hold onto abdominal fat as a survival mechanism.
The good news? Understanding this means you can stop blaming yourself and start implementing strategies that address the root cause.
Targeted core strengthening combined with stress management and strategic nutrition can absolutely counteract these hormonal effects. Your body is different, not defeated.
Metabolism and Muscle Loss: The 40+ Factor
Here’s a stat that stopped me in my tracks: muscle mass naturally decreases by 3-8% per decade after age 30, with the rate accelerating after 40.
This phenomenon, called sarcopenia, directly impacts your metabolism because muscle tissue burns significantly more calories at rest than fat tissue does. Less muscle equals slower metabolism equals easier fat storage, especially in that stubborn lower belly region.
But this creates an opportunity, not just a problem. Building lean muscle becomes your secret weapon for burning belly fat because it addresses the metabolic slowdown at its source.
Every pound of muscle you add increases your resting metabolic rate, meaning you burn more calories even while sleeping. This is why strength training—not just cardio—is non-negotiable for women over 40 who want visible abs.
The powerful reality is that strength training can actually reverse age-related muscle loss. A study in the Journal of Applied Physiology found that women who engaged in regular resistance training maintained muscle mass and metabolic rate comparable to women 20 years younger. That’s not hype; that’s measurable, achievable transformation.
What This Means for Your Lower Abs Strategy
Let’s address the elephant in the room: spot reduction is a myth. You cannot do lower ab exercises and magically burn fat from only that area.
Fat loss happens systemically across your entire body based on genetics, hormones, and overall caloric balance. But—and this is crucial—targeted toning absolutely works.
When you strengthen and build the muscles in your lower abdominal region while simultaneously reducing overall body fat through nutrition and full-body strength training, those specific muscles become more visible and defined. Think of it this way: you can’t choose where fat comes off, but you can choose which muscles you develop underneath.
Consistency trumps intensity every single time, especially for sustainable results. I’ve seen women transform their midsections with three focused 15-minute sessions per week far more effectively than those who go hard for two weeks and then burn out. Your goal isn’t to punish your body into submission; it’s to build a sustainable practice that compounds over time.
Realistic expectations matter: you’ll feel stronger in 2-3 weeks, see initial changes in 4-6 weeks, and achieve visible definition in 8-12 weeks with consistent effort. Not overnight, but absolutely achievable.
The Foundation: Core Principles for Effective Lower Ab Training

Mind-Muscle Connection: The Game-Changer Most Women Miss
The mind-muscle connection isn’t some woo-woo fitness concept—it’s a measurable neurological phenomenon where consciously focusing on the muscle you’re working increases its activation by up to 60%, according to research in the European Journal of Applied Physiology. For your lower abs, this makes the difference between going through the motions and actually building strength.
Here’s how to engage your lower abs properly: before you begin any exercise, place your hand just below your belly button and practice the “draw in” technique.
Imagine pulling your belly button straight back toward your spine without sucking in your breath or tilting your pelvis. You should feel the deep muscles engage under your hand—that’s your transverse abdominis, the corset-like muscle that creates a flat, defined midsection.
Quality of movement matters exponentially more than quantity of reps. I’d rather you do 8 perfectly controlled reverse crunches where you truly feel your lower abs working than 30 sloppy ones where momentum does all the work. Every single rep should be intentional, controlled, and focused.
Simple cue to remember: “Pull belly button to spine” on every exertion. This one mental reminder will transform your results because it ensures you’re recruiting the right muscles instead of compensating with your hip flexors or lower back.
Progressive Overload Without the Overwhelm
Progressive overload sounds intimidating, but it simply means gradually increasing the challenge to your muscles over time so they continue adapting and getting stronger.
For lower abs, this doesn’t require weights or complicated equipment—you can progress by increasing time under tension, adding more reps, reducing rest periods, or advancing to more challenging exercise variations.
Start exactly where you are without shame or comparison. If you can only hold a plank for 15 seconds or do 5 controlled reverse crunches, that’s your starting point.
Progress happens when you do 6 reps next week, then 7 the week after. Small, consistent improvements compound into dramatic transformation.
Here’s a realistic progression timeline: Week 1-2 focus on learning proper form with beginner modifications. Week 3-4 increase reps by 2-3 per exercise.
Week 5-6 reduce rest time between sets by 10-15 seconds. Week 7-8 introduce intermediate variations or add a fourth workout day. By week 8, you’ll be amazed at exercises that seemed impossible initially.
The key is systematic progression, not random intensity. Write down your reps and sets so you know exactly what to beat next time.
The Recovery Factor: Why Rest Days Build Better Abs
Here’s what most fitness content won’t tell you: muscle doesn’t grow during your workout; it grows during recovery. When you train your abs, you’re creating microscopic tears in the muscle fibers. During rest—especially during sleep—your body repairs those tears and builds the muscle back slightly stronger and more defined. Skip recovery, and you’re just breaking down muscle without giving it time to rebuild.
I recommend training your lower abs 3-4 times per week maximum, with at least one full rest day between sessions. This frequency provides enough stimulus for growth while allowing adequate recovery time. Research in the Journal of Strength and Conditioning Research found that training muscle groups 3 times per week produced better results than daily training, which often led to overtraining symptoms.
Active recovery options like walking, gentle yoga, or swimming support core strength without overtaxing the muscles. These activities increase blood flow to healing tissues, reduce inflammation, and maintain mobility without creating additional breakdown.
Signs you’re overtraining: persistent soreness that doesn’t improve, decreased performance despite effort, disrupted sleep, increased irritability, or feeling weaker instead of stronger. If you notice these, dial back intensity or frequency immediately. Your body is asking for rest, not more punishment.
Breathing Technique: Your Secret Weapon
Proper breathing during core exercises can increase muscle activation by up to 30% and protect your pelvic floor—especially important for women over 40. The pattern is simple but powerful: exhale during the exertion (the hard part of the movement) and inhale during the release or return phase.
For example, during a reverse crunch, exhale as you lift your hips off the floor, pulling your knees toward your chest. Inhale as you slowly lower back down. This breathing pattern does three critical things: it engages your deep core muscles more fully, prevents you from holding your breath and spiking blood pressure, and creates intra-abdominal pressure that supports your spine.
The connection between breath work and pelvic floor strength is especially relevant for women over 40. Coordinating your exhale with core engagement helps maintain pelvic floor integrity and prevents the downward pressure that can lead to dysfunction. Think of your core and pelvic floor as a pressure system—proper breathing keeps that system balanced.
Common breathing mistake: holding your breath during the hard part of the movement. This creates excessive intra-abdominal pressure, strains your pelvic floor, and reduces the effectiveness of the exercise. If you catch yourself holding your breath, slow down and focus on the exhale during exertion.
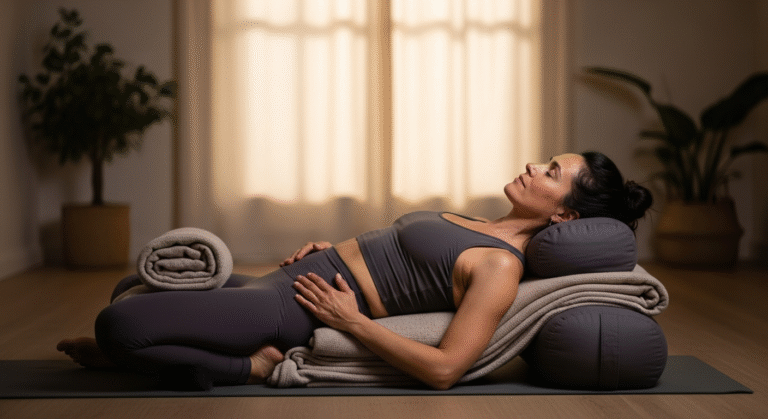
The Ultimate Lower Abs Shred Routine: 8 Proven Exercises

Exercise 1: Reverse Crunches (The Lower Ab Foundation)
Reverse crunches are the gold standard for lower ab development because they specifically target the area below your belly button while minimizing hip flexor involvement—a common problem with traditional crunches. Lie on your back with knees bent at 90 degrees, feet lifted off the floor. Place your hands by your sides or under your glutes for support. Exhale and use your lower abs to curl your hips off the floor, bringing your knees toward your chest. The movement is small—only 2-3 inches of hip lift—but intensely focused.
The most common mistake is using momentum and swinging your legs, which completely defeats the purpose. Instead, move slowly and deliberately, taking 2 seconds to lift and 3 seconds to lower with control. Your lower back should maintain contact with the floor throughout the movement—if it arches, you’ve gone too far.
Beginner modification: Keep the range of motion smaller, just tilting your pelvis slightly to feel the lower abs engage. You can also keep one foot on the floor while working the other leg.
Advanced variation: Straighten your legs completely and perform the movement with straight-leg raises, which dramatically increases the challenge.
Prescription: 12-15 reps, 3 sets, 30-45 seconds rest between sets.
Exercise 2: Dead Bug (Core Stability Builder)
The dead bug is perfect for women over 40 because it builds functional core strength while protecting your lower back—critical as we age. Lie on your back with arms extended straight up toward the ceiling and knees bent at 90 degrees, shins parallel to the floor. This is your starting position. Slowly lower your right arm overhead while simultaneously extending your left leg, hovering just above the floor. Return to start and repeat on the opposite side.
The key is to maintain lower-back contact with the floor throughout the entire movement. If your back arches, you’ve extended too far. Press your lower back into the floor by engaging your abs—this is where that mind-muscle connection becomes crucial.
Breathing pattern: exhale as you extend the arm and leg, inhale as you return. This coordination might feel awkward initially, but it’s what makes the exercise so effective for deep core activation.
Modification: Move only one limb at a time—just the arm or just the leg—until you build enough control for the full movement.
Challenge: Add light ankle weights (2-3 pounds) or hold a light dumbbell to increase resistance.
Prescription: 10 reps per side (20 total), 3 sets, 30 seconds rest.
Exercise 3: Mountain Climbers (Cardio Meets Core)
Mountain climbers deliver metabolic benefits alongside core strengthening, making them incredibly efficient for busy women over 40.
Start in a high plank position with hands directly under shoulders, body in a straight line from head to heels. Drive your right knee toward your chest, then quickly switch legs, bringing the left knee forward while extending the right leg back. The movement resembles running in place while holding a plank.
Proper plank position is non-negotiable: hips shouldn’t pike up or sag down. Engage your core throughout and avoid rocking your hips side to side—the movement should be controlled and linear.
Use slow mountain climbers (2 seconds per leg) when focusing on core strength and form. Use fast mountain climbers (as quick as possible while maintaining form) when you want the metabolic cardio boost. Both have their place depending on your goals for that workout.
Low-impact modification: Place your hands on a chair or bench to elevate your upper body, which reduces stress on your shoulders and makes the movement more accessible.
Prescription: 20 total reps (10 per side), 3 sets, 45 seconds rest.
Exercise 4: Leg Lowers (Advanced Lower Ab Sculptor)
Leg lowers are incredibly effective but require careful attention to form to protect your lower back. Lie on your back with both legs extended straight up toward the ceiling, perpendicular to the floor. Place your hands under your glutes or by your sides. Slowly lower both legs toward the floor while keeping your lower back pressed into the ground. Stop lowering when you feel your back start to arch—this is your range limit. Return legs to starting position.
The critical form point: the moment your lower back arches off the floor, you’ve gone too far and shifted the work from your abs to your hip flexors. It’s better to work in a smaller range with perfect form than to lower your legs all the way and compromise your back.
Beginner: Single leg lowers—keep one leg bent with foot on the floor while lowering the other straight leg. This reduces the load significantly.
Intermediate: Both legs with bent knees—keep knees bent at 90 degrees while lowering, which shortens the lever and makes it more manageable.
Advanced: Straight leg lowers with a 3-second descent and 2-second ascent for maximum time under tension.
Prescription: 8-12 reps, 3 sets, 45 seconds rest.
Exercise 5: Plank to Pike (Full Core Engagement)
This dynamic movement targets your entire core while emphasizing the lower abs through the pike motion. Start in a high plank position. Keeping your legs straight, lift your hips up and back, creating an inverted V shape with your body. Your weight shifts toward your shoulders as your hips rise. Pause briefly at the top, then return to plank position with control.
The movement engages your deep core stabilizers, hip flexors, and lower abs simultaneously. If you have a towel and smooth floor, you can place the towel under your feet to help them slide, making the movement smoother. Otherwise, small steps with your feet work perfectly.
Modification: Instead of the full pike, perform plank holds with alternating knee tucks—bring one knee toward your chest, return, then switch sides.
Prescription: 10-12 reps, 2-3 sets, 45 seconds rest.
Exercise 6: Scissor Kicks (Lower Ab Burner)
Scissor kicks create constant tension in your lower abs, making them an excellent finishing exercise. Lie on your back with hands under your glutes for support, legs extended straight. Lift both legs about 6 inches off the floor. Keeping legs straight, alternately raise and lower each leg in a scissoring motion—as the right leg lifts, the left lowers, and vice versa.
The tempo matters: use a controlled 1-second up, 1-second down rhythm to maximize the burn. Moving too quickly reduces effectiveness and can strain your hip flexors.
To keep your lower back safe, maintain the natural curve of your spine by keeping your hands under your glutes. If your back arches uncomfortably, lift your legs slightly higher until you find a position where you can maintain proper alignment.
Making it easier: Keep your head and shoulders slightly lifted off the floor, which helps engage your upper abs and takes some pressure off the lower back.
Prescription: 15-20 reps (each leg lift counts as one rep), 2-3 sets, 30 seconds rest.
Exercise 7: Bird Dog (Stability and Strength)
Bird dog builds functional core strength that translates to better posture, reduced back pain, and improved balance—all crucial benefits for women over 40. Start on hands and knees with hands under shoulders and knees under hips. Simultaneously extend your right arm forward and left leg back, creating a straight line from fingertips to toes. Hold for 2-3 seconds, return to start, then repeat on the opposite side.
The functional benefits extend beyond aesthetics: this exercise trains your core to stabilize your spine during asymmetrical movements, which is exactly what your body does during daily activities like carrying groceries or picking up grandkids.