8 Effective seated leg exercises for seniors
You don’t need to stand, balance, or risk a fall to build the leg strength that keeps you independent. Your kitchen chair can become the most effective piece of exercise equipment you own—and physical therapists have known this for decades.
When balance isn’t a variable, you can fully fatigue the exact muscles that control getting out of cars, climbing porch steps, and standing from restaurant booths.
Most people assume standing workouts are superior. They’re wrong. Standing exercises force your body to recruit stabilizer muscles, which dilutes the training effect on your primary leg muscles.
Seated position lets you focus 100 percent of your effort on the muscles that matter most for daily function: your quads, hamstrings, and glutes.
Research consistently shows that older adults build measurable strength faster when they can eliminate balance as a variable—which is exactly why physical therapists use seated exercises post-surgery and in fall-prevention programs.
This guide delivers 8 proven seated leg exercises with specific setup instructions, safety modifications, and progression options as you build strength.
Each exercise targets the functional movements you actually need. No equipment beyond a sturdy chair. No standing required. No intimidation—just practical strength building you can start today.
Why Seated Leg Exercises For Seniors Build Powerful Results

When balance isn’t a variable, you can fully fatigue the muscle groups that matter most. In standing leg exercises, your core, ankle stabilizers, and hip abductors are all firing to keep you upright.
That’s useful for balance training, but it dilutes the training effect on your primary movers. You fatigue the stabilizers before you fatigue the main muscles you’re trying to strengthen.
Seated position reverses this. You can push your quads to genuine fatigue without compensation. Physical therapists use seated exercises specifically because they produce measurable strength gains faster in older adults.
Research on post-surgery rehabilitation consistently shows that patients who progress through seated strength work before returning to standing exercises recover function more completely.
Adults lose 3 to 8 percent of muscle mass per decade after age 30. After 60, that loss accelerates without intervention. By 75, the average person has lost 25 to 30 percent of their peak muscle mass.
This isn’t vanity. Leg strength directly correlates to fall risk—weak quads and glutes are the number-one predictor of balance-related falls.
The threshold that matters is specific: you need adequate quad strength to stand from a chair without using your arms, hamstring strength to control your descent when sitting, and calf strength to maintain balance during walking.
These exercises target the functional strength that keeps you independent in restaurants, bathrooms, and every chair you encounter daily.
When you can stand from a low restaurant booth without gripping the table, climb two porch steps without pausing, or get out of your daughter’s car without struggling—that’s the training effect you’re building. These movements define independence.
Removing the fear factor (falling during exercise) means you’ll actually do the workout consistently. Consistency transforms results more than any single workout ever could. You can safely add resistance and increase intensity because you’re stable.
Effective training happens when you can push muscles to fatigue without compensating with momentum or poor form. Seated position enforces this.
You can’t cheat with momentum on a leg extension when you’re sitting upright in a chair. The muscle does the work, or the movement doesn’t happen.
Safety Setup: Choosing the Right Chair for Leg Strengthening Exercises For Seniors

Before you do a single rep, get the setup right. Your chair is the foundation of every exercise, and a wrong chair choice can undermine your safety or training effect.
Seat height matters more than people realize. Your feet should rest flat on the floor with knees at 90 degrees when you’re sitting upright.
If your feet dangle, you’ll strain your lower back and can’t engage your quads properly. Measure this before you start: sit in the chair, let your arms rest naturally at your sides, and check that your knees form a right angle.
Stability requirements are non-negotiable. Use a four-legged chair without wheels, no cushions that sink or shift under your weight, and verify the weight capacity exceeds your body weight by at least 50 pounds.
Office chairs with wheels will roll during leg exercises. Folding chairs, stools without backs, and soft dining chairs that rock create instability and injury risk.
Test your chair by pressing down on the seat and back—it should feel completely solid, with no flex or movement. Armrests are optional for most exercises but essential if you’re using sit-to-stand progressions or need light support for balance.
Sit toward the front half of the seat so your back doesn’t touch the backrest. This engages your core and prevents slouching. Feet placement: position them hip-width apart, directly under your knees—not stretched out in front, which kills quad activation.
Spine neutral means imagining a string pulling the crown of your head toward the ceiling. Your shoulders should sit directly over your hips.
Unless the exercise specifies otherwise, avoid gripping anything—this creates compensatory tension in your upper body and reduces the training stimulus to your legs.
Before you start any exercise, do a posture check. Sit upright, feet flat, and hold that position for 10 seconds. You should feel stable, not tense. If you feel strain in your lower back, your chair is too low or you’re sitting too far back. If you feel unstable, your feet might be too far forward or your chair is too high.
Muscle burn and fatigue are productive. That shaky feeling in your thighs after 12 reps means you’re building strength. It should feel challenging but sustainable. Sharp joint pain, shooting sensations, or pain that worsens with movement means stop immediately.
Red flags requiring medical consultation: swelling in one leg that develops during or after exercise, pain that doesn’t resolve after 48 hours, clicking or grinding in knees accompanied by pain, or any sensation of instability or “giving way.”
Mild soreness the next day is normal and expected. Pain that limits your daily function means you overdid it—reduce intensity next session.
8 Proven Sitting Leg Exercises That Strengthen What Matters Most

Seated Marches (Hip Flexor and Quad Activation)
Starting position: sit upright with feet flat, hands resting on your thighs. Movement: lift your right knee 3 to 4 inches off the chair, hold for 2 seconds, lower with control. Alternate to the left leg. Breathing: exhale as you lift, inhale as you lower.
Target 10 to 15 reps per leg. This builds hip flexor strength needed for walking and stair climbing—the muscles that tire when you’re climbing multiple flights or walking long distances.
Modification: if lifting feels too difficult, simply slide your foot forward and back along the floor while keeping your heel in contact with the ground.
Common mistake: moving too fast. The lift should take 1 second, hold 2 seconds, lower 1 second. Rushing reduces the training effect and can strain your hip flexors.
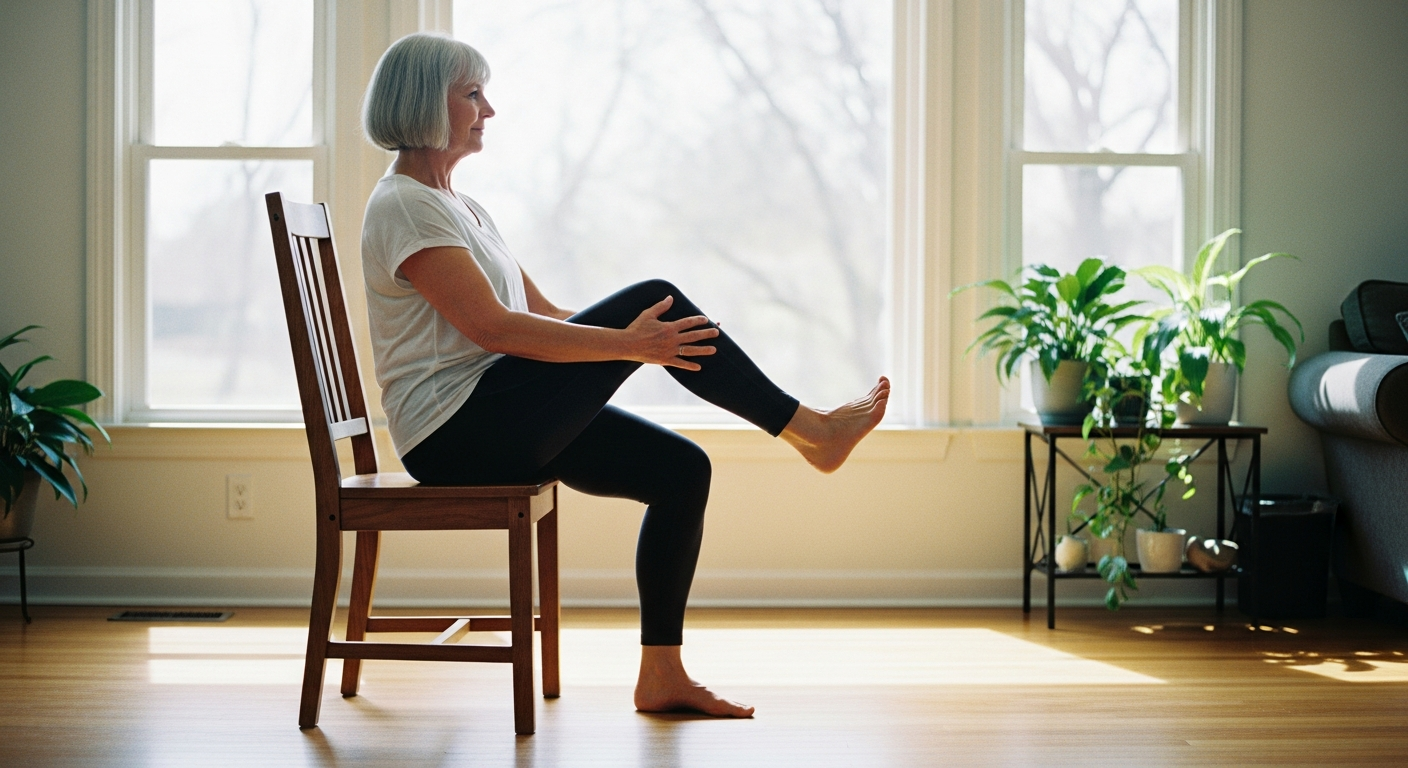
Seated Leg Extensions (Quad Strengthening)
Starting position: sit upright, knees bent at 90 degrees. Movement: straighten your right leg until nearly parallel to the floor (don’t lock your knee at the top—stop just short of full extension), hold for 3 seconds, lower slowly. Target 8 to 12 reps per leg. This directly strengthens the quads that control standing from chairs, climbing stairs, and walking uphill. Breathing: exhale during extension, inhale during lowering. The 3-second hold at the top is critical—it increases time under tension, which is one of the primary drivers of strength gain. Modification: extend only halfway if full extension causes knee discomfort. Advanced: add ankle weights when 15 reps feels easy. Start with 1 to 2 pounds and progress to 5 pounds over 4 to 6 weeks. Common mistake: locking your knee at full extension. This shifts stress to your knee joint instead of your quad. Stop just short of lockout—there should be a slight bend in your knee at the top of the movement.
Seated Hamstring Curls (Posterior Chain Work)
Starting position: sit forward in your chair (not touching the backrest), feet flat on the floor. Movement: slide your right heel back toward the chair leg, pressing the ball of your foot into the floor and lifting your heel as high as comfortable. Hold 3 seconds, return to start. Target 10 to 15 reps per leg. Breathing: exhale during the curl, inhale during release. This builds hamstring strength that controls your descent when sitting and prevents you from plopping down into chairs. Weak hamstrings are often overlooked, but they’re critical for controlled movement and injury prevention. Modification: place a small resistance band around the chair legs and your ankle for added challenge once bodyweight becomes easy. Common mistake: moving too quickly. The curl should be controlled—1 second to curl, 3-second hold, 1 second to return. This tempo maximizes the training stimulus and reduces momentum compensation.
Ankle Pumps and Circles (Circulation and Calf Strength)
Starting position: sit back in your chair, legs extended slightly forward (not stretched aggressively—just enough to work the ankle joint). Movement: flex your feet (toes toward your shins), hold 2 seconds, point your toes, hold 2 seconds. Then rotate your ankles in circles—5 times clockwise, 5 times counterclockwise. Breathing: natural, steady rhythm. Target 15 to 20 reps of the flex-point cycle. This prevents swelling, maintains ankle mobility, and strengthens your calves for balance. These movements are often overlooked but crucial for circulation and preventing blood clots, especially if you sit for extended periods. Modification: if extending your legs forward strains your lower back, keep your knees bent and work one foot at a time. Common mistake: moving only the toes. The movement should come from your ankle joint—your entire foot flexes and points.
Seated Calf Raises (Lower Leg Power)
Starting position: sit upright, feet flat, hands resting on your thighs or lightly touching the armrests. Movement: lift both heels off the ground, rising onto the balls of your feet, hold 2 seconds, lower slowly. Target 12 to 15 reps. Breathing: exhale during lift, inhale during lower. This builds calf strength critical for walking stability and push-off power—the muscles that propel you forward when walking and help you maintain balance on uneven surfaces. Modification: work one leg at a time for more intensity. Place your hands on the armrests for light support if balance feels uncertain. Advanced: once 15 reps feels easy, add a 3-second hold at the top of each rep. Common mistake: incomplete range of motion. Push up as high as possible on the balls of your feet, then lower all the way until your heels touch the floor.
Seated Hip Abduction (Outer Thigh and Hip Stability)
Starting position: sit upright, tie a resistance band around your thighs just above your knees (or work without a band initially). Movement: press your knees apart against the resistance, hold 3 seconds, return to start. Target 10 to 12 reps. Breathing: exhale during press, inhale during release. This strengthens hip abductors that prevent inward knee collapse during standing and walking—critical for balance and injury prevention. Weak hip abductors are a common cause of knee pain and instability. Modification: without a band, simply press your knees outward against your own hand resistance by placing your hands on the outside of your knees. This is equally effective and requires no equipment. Common mistake: allowing your knees to drift inward between reps. Maintain the outward pressure throughout the entire set.
Seated Glute Squeezes (Hip Extension Strength)
Starting position: sit upright, feet flat. Movement: squeeze your buttocks together as tightly as possible, hold 5 seconds, release. Target 12 to 15 reps. Breathing: maintain steady breathing throughout the hold—don’t hold your breath. This activates your glutes, which power standing from chairs and stair climbing. Your glutes are your largest leg muscle, and strong glutes reduce strain on your knees and lower back. Modification: place a small pillow between your knees and squeeze inward simultaneously for added inner thigh work. This combines glute and adductor activation in one movement. Common mistake: not squeezing hard enough. The contraction should be intense. You should feel your buttocks muscle tense under your hands if you place them there during the hold.
Sit-to-Stand Practice (Functional Integration)
Starting position: sit at the front edge of your chair, feet hip-width apart and positioned slightly behind your knees (not stretched out in front). Movement: lean forward slightly, push through your heels to stand, pause upright for 2 seconds, sit back down with control. Target 5 to 8 reps. Breathing: exhale during standing, inhale during sitting. This is the exercise that transforms daily life. You’re practicing the exact movement you need most—getting out of chairs safely and with control. This movement integrates all the muscles you’ve been training in isolation. Modification: start with partial stands where you lift your hips 2 to 3 inches off the chair, progress to full stands, eventually remove arm assistance. If you need support, use your armrests lightly—just enough to steady yourself, not to pull yourself up. Common mistake: using your arms to pull yourself up instead of using your legs. Your arms should assist minimally. The power should come from your legs pushing through the floor.
How to Progress Your Seated Knee Strengthening Exercises Safely
Week 1 to 2: master form with body weight only. Focus on controlled movement and full range of motion. Your nervous system is learning the movement pattern, and form is your foundation. Week 3 to 4: add 2-second holds at the top of each movement.
This doubles time under tension, which is one of the primary drivers of strength gain, without requiring equipment. Week 5 to 6: increase reps by 3 to 5 per exercise or add a second set of each exercise. If you were doing 10 reps, move to 13 to 15.
Week 7 and beyond: introduce household items as resistance. Water bottles in your hands for seated marches, thick books on your thighs for leg extensions, resistance bands around your ankles for leg extensions and hamstring curls. Start with light resistance—the goal is to maintain good form while adding challenge.
You complete your target reps without significant fatigue—time to increase difficulty. The last 2 to 3 reps feel challenging but achievable with good form—you’re at the right intensity.
You recover within 24 hours with only mild soreness—your body adapted and needs new stimulus. You’ve maintained consistent workouts 3 times per week for 3 or more weeks—progressive overload is safe. These are your signals to progress.
Don’t wait until exercises feel easy for multiple weeks. The adaptation window is 4 to 6 weeks. If you stay at the same intensity beyond that, you’ll plateau.
Your muscles adapt to the same stimulus in 4 to 6 weeks—variety prevents stagnation. Rotate exercise order each session. Your first exercise gets the most energy and focus, so alternating which movement comes first prevents the same muscle group from always being trained in a fatigued state.
Change one variable every 2 weeks: add reps, add sets, increase resistance, or slow down tempo. Don’t progress everything at once—increase intensity on 2 to 3 exercises while maintaining others. This prevents overuse and allows you to track which progression variable works best for you.
Building a Realistic Routine with Exercises To Strengthen Legs For Seniors

Three sessions per week, 15 to 20 minutes each, is sufficient stimulus to build and maintain strength. This is the minimum dose that produces measurable results. Rest days matter because your muscles strengthen during recovery, not during the workout itself. Your body needs 48 hours between hard sessions for the same muscle groups. Sample schedule: Monday/Wednesday/Friday or Tuesday/Thursday/Saturday with active rest (walking, stretching) on off days. Consistency beats intensity. Fifteen minutes three times weekly for 3 months will transform your function more than sporadic 45-minute sessions. Most people fail at fitness because they overcommit, burn out, and quit. Three 15-minute sessions fits into any schedule.
Morning routine: 5 minutes of ankle pumps and seated marches while drinking coffee. This wakes up your leg muscles and establishes the habit loop before your day gets busy. After lunch: 10 minutes of the full 8-exercise circuit while watching a show. This pairs the workout with an existing habit, making it easier to remember. Evening: sit-to-stand practice (5 reps) every time you get up from your favorite chair. This integrates functional training into your daily life without requiring a dedicated workout window. You’re not adding time to your day—you’re repurposing time you already spend sitting.
Forget the scale—measure what matters. Can you do 2 more reps than last week? Does the movement feel smoother? Weekly check-in: write down your reps for each exercise. If you did 10 leg extensions on Monday, try for 11 or 12 on Wednesday. This 1 to 2 rep increase weekly adds up to 20 to 30 percent more volume in 3 months. Monthly milestones: photograph yourself doing a seated leg extension to see range of motion improvements. Functional wins: you carried groceries up the porch steps without stopping, you got out of your daughter’s low car without struggle, you stood from a restaurant booth without using the table. These are the real victories.
What Makes These Senior Leg Exercises Different from Generic Workouts

These exercises account for reduced joint flexibility—no deep squats or lunges that compress knees. Movement tempo is controlled (2 to 3 seconds up, 2 to 3 seconds down) to build strength without momentum compensation. Every exercise has a clear functional purpose tied to daily activities you actually do. The progression framework respects realistic timelines. Strength gains in older adults happen over weeks and months, not days. Generic workout plans ignore these realities. They prescribe full-depth squats and rapid movements that don’t match your body’s current capacity. These seated exercises for seniors are built on the opposite principle: start where you are, progress at a pace your body can sustain, and every movement has a practical purpose.
These exercises load muscles without high-impact joint stress. Your bones strengthen in response to muscle tension, not impact. Most physical therapists clear seated knee strengthening exercises once you’re released to exercise. Verify with your provider, but the protocol is standard. Seated position minimizes orthostatic stress (dizziness from standing too quickly). Controlled breathing prevents valsalva spikes (holding your breath during exertion, which temporarily raises blood pressure). If you take blood thinners or diabetes medications, monitor for unusual bruising or blood sugar changes. These are rare but possible. The seated position makes exercise safer for people managing multiple health conditions.
Muscle fibers don’t care if you’re standing or sitting—they respond to tension, time under load, and progressive challenge. Some of the most effective physical therapy protocols use exclusively sitting exercises for strength building. The burn you feel in your quads during seated leg extensions is the same metabolic response that builds muscle at any age. “Easy to start” and “produces powerful results” are not contradictory—accessibility is strategic design. If you never start because the barrier feels too high, you’ll never see results. But if you start with seated exercises for seniors that feel manageable, build consistency, and progress gradually, you’ll transform your strength and function. People who complete 12 weeks of seated leg strengthening exercises report measurable improvements in stair climbing, walking distance, and confidence getting out of chairs.
CONCLUSION

The single most important takeaway: seated leg exercises aren’t a compromise—they’re a strategic choice that lets you build real, functional strength without balance risk. The 8 exercises in this guide target the exact muscle groups that control standing, walking, and stair climbing—the movements that define independence. You can start today with nothing but a sturdy chair, and progress safely by adding reps, holds, and simple resistance over weeks. Consistency matters more than intensity. Three 15-minute sessions weekly will transform your leg strength and confidence in 8 to 12 weeks.
Here’s your next move: Today, test your chair for stability, practice proper seated posture, and try 5 reps of seated marches and leg extensions to establish your baseline. This week, complete the full 8-exercise circuit 2 to 3 times, noting which movements feel challenging—that’s where you’ll see the fastest gains. This month, track one functional milestone (standing from a low chair, climbing stairs with less effort, walking longer without fatigue) and celebrate when you achieve it. Ongoing, revisit the progression framework every 2 to 3 weeks to add challenge. Your body is capable of more than you think, and these exercises will prove it. The independence you’re building isn’t aspirational. It’s practical, measurable, and within reach right now.