bird dog exercise for pelvic floor
You’ve been doing crunches, planks, maybe even dead bugs. Your core routine looks solid on paper. But you’re still dealing with that frustrating leak when you jump rope, or that nagging lower back ache that flares up after a long day sitting.
Here’s what most fitness programs won’t tell you: strengthening your abs without training your pelvic floor is like building a house with no foundation.
The bird dog exercise bridges that gap, activating your deep core and pelvic floor simultaneously while teaching your body the stability pattern it actually needs for real life.
Research from the Journal of Physical Therapy Science shows that exercises requiring simultaneous limb extension and spinal stabilization activate the transverse abdominis and pelvic floor 40% more effectively than isolated movements.
The bird dog workout delivers exactly that coordination challenge, but only if you’re doing it right. Most people rush through the movement, missing the entire point.
This guide walks you through the setup, execution, and breathing pattern that transforms bird dog from a throwaway warm-up into one of the most effective pelvic floor exercises you can do at home.
Understanding Your Pelvic Floor

What Your Pelvic Floor Actually Does
Your pelvic floor is a hammock of muscles stretching from your pubic bone to your tailbone, supporting your bladder, uterus (if you have one), and bowel. It contracts and releases dozens of times per day without you thinking about it. When you cough, sneeze, laugh, or jump, your pelvic floor fires reflexively to maintain intra-abdominal pressure and prevent leakage. When those muscles weaken or lose coordination with your deep core, you start noticing problems that feel embarrassing to talk about but are incredibly common.
Here’s what a struggling pelvic floor actually looks like in daily life:
- Leaking urine when coughing, sneezing, or during high-impact exercise like running or jumping
- Feeling heaviness or pressure in your pelvis, especially at the end of the day
- Lower back pain that won’t quit despite stretching and strengthening your back
- Difficulty controlling gas or a feeling of incomplete bowel emptying
- Pain or discomfort during intercourse
The International Urogynecology Journal reports that one in three women experience some form of pelvic floor dysfunction, yet most never receive proper guidance on how to address it. Men aren’t immune either. Prostate surgery, chronic constipation, heavy lifting with poor form, and even chronic stress can all compromise pelvic floor function. The bird dog exercise addresses this by training the reflexive co-contraction between your deep core and pelvic floor, the same pattern your body uses during functional movement.
Why Traditional Exercises Miss the Mark
Most core workouts focus on the rectus abdominis, the six-pack muscle that flexes your spine. Crunches, sit-ups, and even many plank variations overwork this superficial layer while ignoring the deeper stabilizers. Your transverse abdominis wraps around your midsection like a corset, and your pelvic floor sits at the base of that cylinder. These muscles need to work together to create true core stability, but traditional ab exercises don’t train that coordination.
Here’s the common mistake: people assume that any core exercise strengthens the pelvic floor. Not true. Exercises that increase intra-abdominal pressure without teaching proper bracing can actually weaken pelvic floor function over time. Think about bearing down during a heavy crunch or holding your breath during a plank. You’re pushing pressure downward onto a pelvic floor that isn’t prepared to resist it. The bird dog workout takes the opposite approach, teaching you to maintain neutral spine and coordinate breath with movement, which trains the pelvic floor to activate reflexively rather than forcing it to bear load it can’t handle.
The other piece most programs miss is unilateral stability. Life doesn’t happen in a perfectly balanced plank position. You carry groceries in one hand, pick up a toddler from one side, reach overhead while standing on one leg to grab something from a shelf. The bird dog exercise trains that real-world pattern by extending opposite limbs while maintaining a stable pelvis and spine. Your pelvic floor has to fire to prevent rotation and maintain alignment, exactly the way it needs to work during daily movement.
Bird Dog Exercise Benefits for Core and Beyond

How Bird Dog Targets Multiple Muscle Groups
The bird dog muscles worked list is longer than you’d expect from such a simple-looking movement. This is a full-body stability exercise disguised as a core drill. When you extend your right arm and left leg simultaneously while maintaining a neutral spine, you’re creating a chain of muscle activation from your fingertips to your toes.
Primary muscles worked:
- Erector spinae (back muscles): Keeps your spine neutral as you extend your limbs, preventing the sag or arch that defeats the purpose
- Glutes: Stabilize your hips and power the leg extension without rotating your pelvis
- Deep core (transverse abdominis): Acts like a corset around your midsection, preventing rotation and maintaining intra-abdominal pressure
- Pelvic floor: Fires reflexively to maintain pelvic stability and resist the rotational force created by opposite limb extension
- Shoulders and upper back: Control the arm extension and prevent your torso from sagging toward the supporting side
Secondary benefits:
- Improves balance and proprioception (your body’s awareness of where it is in space)
- Corrects muscle imbalances between left and right sides, which is critical if you’ve compensated for an injury or have a dominant side
- Enhances posture by strengthening the postural muscles that keep you upright against gravity
- Reduces lower back pain by teaching proper spinal stabilization instead of relying on passive structures like ligaments
A 2019 study in the Journal of Exercise Rehabilitation found that eight weeks of bird dog training significantly reduced lower back pain and improved core endurance in office workers. The key was consistency and proper form, not intensity. You don’t need to make the bird dog “harder” by adding weights or speed. The challenge is maintaining perfect position while moving slowly and breathing properly.
Pelvic Floor Activation During Bird Dog
Here’s what makes the bird dog exercise uniquely effective for pelvic floor training: it doesn’t isolate the pelvic floor, it integrates it. Kegel exercises have their place, but they train the pelvic floor in isolation, which isn’t how it functions during movement. Your pelvic floor needs to coordinate with your diaphragm, deep core, and back muscles to create what physiotherapists call the “inner unit” of core stability.
During a properly executed bird dog, here’s the sequence: you exhale as you extend your arm and leg, which naturally engages your transverse abdominis and lifts your pelvic floor. You’re not forcing a Kegel or “squeezing” anything. The activation happens reflexively as part of the breathing and bracing pattern. This is exactly how your pelvic floor is designed to work during functional movement, not as a separate muscle you consciously contract.
The pelvic floor doesn’t work alone. It functions as part of a coordinated system that includes your diaphragm, deep core, and back muscles.
The breathing connection: Your diaphragm and pelvic floor move in tandem. When you inhale, your diaphragm descends and your pelvic floor gently relaxes and descends. When you exhale, your diaphragm rises and your pelvic floor lifts and engages. This reciprocal relationship is why breathing matters so much during bird dog variations. If you hold your breath or breathe shallowly, you disconnect the diaphragm-pelvic floor coordination and turn the exercise into a bracing contest instead of a stability drill.
Common mistake: people try to add a deliberate Kegel contraction during the bird dog. Don’t. The pelvic floor will activate naturally if you breathe correctly and maintain neutral spine. Adding a forced contraction often leads to gripping or bearing down, which defeats the reflexive training you’re after. Trust the system. Exhale as you extend, maintain neutral spine, and let your pelvic floor do what it’s designed to do.
How To Do Bird Dogs Exercise: Step-by-Step Guide

Perfect Form Setup and Starting Position
Before you extend a single limb, you need to nail the setup. Most bird dog form breakdowns happen before the movement even starts because people rush past the foundation position. Here’s how to do bird dogs exercise with proper alignment from the first second.
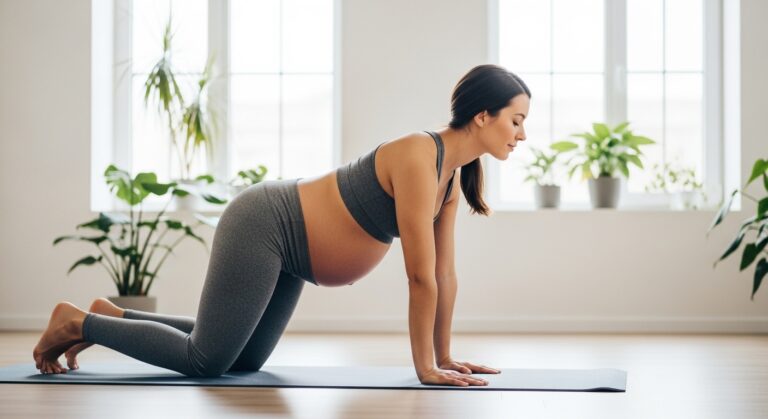
Starting position:
- Position yourself on all fours on a yoga mat or padded surface. Your hands should be directly under your shoulders, fingers spread wide for stability.
- Place your knees directly under your hips, about hip-width apart. Your shins and tops of your feet rest flat on the floor.
- Find neutral spine by tilting your pelvis forward and back a few times, then settling in the middle position where your lower back has its natural curve. Your head, upper back, and tailbone should form a straight line.
- Engage your core by gently drawing your lower ribs toward your hips without tucking your pelvis. Think about creating tension around your midsection, not sucking in your stomach.
- Take three full breaths in this position. Inhale through your nose, feeling your ribcage expand in all directions. Exhale through your mouth, feeling your core naturally engage.
Common setup mistakes to avoid:
- Hands too far forward, which strains your shoulders and shifts weight away from your core
- Knees too wide, which reduces the stability challenge and lets your hips wobble
- Hips higher than shoulders or shoulders higher than hips, which changes the muscle recruitment pattern entirely
- Sagging through the middle with an arched lower back, which loads your spine instead of your core
The foundation breath: Before you move, practice the breathing pattern. Inhale for a count of three, letting your belly and ribcage expand. Exhale for a count of four, feeling your core naturally draw in and up. This isn’t a forced contraction. You’re simply allowing the natural engagement that happens when you exhale fully. This breath pattern will drive every repetition of your bird dog workout.
The Movement: Execution and Breathing
Now that you’ve established your foundation, here’s how to execute the bird dog exercise with the form and breathing pattern that actually trains your pelvic floor. Start with progressions before attempting the full movement. Most people skip this step and wonder why they can’t feel the right muscles working.
Progression 1: Arm-only extension (Week 1)
- From your setup position, inhale and prepare to move.
- As you exhale, slowly extend your right arm forward until it’s parallel to the floor, thumb pointing up. Your arm should be in line with your torso, not reaching higher than your shoulder.
- Hold for two full breath cycles (inhale, exhale, inhale, exhale) while maintaining neutral spine. Your hips should not shift or rotate.
- Inhale as you slowly return your hand to the starting position.
- Repeat on the left side. That’s one complete repetition.
- Perform 6-8 repetitions per side, focusing entirely on preventing any torso rotation or weight shift.
Visual cue: imagine balancing a cup of water on your lower back. If your hips shift or your spine rotates, the water spills. Keep it level.
Progression 2: Leg-only extension (Week 1-2)
- From setup position, inhale and prepare.
- As you exhale, slowly extend your right leg straight back until it’s parallel to the floor. Your foot should be flexed (toes pointing down), and your leg should be in line with your torso, not lifted higher than your hip.
- Hold for two full breath cycles. Your pelvis should stay level. This is where most people fail. Your left hip will want to drop or your pelvis will want to rotate. Resist both.
- Inhale as you return your knee to the starting position.
- Repeat on the left side.
- Perform 6-8 repetitions per side.
Visual cue: your extended leg should feel like it’s being pulled straight back by a string attached to your heel, not lifted up by your glutes. The height comes from hip extension, not hip hiking.
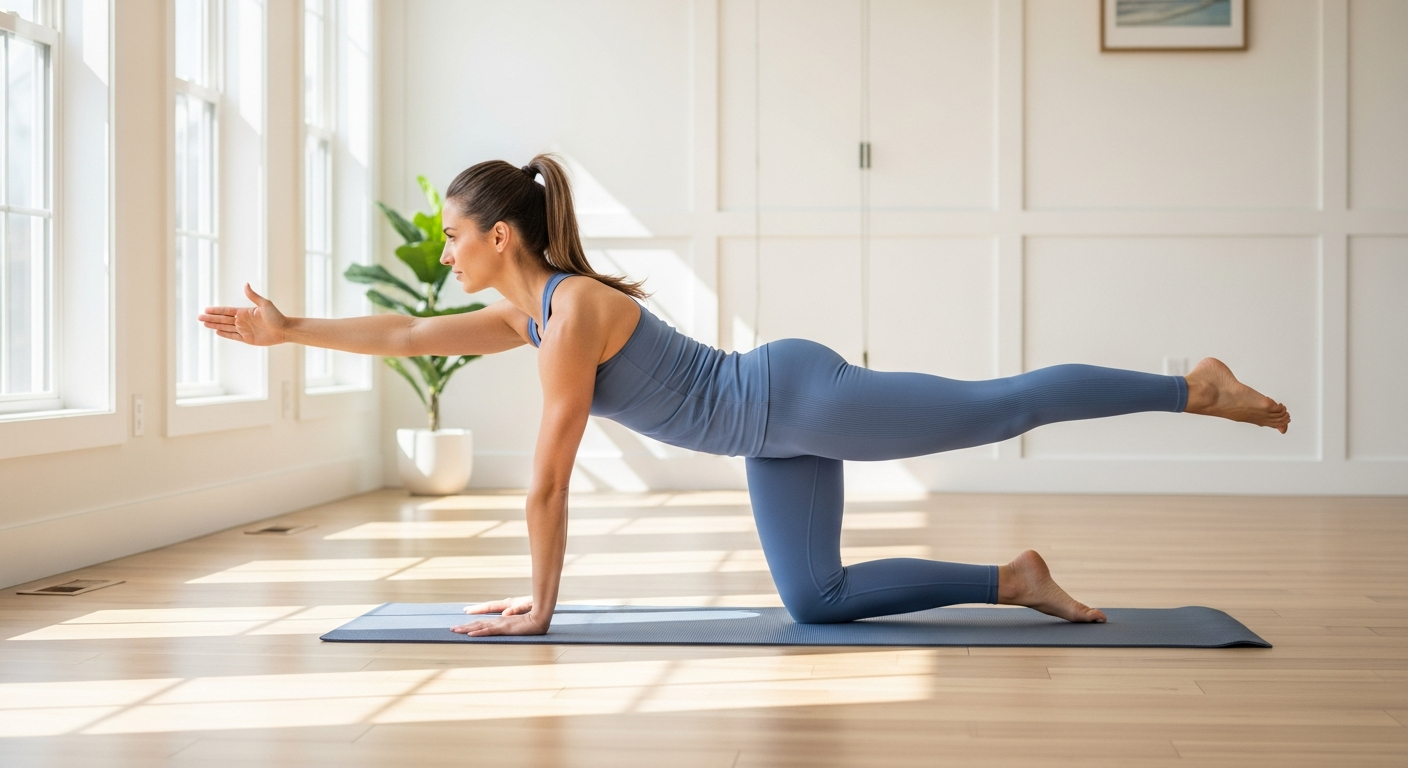
Progression 3: Full bird dog (Week 2 onward)
- From setup position, inhale and prepare.
- As you exhale, simultaneously extend your right arm forward and left leg back until both are parallel to the floor. This is the full bird dog position.
- Hold for two full breath cycles. Your spine stays neutral, your hips stay level, your core stays engaged. Nothing moves except your ribcage as you breathe.
- Inhale as you slowly return to the starting position, hand and knee touching down at the same time.
- Repeat on the opposite side (left arm, right leg).
- Perform 8-10 repetitions per side, moving slowly and deliberately.
Visual cue: imagine a straight line running from your extended fingertips through your torso to your extended heel. That line should stay parallel to the floor throughout the hold.
Breathing pattern for all progressions: Exhale as you extend. Hold the position while breathing normally (inhale through nose, exhale through mouth). Inhale as you return. Never hold your breath during the static hold. That’s when your pelvic floor needs to work reflexively with your diaphragm, and breath-holding disconnects that coordination.
Sets and frequency: Start with 2-3 sets of 6-8 reps per side, three times per week. Once you can maintain perfect form for 10 reps per side with two full breath cycles per hold, you’ve mastered the movement. Don’t rush to add difficulty. Perfect execution at this level delivers more pelvic floor benefit than sloppy advanced variations.
Common execution mistakes:
- Extending too fast, which uses momentum instead of muscle control
- Lifting your leg or arm higher than parallel, which hyperextends your spine and shifts the work away from your core
- Holding your breath during the static hold, which eliminates the diaphragm-pelvic floor coordination you’re training
- Allowing your hips to rotate or shift weight to the supporting side, which means your core isn’t stabilizing
- Rushing through the return phase instead of controlling the descent
When you feel your pelvic floor working: you probably won’t feel a strong contraction like you would during a Kegel. Instead, you’ll notice a subtle engagement deep in your pelvis as you exhale and extend. It feels like a gentle lift or tightening at the base of your core. If you don’t feel anything initially, that’s normal. The mind-muscle connection develops over 2-3 weeks of consistent practice. Trust that the muscles are activating even if you can’t perceive them yet.
Bird Dog Variations for Progressive Challenge
Once you’ve mastered the standard bird dog with perfect form and controlled breathing, these bird dog variations add progressive challenge without compromising the pelvic floor training effect. The key principle: only advance to a variation when you can perform 10 perfect reps of the previous level with zero form breakdown.
Variation 1: Extended hold bird dog
Instead of holding for two breath cycles, extend the hold to 20-30 seconds per side while maintaining continuous, relaxed breathing. This trains muscular endurance and challenges your pelvic floor to maintain activation over a longer duration. If your form breaks down before 20 seconds, you’re not ready for this variation yet. Drop back to the standard version and build up gradually.
Variation 2: Bird dog with knee tap
From the extended bird dog position, slowly bring your elbow and knee together underneath your torso, rounding your spine slightly as you exhale. Then extend back out to the bird dog position as you inhale. This adds a dynamic component and trains spinal mobility while maintaining core control. Perform 8-10 taps per side. The pelvic floor has to modulate between the rounded and extended positions, which builds adaptability.
Variation 3: Bird dog with resistance band
Loop a resistance band around your extended foot and hold the other end in your extended hand. The band creates rotational force that your core and pelvic floor must resist. Start with light resistance. The goal is to maintain perfect position against the pull, not to see how much resistance you can handle. This variation significantly increases pelvic floor activation because the rotational challenge demands more from your deep stabilizers.
Variation 4: Bird dog on unstable surface
Perform the standard bird dog with your supporting hand on a folded towel or your supporting knee on a balance pad. The instability forces your stabilizers to work harder to maintain position. Don’t use both an unstable hand and knee position simultaneously—that’s overkill and compromises form. Pick one point of instability and master it before progressing.
What about weights? You’ll see bird dog variations with ankle weights or dumbbells in the extended hand. Skip them. The added load shifts the training stimulus toward strength and away from the stability and pelvic floor coordination that makes the bird dog valuable. If you can perform 15 perfect reps of the extended hold variation with controlled breathing, you’ve maximized the benefit for pelvic floor training. Adding weight won’t improve that outcome.
Sample progression timeline:
- Weeks 1-2: Arm-only and leg-only progressions, 2-3 sets of 6-8 reps, three times per week
- Weeks 3-4: Full bird dog, 3 sets of 8-10 reps, three times per week
- Weeks 5-6: Extended hold bird dog, 3 sets of 20-30 second holds per side, three times per week
- Weeks 7-8: Bird dog with knee tap or resistance band, 3 sets of 8-10 reps, three times per week
Realistic expectations: you should notice improved core control and reduced lower back discomfort within 3-4 weeks. Pelvic floor improvements like reduced leakage or better control typically show up around the 6-8 week mark with consistent practice. This isn’t a quick fix. You’re retraining fundamental movement patterns that may have been dysfunctional for years.
Your Next Move
The bird dog exercise works because it trains the coordination between your deep core and pelvic floor exactly the way they need to function during real movement. Not isolated. Not forced. Reflexive and integrated. Start with the progressions, nail the breathing pattern, and resist the urge to make it “harder” before you’ve mastered perfect form. Your pelvic floor doesn’t need intensity. It needs consistent, intelligent training that respects how the system actually works.
Here’s your next action: set a recurring calendar reminder for three days this week. Each session, perform 2-3 sets of whichever progression matches your current ability level. Film yourself from the side to check that your spine stays neutral and your hips don’t rotate. The visual feedback is worth more than any cue I can give you in writing. If you notice leakage during exercise or daily activities, this movement pattern is foundational. Give it eight weeks of consistent practice before deciding whether it’s working. The results compound slowly, then all at once.
Most importantly, if you’re dealing with significant pelvic floor dysfunction—prolapse, severe leakage, pain during intercourse, or symptoms that interfere with daily life—see a pelvic floor physical therapist before relying solely on exercise. The bird dog is powerful, but it’s not a replacement for individualized assessment and treatment when dysfunction is advanced. For most people dealing with minor leakage, poor core control, or lower back pain, though, this is the movement pattern that bridges the gap between where you are and where you want to be.