30 Minutes Feel Good Yoga Flow
I used to think 30 minutes wasn’t enough for a “real” yoga practice. I’d skip it entirely if I couldn’t carve out 60 or 90 minutes, which meant I practised maybe once a week—if that.
Then I had a conversation with a physical therapist who specialized in movement science. She told me something that changed my approach completely: “Your nervous system responds to consistency, not duration. Thirty minutes daily beats two hours weekly, every single time.” That insight transformed my practice and my body.
Here’s what you’re going to learn: a complete 30-minute yoga flow that delivers genuine results without a gym membership, without fancy equipment, and without pretending you have unlimited time. This isn’t about contorting yourself into Instagram-worthy poses.
It’s about building a sustainable practice that reduces stress hormones, improves mobility, and makes your body feel genuinely better—all in the time it takes to watch a sitcom.
No previous yoga experience required. No judgment about your flexibility. Just a mat (or carpeted floor) and the willingness to move.
Why 30 Minutes Is the Sweet Spot for Busy Lives

The Science Behind Short, Effective Practices
Research from the Journal of Clinical Psychology shows that 20-30 minute mindfulness-based movement practices produce measurable decreases in cortisol levels—the stress hormone that contributes to weight gain, poor sleep, and chronic inflammation.
The key finding? The benefits plateau after about 30 minutes for most practitioners. Going longer doesn’t make it twice as effective; it just makes it harder to sustain.
Here’s what happens physiologically in a 30-minute yoga session: Your heart rate elevates enough to improve cardiovascular function without triggering a full stress response. Your muscles engage in both eccentric and isometric contractions, building functional strength.
Your fascia—the connective tissue surrounding muscles—gets the dynamic stretching it needs to maintain mobility. And perhaps most importantly, your parasympathetic nervous system activates, shifting your body from “fight or flight” to “rest and digest” mode.
This isn’t just stretching. It’s a complete neuromuscular workout that addresses the exact problems created by sitting at desks, staring at screens, and carrying stress in your shoulders and jaw.
What You’ll Actually Feel After This Flow
Let’s be realistic about expectations. After your first session, you won’t suddenly touch your toes if you currently can’t reach your shins. You won’t lose five pounds. You won’t achieve enlightenment.
What you *will* notice: Your shoulders sit lower, away from your ears. Your breath comes easier and deeper. That nagging lower back tension that’s been your constant companion?
It quiets down for a few hours, maybe longer. You’ll feel simultaneously energized and calm—not the jittery energy from caffeine, but the grounded alertness that comes from actually moving your body through full ranges of motion.
By week two of consistent practice, you’ll notice you’re sleeping better. By week four, movements that felt awkward become fluid.
By week eight, you’ll have measurably improved flexibility and strength. I’m giving you these timelines because the fitness industry has conditioned us to expect overnight transformations, and that sets everyone up for disappointment and quitting.
No Gym, No Problem—What You Really Need
Here’s your complete equipment list: a yoga mat or towel on carpet, comfortable clothes that allow movement, and a wall or sturdy chair for balance support if needed. That’s it.
Optional but helpful: yoga blocks (or thick books), a strap (or belt), and a cushion or folded blanket for seated poses. I practiced for two years with a beach towel and hardcover books before buying actual yoga props. It works fine.
The biggest barrier isn’t equipment—it’s the mental story that you need the perfect setup before you can start. You don’t. Clear a space roughly the size of your body lying down with arms extended. That’s your yoga studio.
Understanding the Feel-Good Flow Structure

The Three Phases That Make This Flow Work
This flow follows a proven progression based on how your body actually warms up and cools down. Phase one (8 minutes) gradually increases synovial fluid in your joints and prepares your muscles for deeper work. Rush this, and you risk strain. Skip it entirely, and you’re asking for injury.
Phase two (14 minutes) is where the real work happens. This dynamic flow builds heat through continuous movement, strengthens major muscle groups, and challenges your balance and coordination. Heart rate elevates to approximately 60-70% of maximum—the sweet spot for fat burning and cardiovascular benefits without exhausting yourself.
Phase three (8 minutes) brings your nervous system back down, lengthens muscles while they’re warm, and signals to your body that the stress response can end. This isn’t optional recovery fluff. This phase determines whether you feel amazing after practice or just tired.
Breath-to-Movement Connection (The Secret Ingredient)
Here’s what most yoga articles skip: the breath pattern is what makes this effective, not just the poses. In yoga terminology, we call this vinyasa—linking one breath to one movement. Inhale as you expand or reach; exhale as you fold or contract.
Why does this matter? When you synchronize breath with movement, you’re essentially doing interval training for your nervous system. The controlled breathing activates your vagus nerve, which directly reduces anxiety and improves heart rate variability—a key marker of stress resilience and overall health.
The practical application: If you’re holding your breath, you’re working too hard. If your breathing becomes rapid and shallow, you’ve lost the thread. Scale back the intensity until you can maintain smooth, steady breaths. This is your primary feedback mechanism, more important than how deep you can fold or how long you can hold a pose.
Modifications That Make It Accessible for Everyone
Every pose in this flow has at least three variations. Beginner modifications reduce range of motion and provide more stability. Intermediate options add challenge through duration or balance. Advanced variations incorporate deeper stretches or more complex transitions.
The common mistake: people assume they should always push toward the advanced version. That’s ego, not intelligence. I’ve practiced yoga for over a decade, and I still use beginner modifications when my body needs them—after poor sleep, during high-stress periods, or when recovering from other workouts.
Your modification guide: If you feel sharp pain (different from muscular effort), back off immediately. If you’re shaking uncontrollably, reduce the hold time or depth. If you can’t breathe smoothly, simplify the pose. Your body is giving you real-time feedback. Listen to it.
The Complete 30-Minute Feel-Good Yoga Flow

Warm-Up Phase (Minutes 1-8): Wake Up Your Body
Minute 1-2: Centering and Breath Awareness Start seated comfortably, either cross-legged on your mat or in a chair with feet flat. Close your eyes. Place one hand on your chest, one on your belly. Breathe naturally for 30 seconds, just noticing the current state of your breath without changing it. Then gradually deepen your inhales and exhales, counting to four on each. You’re establishing your baseline and activating parasympathetic response before you move.
Minute 3-4: Cat-Cow Spinal Waves Come to hands and knees, wrists under shoulders, knees under hips. Inhale, drop your belly, lift your chest and tailbone (cow). Exhale, round your spine, tuck your chin and tailbone (cat). Move slowly, making this continuous and fluid rather than two separate poses. Do 8-10 complete cycles. You should feel your entire spine articulating, warming up the small stabilizer muscles that support your back all day.
Minute 5-6: Thread the Needle and Side Body Stretch From hands and knees, inhale your right arm up toward the ceiling, opening your chest. Exhale, thread that arm under your left arm, lowering your right shoulder and ear to the mat. Hold for 3-4 breaths, feeling the stretch between your shoulder blades. Inhale back to center, repeat on the left. Then sit back on your heels, walk your hands to the right for 3 breaths (stretching your left side body), then to the left. This targets the areas that get compressed from sitting and driving.
Minute 7-8: Downward Dog Preparation From hands and knees, tuck your toes, lift your hips up and back into downward-facing dog. Bend your knees generously—this isn’t about straight legs. Pedal your feet, bending one knee then the other, waking up your calves and hamstrings. Take 5-6 breaths here. If this bothers your wrists or shoulders, stay in hands and knees instead, or try forearm plank. You’re ready for the dynamic phase when your breathing feels steady and your joints feel mobile.
Dynamic Flow Phase (Minutes 9-22): Build Heat and Strength
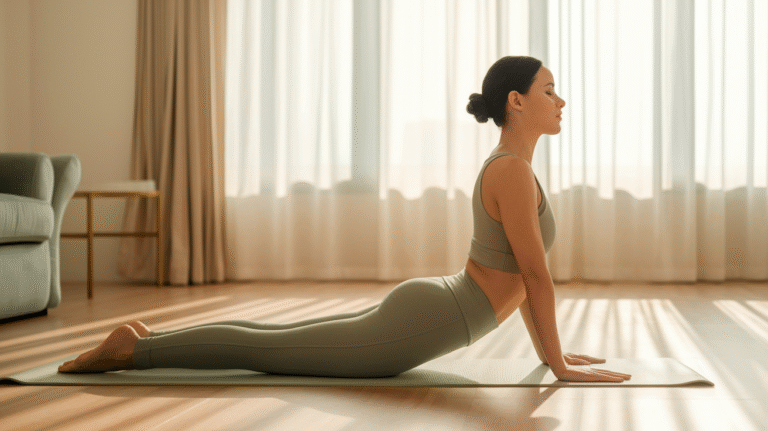
Minute 9-12: Sun Salutation Flow (4 rounds) This is where we build heat. From downward dog: Inhale, step or jump feet to hands, lift halfway up with a flat back. Exhale, fold forward. Inhale, rise to standing, arms overhead. Exhale, hands to heart. Inhale, arms overhead. Exhale, fold forward. Inhale, halfway lift. Exhale, step or jump back to plank. Lower to your belly or hold plank for one breath. Inhale, lift your chest (cobra or upward dog). Exhale, back to downward dog.
That’s one round. Do four complete rounds, moving with your breath. Beginners: step instead of jumping, lower your knees in plank, skip upward dog and just do cobra. Intermediate: jump lightly between poses. Advanced: add a push-up in plank before lifting to cobra.
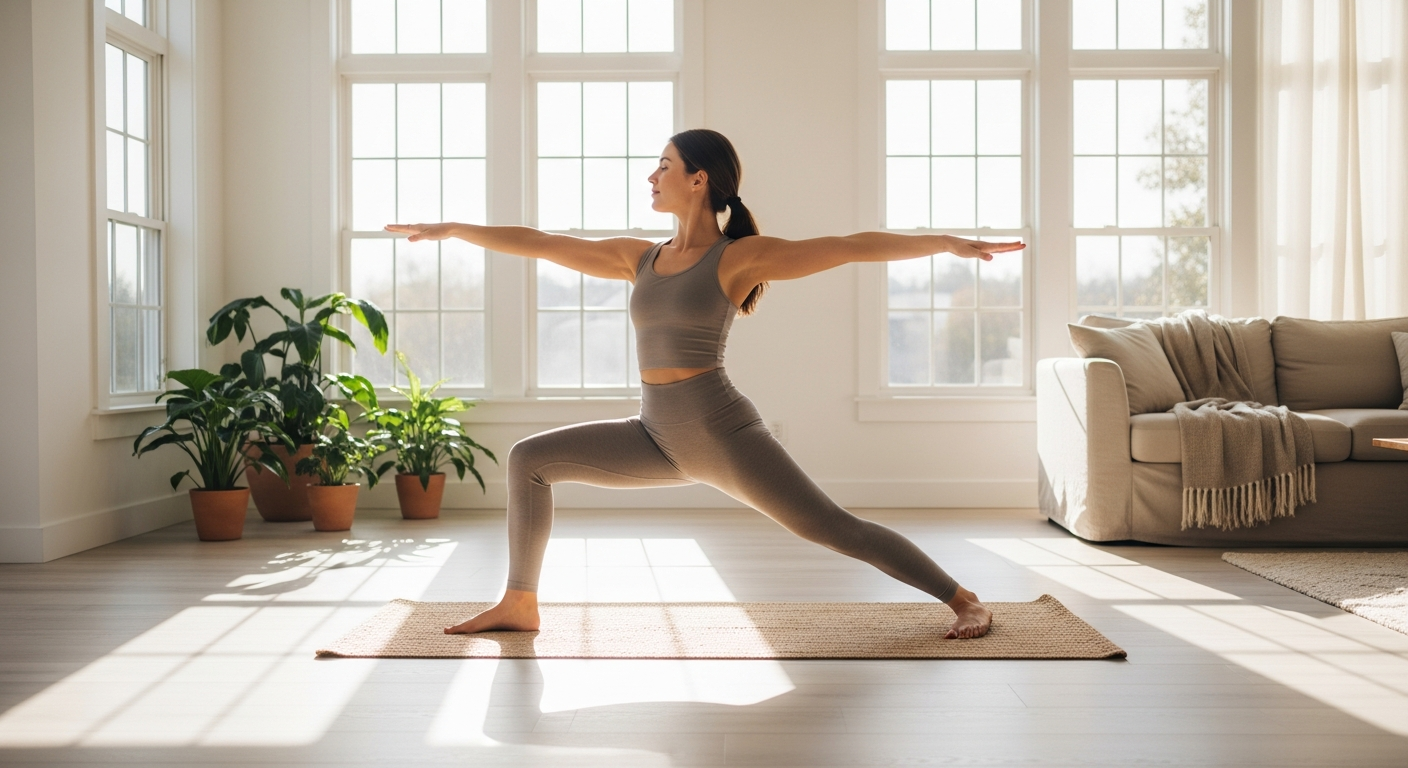
Minute 13-16: Warrior Sequence From downward dog, step your right foot forward between your hands. Rise up to warrior I (front knee bent, back leg straight, arms overhead). Hold for 3 breaths. Open to warrior II (arms out to sides, gaze over front hand). Hold for 3 breaths. Straighten your front leg, reach toward your front foot for triangle pose. Hold for 3 breaths. Return to downward dog. Repeat the entire sequence on the left side.
This sequence builds serious leg strength while improving balance and hip mobility. You should feel your quads burning—that’s the point. If your legs are shaking, you’re doing it right.
Minute 17-20: Balance and Core Series From downward dog, lift your right leg up behind you (three-legged dog). Bring your right knee to your right elbow, then to your nose, then to your left elbow. That’s one round—do 3 rounds. Step your right foot forward into a low lunge. Hold for 3 breaths. Option to lift your back knee for high lunge. Lower back down, twist to the right, left hand to the inside of your right foot, right arm reaching up. Hold for 3 breaths. Return to downward dog, repeat everything on the left side.
This is the most challenging section. Your heart rate should be elevated, you should be sweating lightly, and your core should be fully engaged. If you need a break, take child’s pose for 2-3 breaths.
Minute 21-22: Standing Forward Fold Reset Step or walk your feet to your hands. Bend your knees generously and hang forward, letting your head and arms dangle. Sway gently side to side. Grab opposite elbows if that feels good. Take 6-8 slow breaths here. This signals the transition from dynamic to restorative.
Cool-Down Phase (Minutes 23-30): Restore and Reset
Minute 23-25: Seated Stretches Sit with your legs extended. Flex your feet, reach forward (you don’t need to touch your toes—just reach toward them). Hold for 5 breaths. Bring the soles of your feet together, knees falling open (butterfly pose). Fold forward gently. Hold for 5 breaths. Extend your right leg, bring your left foot to your inner right thigh, fold toward your right leg. Hold for 4 breaths, switch sides.
These static stretches work because your muscles are thoroughly warm. You’re improving flexibility and signaling to your nervous system that effort is complete.
Minute 26-28: Supine Twists and Hip Openers Lie on your back. Hug your knees into your chest, rock gently side to side. Drop both knees to the right, extend your arms out to the sides, look left. Hold for 5 breaths. Repeat on the other side. Then bring your right ankle to your left knee (figure-four position), draw your left thigh toward your chest. Hold for 5 breaths, switch sides.
This releases tension in your lower back and hips—the areas that accumulate the most stress from daily life.
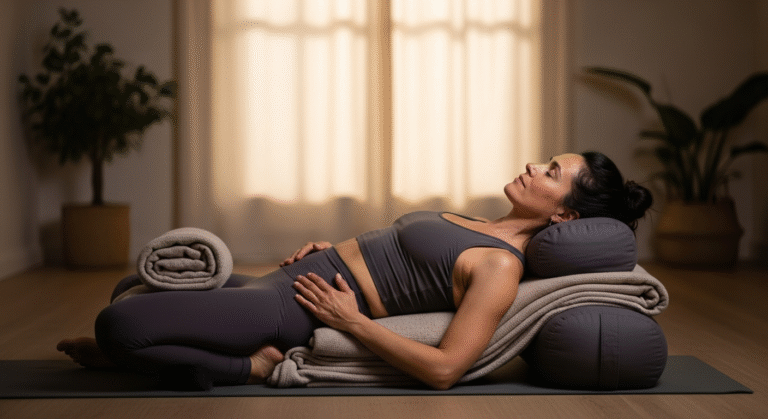
Minute 29-30: Final Relaxation (Savasana) Extend your legs, let your feet fall open naturally. Arms slightly away from your body, palms facing up. Close your eyes. For these final 90 seconds, do absolutely nothing. Let your body be completely heavy. Let your breath return to its natural rhythm. This pose allows your nervous system to integrate everything you just did.
Set a gentle timer if you’re worried about time. Otherwise, rest for 1-2 minutes, then slowly roll to one side, pause, and press yourself up to seated.
Common Mistakes That Sabotage Your Practice (And How to Avoid Them)

Pushing Too Hard, Too Fast
The fitness industry has conditioned us to believe that effective workouts should leave us destroyed. That’s not how yoga works, and honestly, it’s not how sustainable fitness of any kind works.
I see this constantly: someone tries yoga for the first time, forces themselves into positions their body isn’t ready for, feels terrible the next day, and concludes yoga “isn’t for them.” The problem wasn’t yoga—it was the approach.
Your guideline: You should feel challenged but not desperate. Muscles should engage and possibly shake from effort, but you should never feel sharp pain in joints. The day after practice, you might feel pleasantly sore in your muscles, but you shouldn’t feel injured or unable to move normally.
The fix: Use modifications without shame. Bend your knees in forward folds. Lower your knees in plank. Hold poses for fewer breaths. Yoga isn’t a competition, including with yourself.
Holding Your Breath During Challenging Poses
When poses get difficult, the instinctive response is to hold your breath and grit through it. This completely defeats the purpose. Breath-holding activates your sympathetic nervous system—your stress response. You’re essentially telling your body you’re in danger, which raises cortisol and creates tension.
The moment you notice you’re holding your breath, that’s your signal to ease up. This is non-negotiable. The breath is the practice. The poses are just the vehicle.
The fix: Count your breaths out loud (even just whisper-counting) during challenging holds. If you can’t maintain smooth breathing, modify the pose until you can. Over time, you’ll build the capacity to breathe smoothly through more challenging variations.
Skipping the Warm-Up or Cool-Down
I get it. You’re short on time, you want to maximize the “real” workout, so you skip the first few minutes or bail right after the dynamic phase. This is like doing heavy deadlifts without warming up or never foam rolling after intense training—you might get away with it for a while, but you’re accumulating a debt your body will eventually collect.
The warm-up prevents injury by preparing your joints and muscles for load. The cool-down reduces next-day soreness and helps your nervous system transition from activity to rest. Both phases are essential for the long-term sustainability of your practice.
The fix: If you truly only have 20 minutes, do a 20-minute flow with appropriate warm-up and cool-down. Don’t try to cram a 30-minute flow into 20 minutes by cutting the ends. A shorter, complete practice beats a longer, incomplete one every time.
How to Make This Flow Work for Your Specific Goals

For Weight Loss and Toning
Let’s be direct: yoga alone won’t create the caloric deficit needed for significant weight loss. A 30-minute vinyasa flow burns approximately 120-180 calories—about the same as walking at a moderate pace.
However, yoga contributes to weight loss in ways that don’t show up on a calorie-burn calculator. It reduces cortisol, which directly impacts belly fat storage. It improves your relationship with your body, which supports better food choices and consistent exercise habits. It builds lean muscle mass, which increases your resting metabolic rate.
The strategy: Practice this flow 4-5 times per week, and add 2-3 sessions of higher-intensity cardio or strength training. The yoga isn’t your primary fat-burning tool—it’s the practice that makes you resilient enough to sustain the harder work. It’s also the practice that helps you sleep better, which is essential for weight loss (sleep deprivation increases ghrelin, the hunger hormone).
For toning specifically, hold the warrior poses and plank variations for longer periods—up to 5 breaths instead of 3. Add a second round of the core series. These modifications increase muscular endurance and definition.
For Stress Relief and Better Sleep
This is where yoga absolutely shines. The combination of controlled breathing, rhythmic movement, and final relaxation directly counteracts the physiological effects of chronic stress.
The key modification: Slow everything down. Instead of moving quickly through sun salutations, take two breaths per movement. Extend your cool-down phase to 10-12 minutes, adding more restorative poses. Practice in the evening, 1-2 hours before bed.
Add this breath technique during final relaxation: Inhale for a count of 4, hold for a count of 4, exhale for a count of 6. This extended exhale activates your vagus nerve even more powerfully, signaling deep relaxation. Do this for 2-3 minutes.
Research from Harvard Medical School shows that regular yoga practice improves sleep quality more effectively than sleep hygiene education alone. The timeline: most people notice improved sleep within 2-3 weeks of consistent practice.
For Flexibility and Injury Prevention
If flexibility is your primary goal, extend the cool-down phase and add more static stretching. Hold each seated stretch for 8-10 breaths instead of 4-5. Add pigeon pose (one of the most effective hip openers) and reclined hamstring stretches with a strap.
The science: Flexibility improvements come from consistent stretching of warm muscles, held for at least 30 seconds. You need to practice at least 3-4 times per week to see measurable gains. Realistic timeline: noticeable improvement in 4-6 weeks, significant improvement in 3-4 months.
For injury prevention, focus on the warm-up phase and on building strength in your end ranges of motion.