7 Daily Yoga Poses for Spine Health
I still recall vividly the morning I couldn’t tie my shoes without shooting pain down my left leg. At 34, hunched over my laptop for 10-hour days, I’d ignored every warning sign my spine had sent.
The wake-up call came with a $3,500 medical bill and a prescription for physical therapy that my insurance barely covered. The irony? The PT gave me seven stretches that looked suspiciously like the yoga poses I’d been scrolling past on Instagram for years.
If you’re reading this between back spasms or after another night of tossing and turning to find a pain-free position, I get it.
Back pain affects 80% of adults at some point in their lives, and desk workers and busy parents are hit hardest. You’ve probably tried expensive ergonomic chairs, heating pads, or those foam rollers collecting dust under your bed.
Nothing delivered lasting results because here’s what most people miss: your spine doesn’t need a quick fix—it needs daily attention.
The good news? You don’t need a gym membership, expensive equipment, or even flexibility. Just 10-15 minutes of targeted yoga poses can transform spine health by decompressing vertebrae, strengthening support muscles, and restoring mobility. These seven poses are backed by research showing significant pain reduction in 2-4 weeks of consistent practice.
This isn’t about twisting yourself into Instagram-worthy pretzel shapes. These beginner-friendly poses work whether you’re 25 or 55, stiff as a board or naturally bendy. What matters is showing up daily—and I’ll show you exactly how to do that without adding another impossible demand to your already packed schedule.
Why Your Spine Needs Daily Attention (And Why Yoga Works)

The Modern Spine Crisis
Here’s the reality: your spine wasn’t designed for what you’re putting it through. Research from the American Chiropractic Association shows that back pain is the single leading cause of disability worldwide, with desk workers experiencing symptoms at rates 40% higher than the general population. Parents lifting kids, groceries, and car seats while sleep-deprived? You’re not far behind.
The problem isn’t just sitting—it’s the relentless compression. Every hour you spend hunched over a keyboard or slouched on the couch, gravity pushes your vertebrae closer together. The gel-like discs between them get squeezed, reducing their shock-absorbing capacity. Meanwhile, the muscles meant to support your spine weaken from disuse. It’s a vicious cycle: weak muscles lead to poor posture, poor posture creates pain, and pain makes you move less, weakening muscles further.
Ignoring this doesn’t just mean occasional discomfort. Chronic back pain costs Americans over $100 billion annually in medical treatments, lost productivity, and reduced quality of life. I learned this the expensive way—you don’t have to.
How Yoga Delivers Effective Results for Spine Health
A 2017 study published in the Annals of Internal Medicine compared yoga to physical therapy for chronic lower back pain. The results? Both groups experienced nearly identical improvements in pain and function after 12 weeks. Translation: yoga works as well as professional PT, but you can do it in your living room at 6 AM in pajamas.
The magic happens through three mechanisms. First, yoga decompresses the spine through gentle lengthening movements, creating space between vertebrae and allowing discs to rehydrate. Think of your spinal discs like sponges—they need movement to absorb nutrients and expel waste. Second, yoga strengthens the deep stabilizing muscles along your spine that gym exercises often miss. These small muscles work constantly to keep you upright, but they shut down when you’re in pain. Third, yoga improves flexibility in the muscles and connective tissue surrounding your spine, reducing the pulling and tugging that causes misalignment.
But here’s what makes yoga uniquely powerful for spine health: the breath-spine connection. When you breathe deeply, your diaphragm creates internal pressure that stabilizes your core and supports your spine from the inside out. This is why aggressive exercises often fail—they create external force without addressing internal support. You can’t brace-and-lift your way out of chronic back pain.
In my first month of daily practice, I noticed my morning stiffness disappearing. By week six, I could sit through a two-hour meeting without shifting in my chair. By three months, I’d forgotten what constant low-grade back pain felt like. That’s the realistic timeline: noticeable improvement in 2-3 weeks, significant change in 6-8 weeks, and transformation in 3-6 months.
Before You Begin: Setting Up for Success

What You Actually Need (Hint: Not Much)
This is where yoga beats every other back pain solution—the barrier to entry is basically nonexistent. You need a yoga mat or a large towel on carpet. That’s it. I practiced on a $15 mat from Target for two years before upgrading. Comfortable clothes that let you move—old t-shirt and sweatpants work perfectly.
The best time for spine-focused practice is actually morning, right after you wake up. Your spine lengthens by about half an inch overnight as discs rehydrate without the compression of gravity. Morning yoga capitalizes on this natural lengthening while also counteracting the stiffness from hours of immobility. That said, evening practice works too, especially for releasing the day’s accumulated tension. I do 10 minutes in the morning and add 5 minutes before bed when my back feels cranky.
Creating space at home doesn’t require a dedicated yoga room. I practice in the narrow strip between my bed and dresser. You need about 6 feet by 3 feet—roughly the size of a yoga mat. Clear that space, close the door if you have one, and that’s your studio.
Listen to Your Body: The Golden Rule
Here’s what took me too long to learn: there’s a difference between “good” discomfort and pain signals. A “good” stretch feels like gentle pulling or mild burning in the muscle—you can breathe through it, and it eases slightly as you hold the position. Pain signals feel sharp, electric, or make you hold your breath. They might shoot down your leg or create numbness. If you feel pain signals, back off immediately. This isn’t weakness—it’s wisdom.
Modifying poses isn’t “cheating”—it’s intelligent practice. When I started, I couldn’t straighten my legs in a forward fold without my lower back screaming. So I bent my knees. A lot. For weeks. Then one day, I could straighten them a bit more. Your body will tell you when it’s ready to progress. Pushing past pain signals just to achieve some Instagram-worthy shape is how people get injured and quit.
Your breath is your indicator light for proper alignment. If you’re holding your breath or breathing shallowly, you’re working too hard or misaligned. Every pose should allow full, deep breaths. When your breath gets choppy, ease up or adjust your position. This single principle prevents more injuries than any other cue.
The 7 Proven Daily Poses for a Healthy Spine

Pose 1: Cat-Cow Pose (Marjaryasana-Bitilasana)
What it does: This flowing movement mobilizes your entire spine from neck to tailbone while gently waking up the gel-like discs between vertebrae. It’s the single best warm-up for any spine-focused practice.
Step-by-step instructions: Start on hands and knees with wrists directly under shoulders and knees under hips. Spread your fingers wide and press firmly through your palms. On an inhale, drop your belly toward the floor, lift your chest and tailbone toward the ceiling, and gaze gently upward (Cow Pose). On an exhale, press the floor away, round your spine toward the ceiling like a Halloween cat, and tuck your chin toward your chest (Cat Pose). Move slowly between these positions, letting your breath lead the movement—inhale into Cow, exhale into Cat.
Common mistakes to avoid: Rushing through the movement destroys the therapeutic benefit. This isn’t cardio. Each transition should take a full breath cycle—4-5 seconds. Also, many people forget to move their entire spine. Your lower back, mid-back, and neck should all participate. Finally, don’t collapse into your shoulders. Keep your arms strong and shoulders away from your ears.
Modifications: If you have wrist pain, try placing your forearms on the floor or making fists with your hands. For knee discomfort, fold your mat or place a blanket under your knees.
Hold/Reps: 8-10 slow cycles, spending about one minute total.
Why it works: Research on spinal disc nutrition shows that gentle compression and decompression—exactly what Cat-Cow creates—helps discs absorb nutrients and expel waste products. The alternating flexion and extension also lubricates the facet joints between vertebrae, which is why this pose feels so good first thing in the morning.
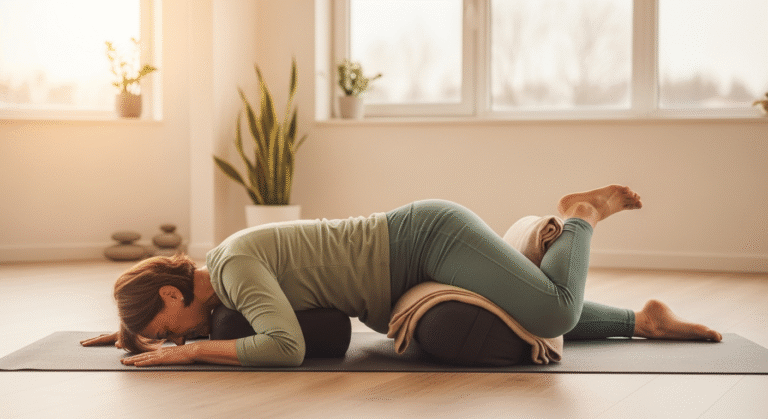
Pose 2: Child’s Pose (Balasana)
What it does: This resting pose decompresses your lower spine and releases tension in your back muscles through gentle, sustained stretching. It’s also your reset button during practice.
Step-by-step instructions: From hands and knees, bring your big toes together and separate your knees about hip-width apart (or wider for more space). Sit your hips back toward your heels and extend your arms forward, resting your forehead on the mat. Your arms can reach forward for a more active stretch or rest alongside your body with palms facing up for deeper relaxation. Breathe deeply into your lower back, feeling it expand with each inhale.
Common mistakes to avoid: Don’t force your hips all the way to your heels if it creates strain. Some people’s hip structure simply won’t allow it—and that’s fine. Also, remember to breathe. It sounds obvious, but when something feels intense, we unconsciously hold our breath.
Modifications: If your hips don’t reach your heels, place a folded blanket or pillow between your thighs and calves. If your forehead doesn’t reach the floor, stack your fists or use a yoga block. For tight hips, separate your knees wider—there’s no rule about how far apart they should be.
Hold/Reps: 1-3 minutes. This is a resting pose, so stay longer when you need it.
Why it works: Gravity does the work here. As you relax forward, gravity gently lengthens your spine while your lower back muscles can fully release. The sustained stretch also triggers a parasympathetic nervous system response, which tells your muscles it’s safe to let go.
Pose 3: Cobra Pose (Bhujangasana)
What it does: Cobra strengthens the erector spinae muscles along your spine—the crucial support system that keeps you upright. It also counteracts the forward-slouching position most of us live in.
Step-by-step instructions: Lie on your stomach with legs extended and tops of feet on the floor. Place your hands under your shoulders, elbows bent and hugging your ribs. Press the tops of your feet and thighs firmly into the floor. On an inhale, begin to straighten your arms, lifting your chest off the floor. Keep your elbows slightly bent and shoulders rolling back and down—not hunched up by your ears. Your pubic bone stays grounded. Gaze forward or slightly upward, keeping the back of your neck long.
Common mistakes to avoid: This is not an arm exercise. The lift should come from your back muscles, with your hands providing light support. If you’re pushing hard through your palms, you’re doing it wrong. Also, don’t crunch your neck back. Your gaze should be forward, not at the ceiling. Finally, keep your shoulders away from your ears—this isn’t a shoulder shrug.
Modifications: Baby Cobra keeps your hands on the floor with just a small lift, using almost no arm strength. This is where everyone should start. Sphinx Pose—resting on your forearms instead of your hands—is another excellent alternative that reduces the backbend intensity.
Hold/Reps: Hold for 3-5 deep breaths, then lower down. Rest for a breath or two, then repeat 2-3 times.
Why it works: Backbending movements like Cobra build powerful support muscles along your spine. A 2016 study in the Journal of Physical Therapy Science found that back extension exercises significantly reduced pain and improved function in people with chronic lower back pain. The key is using your back muscles actively—not just passively draping over your arms.
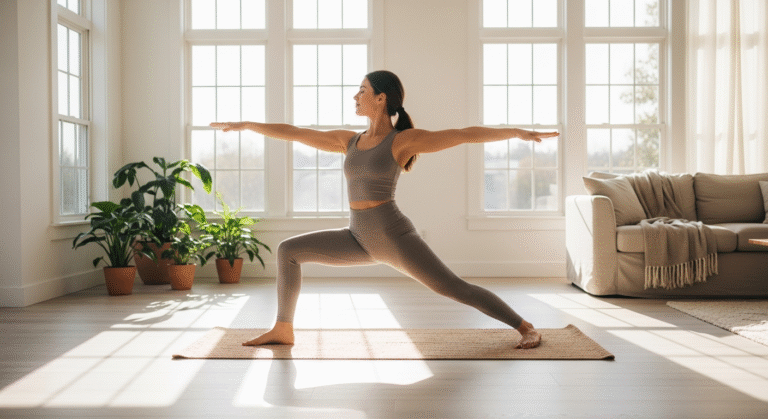
Pose 4: Downward-Facing Dog (Adho Mukha Svanasana)
What it does: This inverted V-shape lengthens your entire spine, strengthens your shoulders and core, and stretches tight hamstrings that often contribute to lower back pain.
Step-by-step instructions: From hands and knees, tuck your toes under and lift your hips toward the ceiling, straightening your legs. Your body forms an inverted V. Hands are shoulder-width apart, fingers spread wide, with your middle finger pointing forward. Feet are hip-width apart. Press firmly through your hands, especially the space between thumb and index finger. Engage your arms by rotating your upper arms outward. Lift your hips high and back, lengthening your spine. Your heels reach toward the floor but don’t need to touch.
Common mistakes to avoid: Locked elbows create joint strain—keep a micro-bend. Rounding your upper back defeats the purpose. If your hamstrings are tight and your back rounds, bend your knees generously. A straight spine with bent knees beats a rounded spine with straight legs every time. Also, don’t let your shoulders creep toward your ears. Push the floor away and broaden across your upper back.
Modifications: If this feels too intense, place your hands on a chair seat or against a wall at shoulder height. This reduces the load and makes the pose accessible while you build strength. Bent knees are not just okay—they’re often necessary for proper spinal alignment.
Hold/Reps: 5-8 deep breaths. Come down to Child’s Pose to rest afterward.
Why it works: Downward Dog creates traction along your spine through gentle inversion. The position allows gravity to decompress your vertebrae while you actively engage the muscles that support spinal alignment. It’s also a full-body strengthener, building the shoulder and core stability your spine needs.
Pose 5: Bridge Pose (Setu Bandhasana)
What it does: Bridge strengthens your entire posterior chain—glutes, hamstrings, and the muscles along your spine—while opening your chest and hip flexors. It’s the perfect antidote to sitting.
Step-by-step instructions: Lie on your back with knees bent and feet flat on the floor, hip-width apart and parallel. Your heels should be close enough that you can graze them with your fingertips. Press firmly through your feet and lift your hips toward the ceiling. Your thighs should be parallel—not splaying open. Interlace your fingers under your back and wiggle your shoulders closer together, creating a supportive base. Keep your neck neutral—don’t turn your head.
Common mistakes to avoid: Squeezing your glutes too aggressively can actually create compression in your lower back. Engage them, but don’t clench. Also, watch for your knees splaying outward. Keep them tracking over your second toe. Finally, don’t overarch your lower back. The curve should be distributed evenly along your spine.
Modifications: For a supported version, place a yoga block under your sacrum (the flat bone at the base of your spine). This allows you to hold the position longer with less effort, getting the chest-opening benefits without the strengthening demand. For a dynamic version, lift and lower your hips 10 times, which builds strength faster.
Hold/Reps: Hold for 5-8 breaths, or perform 10 slow lifts and lowers.
Why it works: Hours of sitting shorten your hip flexors and weaken your glutes and back muscles. Bridge reverses this pattern. It also creates extension through your thoracic spine (mid-back), the area that becomes rounded and stiff from desk work. Research shows that hip extension exercises significantly reduce lower back pain by addressing the muscular imbalances that cause it.
Pose 6: Supine Spinal Twist (Supta Matsyendrasana)
What it does: This gentle twist releases tension in the deep muscles along your spine and improves rotational mobility—the movement pattern we lose first when our backs get stiff.
Step-by-step instructions: Lie on your back and hug your right knee into your chest. Extend your right arm out to the side at shoulder height, palm down. Use your left hand to guide your right knee across your body toward the left side. You can keep your left leg extended or bend it for stability. Your right shoulder might lift off the floor—that’s fine. Turn your head to the right, gazing toward your extended hand. Breathe deeply, feeling the twist through your spine.
Common mistakes to avoid: Don’t force your knee to the floor. The twist happens in your spine, not by cranking your leg down. Also, twisting your neck too far can create strain. Keep the movement comfortable. Finally, if your shoulder lifts significantly off the floor, you’re probably twisting too far.
Modifications: Place a pillow or folded blanket under your bent knee for support. This removes the pressure to force anything. You can also keep both knees bent and drop them together to one side for a gentler version.
Hold/Reps: Hold for 1-2 minutes on each side. This is a relaxation pose, so longer is better.
Why it works: Twisting movements create a gentle “wringing” action that releases the small rotator muscles along your spine. These muscles get chronically tight from repetitive movements and poor posture. The sustained stretch also allows your nervous system to register that it’s safe to release the tension—something quick stretches can’t achieve.
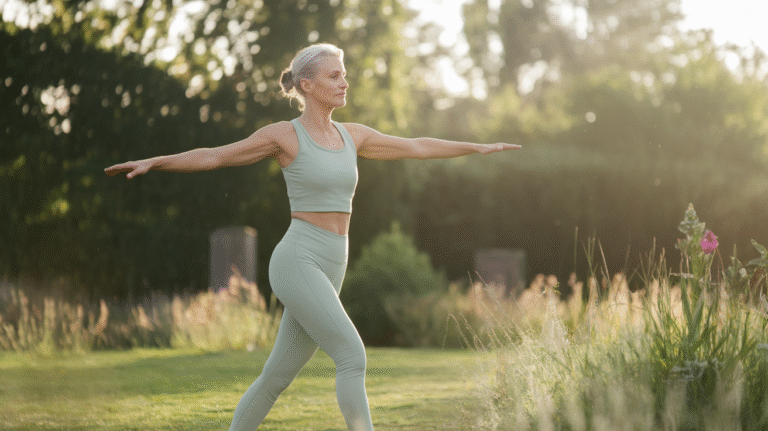
Pose 7: Chair Pose (Utkatasana)
What it does: Chair builds serious core and leg strength—the “scaffolding” that protects your spine during daily activities. Strong legs and core mean your spine doesn’t have to do all the work.
Step-by-step instructions: Stand with feet hip-width apart. Inhale and raise your arms overhead, palms facing each other. Exhale and bend your knees, sitting your hips back as if lowering into a chair.
Keep your weight in your heels—you should be able to wiggle your toes. Your thighs aim toward parallel with the floor, but don’t force it. Keep your spine long, chest lifted, and core engaged. Avoid overworking your lower back.
Common mistakes to avoid: The biggest mistake is letting your knees drift forward past your toes, which stresses your knee joints and misses the strengthening benefit. Sit back into your hips. Also, don’t arch your lower back to get your arms higher. If you feel compression in your lower back, raise your arms less or place your hands on your thighs.