Yoga Balance Flow For Beginners
No gym intimidation. No expensive membership. Just you, your living room, and a powerful practice that’s about to transform your fitness journey.
If you’ve been scrolling through social media watching yogis perform impossible-looking balance poses while you can barely stand on one foot without wobbling, here’s the truth: every expert started exactly where you are right now. And here’s even better news—you don’t need fancy equipment, a studio membership, or hours of free time to build a proven balance flow practice.
When I first attempted Tree Pose in my apartment, I lasted approximately four seconds before my standing leg started shaking like I was in an earthquake. I grabbed the wall, felt ridiculous, and almost quit. But here’s what I learned after weeks of consistent practice: that wobble isn’t weakness—it’s your nervous system learning a completely new skill. Research shows that balance training activates hundreds of stabilizer muscles simultaneously, creating neural pathways that strengthen with each attempt.
In this guide, you’ll discover how to create an effective yoga balance flow routine that fits into your busy schedule, builds real strength and stability, and delivers results you can feel in just weeks. Whether you’re a complete beginner or someone whose previous workout plans didn’t stick, this science-backed approach will meet you exactly where you are.
Balance flow yoga isn’t just about standing on one leg—it’s about building the mind-body connection that sculpts functional strength, burns stress, and tones your entire body from the inside out. Most beginners notice improved stability within 2-3 weeks of consistent practice. The transformation isn’t just physical—you’ll sharpen your focus, develop better posture, and build confidence that carries into every area of your life.
Let’s get started.
What Is Yoga Balance Flow? (And Why It Works For Busy Beginners)
The Balance Flow Difference
Balance flow yoga is a continuous sequence of poses that emphasize stability, coordination, and controlled movement while syncing breath with motion. Unlike traditional static yoga where you hold poses in isolation, flow practices keep you moving in a way that challenges both your physical balance and mental focus simultaneously.
Here’s why this matters: when you link poses together, you force your body to maintain stability during transitions—the exact moments when we lose balance in real life. Think about it: you don’t just stand still on one leg in daily activities. You shift weight, reach for objects, turn your head, move your arms. Balance flow trains functional stability that actually translates to fewer stumbles, better coordination, and genuine injury prevention.
The science backs this up. A 2019 study in the Journal of Physical Therapy Science found that dynamic balance training (movement-based) improved stability markers 34% more effectively than static balance exercises alone. Your nervous system learns faster when challenged with variable conditions, not just holding still.
For beginners, this approach is perfect because it builds foundational strength while remaining low-impact and infinitely modifiable. You don’t need to master advanced poses—you need to master the transitions between simple ones. That’s where the real strength-building happens.
Real Results You Can Expect
Let’s set realistic expectations. You won’t transform into a pretzel-bending yogi overnight, and that’s completely fine.
Physical benefits you’ll notice first: – Improved muscle tone in your legs, core, and glutes without adding bulk – Better posture as your deep stabilizer muscles strengthen – Enhanced functional strength that makes everyday movements easier – Reduced lower back discomfort as your core engagement improves
Mental benefits that surprise most beginners: – Significantly reduced stress levels (balance poses demand presence—you can’t balance while worrying about tomorrow) – Sharper focus and concentration that extends beyond your practice – Developed mind-body awareness that helps you recognize tension patterns – A sense of accomplishment that builds genuine confidence
Timeline reality check: Most beginners notice they can hold basic balance poses 10-15 seconds longer after just two weeks of consistent practice (4-5 sessions per week). By week four, poses that felt impossible start feeling challenging but doable. By week eight, you’ll likely surprise yourself with how steady you’ve become.
The bonus that nobody talks about enough: better balance translates directly to everyday life. You’ll navigate uneven sidewalks more confidently, catch yourself faster when you trip, and move through your day with better body awareness.
Why Balance Flow Beats Traditional Gym Workouts For Beginners
I’m not here to bash gyms—they serve a purpose. But for busy professionals and parents who struggle to find time, balance flow offers specific advantages.
No equipment needed: Your bodyweight provides all the resistance necessary to build strength. No dumbbells, no machines, no excuses about not having the right gear.
Time-efficient: An effective balance flow session takes 10-30 minutes. Research from the American College of Sports Medicine confirms that even 10-minute exercise sessions provide measurable benefits when performed consistently. You can practice before work, during lunch breaks, or after the kids are in bed.
Joint-friendly: Unlike high-impact cardio or heavy lifting, balance flow protects your knees, hips, and spine through controlled, low-impact movements. This matters enormously for beginners over 30 or anyone with previous injuries.
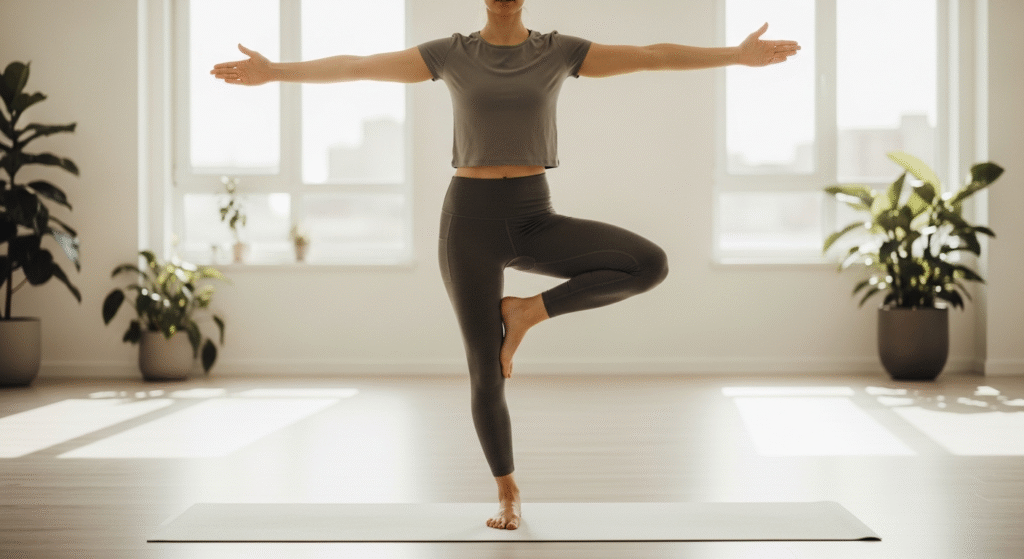
Infinitely scalable: Every pose has modifications. Struggling with Tree Pose? Keep your toe on the ground. Mastered that? Lift your foot higher. Close your eyes for an advanced challenge. You progress at your own pace without feeling left behind or intimidated.
Essential Balance Flow Poses Every Beginner Should Master
Foundational Standing Balance Poses
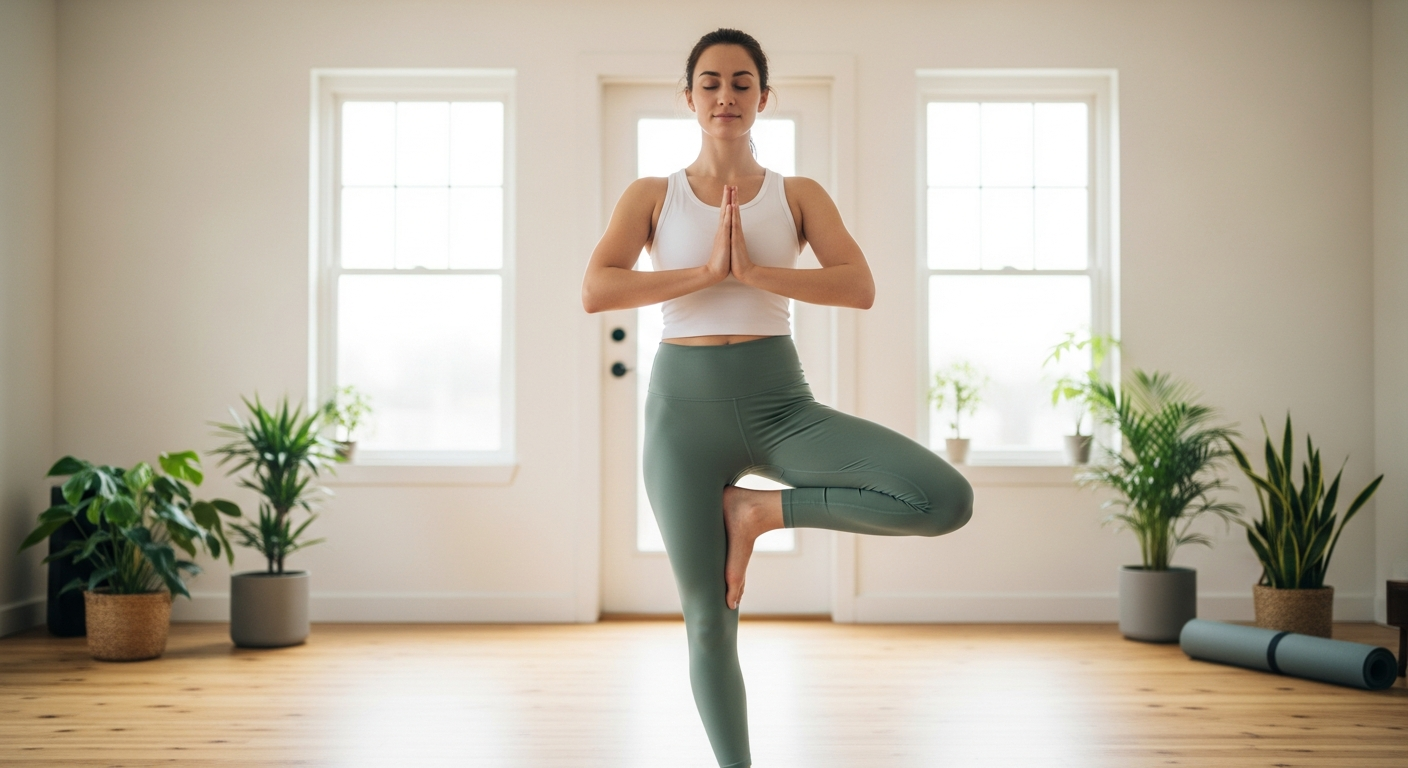
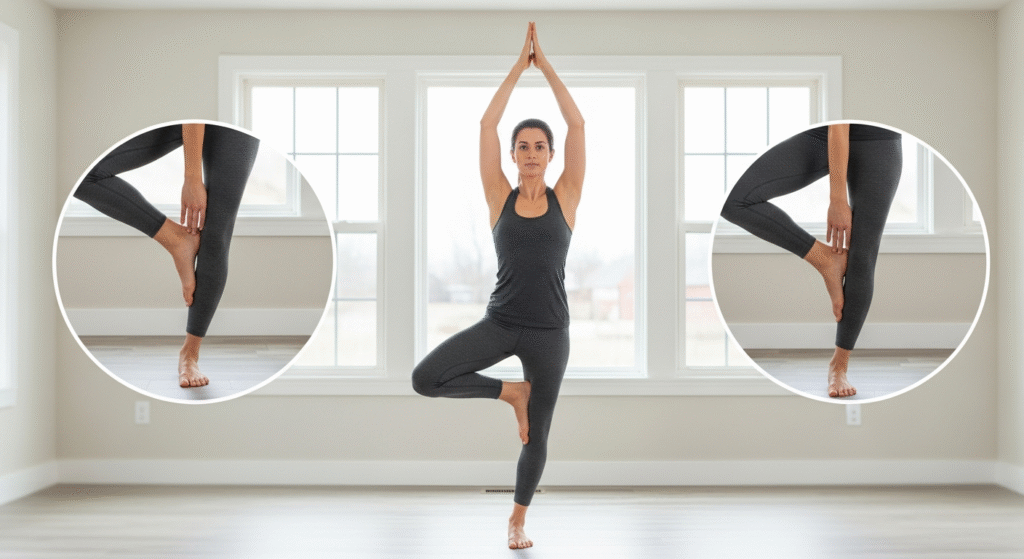
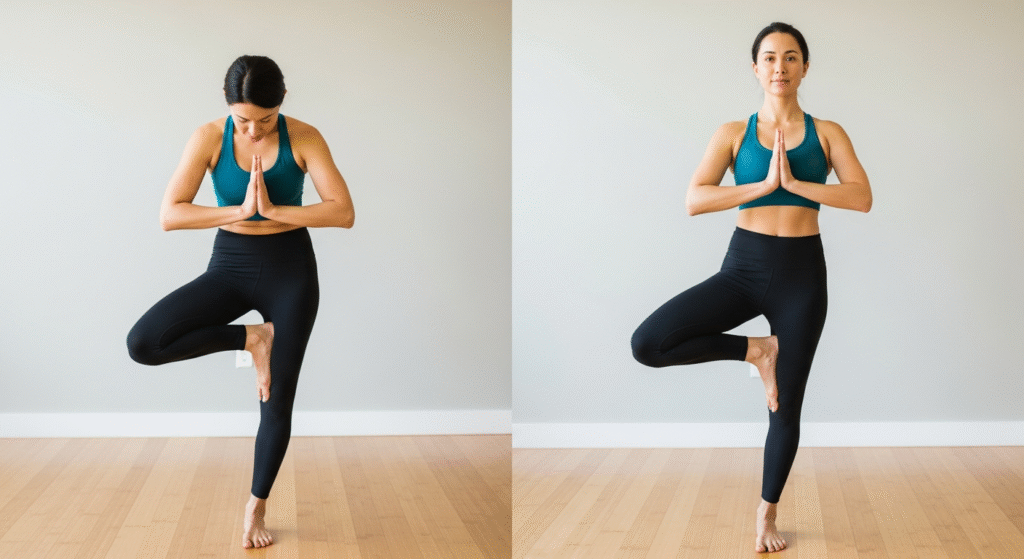
Tree Pose (Vrksasana): The Gateway Balance Pose
This is where everyone starts, and for good reason. Tree Pose teaches you the fundamental principle of all balance work: finding stability through subtle, constant micro-adjustments.
Step-by-step breakdown: 1. Start in Mountain Pose (feet hip-width apart, weight evenly distributed) 2. Shift your weight into your right foot, pressing through all four corners 3. Lift your left foot and place it against your right ankle (beginner), calf (intermediate), or inner thigh (never on the knee—this destabilizes the joint) 4. Bring your hands to prayer position at your chest or raise them overhead 5. Find a focal point at eye level and don’t let your gaze wander 6. Hold for 20-30 seconds, breathing steadily
Common mistake: Popping your hip out to the side of your standing leg. This shifts your center of gravity and actually makes balancing harder. The fix: engage your core and imagine drawing your hip points toward each other to maintain neutral pelvis alignment.
Breathing cue: Inhale for 4 counts, exhale for 4 counts. When you wobble (you will), return to your breath. Your stability returns when your breathing steadies.
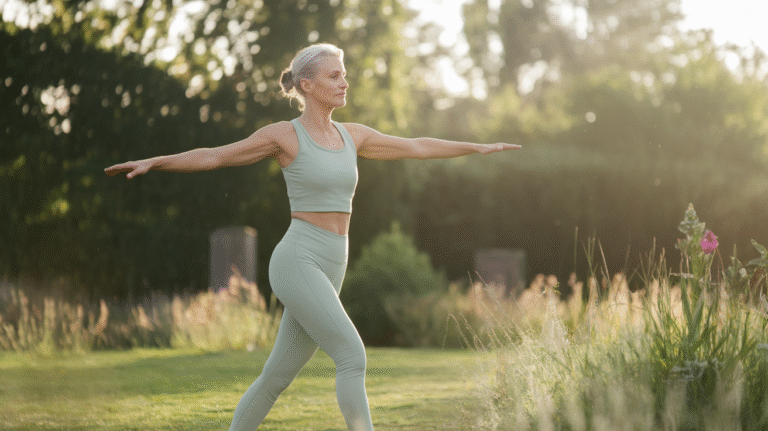
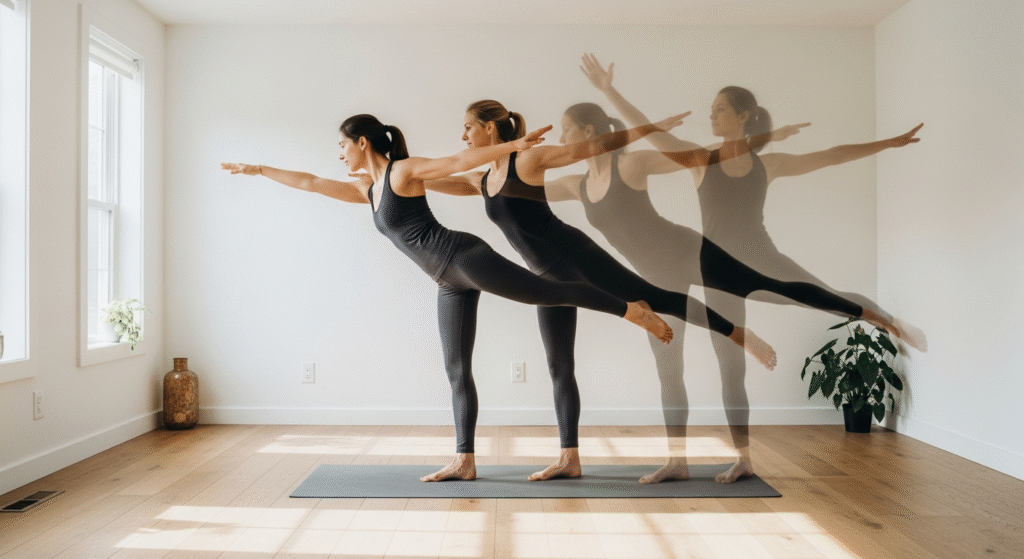
Warrior III (Virabhadrasana III): Build Powerful Leg and Core Strength
This pose looks intimidating but offers incredible benefits. It sculpts your entire posterior chain—glutes, hamstrings, and back muscles—while forcing your core to stabilize your spine.
Step-by-step breakdown: 1. Start in Mountain Pose, shift weight to your right foot 2. Hinge forward at your hips while lifting your left leg behind you 3. Extend your arms forward or keep them at your sides (beginner modification: hands on a wall or chair) 4. Create one straight line from fingertips to lifted heel 5. Keep your hips level—don’t let the lifted leg’s hip rotate open 6. Hold for 15-20 seconds initially, building to 30-45 seconds
Proper alignment: Your standing leg should have a micro-bend at the knee, not locked straight. This engages your quadriceps and protects your knee joint. Your core should feel like you’re bracing for a gentle punch—engaged but not rigid.
This pose works because it demands full-body integration. Your standing leg stabilizes, your core prevents rotation, your back muscles hold your spine neutral, and your lifted leg actively extends backward. It’s a complete workout disguised as a single pose.
Core-Focused Balance Transitions
Low Lunge to Standing Knee Lift: Create Flow and Burn Calories
This transition teaches you to maintain stability while moving—the essence of functional fitness.
The movement pattern: 1. Start in a low lunge with your right foot forward, left knee down 2. Press through your right foot to rise to standing 3. Draw your left knee up toward your chest 4. Balance on your right leg for 10-15 seconds 5. Lower back to low lunge with control 6. Repeat 3-5 times per side
Why this builds functional fitness: You’re training the exact movement pattern you use when climbing stairs, stepping over obstacles, or getting up from the floor. The slow, controlled motion builds eccentric strength (the lowering phase) which research shows is crucial for injury prevention.
Modification: Use a wall for support initially. There’s no shame in this—you’re building the neural pathways that will eventually allow you to do this unsupported.
Chair Pose (Utkatasana) Variations: Tone Legs While Improving Stability
Don’t let the name fool you—there’s no chair involved, and this pose is deceptively intense.
Basic form: 1. Stand with feet hip-width apart 2. Bend your knees as if sitting back into a chair 3. Shift your weight into your heels 4. Raise your arms overhead or keep them at chest level 5. Hold for 30-60 seconds
Adding arm movements to challenge balance: Slowly circle your arms while maintaining the squat position. This shifts your center of gravity and forces your legs to make constant adjustments.
Breathing technique: This pose burns. Your legs will shake. Breathe deeply into your belly—inhale for 4 counts, exhale for 6 counts. The longer exhale activates your parasympathetic nervous system, helping you tolerate discomfort.
Why this pose is more effective than it looks: You’re holding a quasi-isometric squat while managing arm movements and maintaining balance. It simultaneously builds strength, stability, and mental resilience.
Your First 15-Minute Beginner Balance Flow Sequence
This sequence is designed for complete beginners. You’ll need just a yoga mat (or carpeted floor) and wall space for support. No other equipment required.
Warm-Up Phase (3 minutes): Prepare Your Body
Breath Awareness in Mountain Pose (1 minute)
Stand with your feet hip-width apart, arms relaxed at your sides. Close your eyes or soften your gaze. Notice where you feel your weight in your feet—are you leaning forward onto your toes? Rocking back into your heels? Shift until you feel evenly distributed across both feet.
Breathe naturally for 5-6 breaths, then establish a steady rhythm: inhale for 4 counts, exhale for 4 counts. This isn’t just relaxation—you’re setting the neural foundation for everything that follows. Balance begins with awareness.
Gentle Neck and Shoulder Rolls (1 minute)
Drop your right ear toward your right shoulder, hold for two breaths, then slowly roll your chin to your chest and over to your left shoulder. Reverse direction. Repeat 3-4 times each direction.
Roll your shoulders backward 5 times, then forward 5 times. You’re releasing tension that interferes with balance and waking up proprioceptive awareness—your body’s sense of where it is in space.
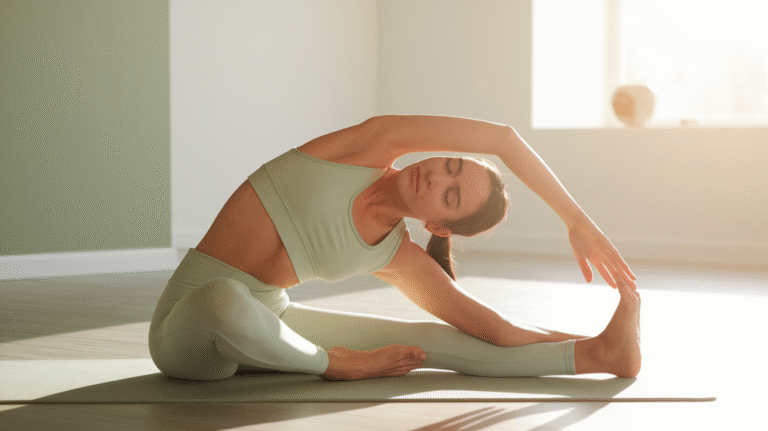
Standing Side Bends (1 minute)
Raise your right arm overhead, reach up and over to your left side, feeling length along your right side body. Hold for 3 breaths. Return to center, switch sides. Repeat 3 times per side.
This activates your obliques and lateral stabilizers—muscles that prevent you from tipping sideways when balancing on one leg.
Main Balance Flow Sequence (10 minutes): Build Strength and Stability
Round 1: Right Side Focus (5 minutes)
Mountain Pose to Tree Pose (hold 30 seconds): From Mountain Pose, shift your weight to your right foot. Place your left foot against your right ankle, calf, or inner thigh. Hands to prayer at chest. Find your focal point. Breathe steadily. If you wobble, that’s your nervous system learning. Reset and try again.
Tree Pose to Low Lunge to Warrior III (transition slowly): From Tree Pose, lower your left foot behind you, stepping back into a low lunge. Hands frame your right foot. Press through your right foot to rise, lifting your left leg behind you as you hinge forward into Warrior III. Hands can stay on a wall, reach forward, or rest on your hips. Hold for 20 seconds.
Warrior III to Standing Knee Lift (hold 20 seconds): From Warrior III, draw your left knee forward and up toward your chest. Find your balance. Engage your core. Hold for 20 seconds.
Standing Knee Lift to Chair Pose (hold 30 seconds): Lower your left foot to meet your right. Feet hip-width apart, bend your knees, sit back into Chair Pose. Arms overhead or at chest level. Feel your thighs burning. Breathe through it.
Return to Mountain Pose (rest 30 seconds): Stand tall. Shake out your legs if needed. Notice how your body feels. Take 3-4 deep breaths before moving to the left side.
Round 2: Left Side Focus (5 minutes)
Repeat the entire sequence on your left side. You’ll likely notice differences—one side feels stronger or more stable. This is completely normal. Most people have a dominant side. The practice is about awareness and gradual balancing, not perfection.
Focus on consistency, not perfection. Some days you’ll feel rock-solid. Other days you’ll wobble more—this can depend on sleep, stress, hydration, or simply neural fatigue. All of it is part of the process.
Cool-Down Phase (2 minutes): Integrate and Restore
Wide-Legged Forward Fold (1 minute)
Step your feet 3-4 feet apart, toes pointing forward. Hinge at your hips and fold forward, letting your hands rest on the floor, a block, or your shins. Let your head hang heavy. Feel the release in your hamstrings and lower back. Breathe deeply. This allows your heart rate to normalize and blood flow to redistribute.
Mountain Pose with Gratitude (1 minute)
Return to standing. Feet together or hip-width apart. Close your eyes. Notice the difference in your body from when you started. Your legs might feel more engaged. Your mind might feel clearer. Set an intention to return to your mat tomorrow or the next day. Consistency builds results, not perfection.
Progression Tips: When and How to Level Up
Week 1-2: Use wall support liberally. Hold poses for 15-20 seconds. Focus on form over duration. Your goal is to learn the positions and build neural pathways.
Week 3-4: Reduce wall support gradually. Increase hold times to 30-45 seconds. Start noticing your focal point more than your wobbles.
Week 5+: Add arm variations (circling arms in Tree Pose, changing arm positions in Warrior III). Try closing your eyes for 5-10 seconds in Tree Pose—this removes visual input and forces your proprioceptive system to work harder.
Listen to your body: Some days you’ll wobble more than others. This doesn’t mean you’re regressing—it means your nervous system is tired, you’re dehydrated, or you didn’t sleep well. Balance is a sensitive barometer of your overall state. Honor it.
Common Balance Flow Mistakes (And How To Fix Them Fast)
Mistake #1: Holding Your Breath
When I first practiced balance poses, I’d attempt Tree Pose and realize 15 seconds in that I hadn’t taken a single breath. Concentration makes us forget to breathe, but here’s the problem: breath-holding increases muscular tension and actually reduces stability. Your muscles need oxygen to make those constant micro-adjustments that keep you balanced.