Slow Flow Yoga Sequence: 20-Minute Routine for Deep Relaxation
You know that feeling when your shoulders are practically touching your ears, your mind won’t stop racing, and you desperately need to relax but can’t seem to slow down? I’ve been there—we all have.
The good news is that you don’t need an hour-long yoga class or a fancy studio membership to find deep relaxation. This 20-minute slow flow yoga sequence delivers proven stress relief that fits into even the busiest schedule.
Slow flow yoga combines gentle, mindful movement with intentional breathing to activate your body’s natural relaxation response. Unlike intense workout styles, this practice works by slowing down, not speeding up.
You’ll move through carefully selected poses that release tension from your hips, shoulders, and spine—the places where we store stress without even realizing it.
In this complete guide, you’ll learn an easy-to-follow sequence you can practice anywhere, anytime. No expensive equipment required, no complicated poses to master, just you, your breath, and 20 minutes of intentional movement. Whether you’re a complete beginner or you’ve been practicing yoga for years, this routine meets you exactly where you are.
By the end of this sequence, you’ll feel the difference in your body and mind. That’s not a promise—it’s what happens when you give yourself permission to slow down and breathe.
What Makes Slow Flow Yoga the Ultimate Relaxation Practice
Understanding Slow Flow Yoga
Slow flow yoga is exactly what it sounds like: a gentle, flowing practice where you move mindfully from one pose to the next, synchronized with your breath. Each movement gets the time it deserves, and each breath becomes an anchor that keeps you present.
Here’s what sets slow flow apart from other yoga styles: In vinyasa or power yoga, you’re moving quickly, building heat, and working up a sweat.
Those styles are amazing for different goals, but they’re not designed for deep relaxation. Slow flow takes the opposite approach. You’ll hold poses longer, transition more deliberately, and focus on releasing tension rather than building it.
The science backs this up. When you move slowly and breathe deeply, you activate your parasympathetic nervous system—the “rest and digest” mode that counteracts stress.
Your heart rate slows, your blood pressure decreases, and your body gets the message that it’s safe to relax. This isn’t just feel-good theory; it’s measurable physiology.
The Amazing Benefits You’ll Experience
The benefits of slow flow yoga go way beyond just feeling relaxed for a few minutes. Regular practice creates lasting changes in how your body responds to stress. You’ll notice improved sleep quality because your nervous system learns to shift into relaxation mode more easily. Mental clarity improves when you’re not constantly operating in fight-or-flight mode.
The physical benefits are just as impressive. Slow, sustained stretching releases chronic tension patterns that develop from sitting at desks, looking at phones, or carrying stress in your body. Your hips open up, your shoulders drop away from your ears, and your spine regains mobility it may have lost.
What makes this practice truly perfect is its accessibility. You don’t need to be flexible, strong, or experienced. Slow flow welcomes everyone because it’s about working with your body, not against it. There’s no competition, no pressure to look a certain way, and no “right” way to practice beyond showing up and breathing.
When to Practice This Sequence
This 20-minute sequence works beautifully at different times of day, each offering unique benefits. As a morning practice, it sets an intentional tone for your entire day. You wake up your body gently, clear mental fog, and create space before the day’s demands take over.
Midday practice provides an effective reset when your energy starts to dip. Instead of reaching for another coffee, you can release physical tension and refresh your focus in just 20 minutes. It’s like hitting the reset button on your entire system.
Evening practice might be where this sequence shines brightest. After a long day, you need to actively signal to your body that it’s time to wind down. This sequence releases accumulated stress and prepares you for restful sleep. You’ll transition from doing mode to being mode.
The truth is, anytime you need to reconnect with yourself is the right time to practice. Feeling overwhelmed? Roll out your mat. Can’t focus? Take 20 minutes. Just need a break from everything? This sequence has you covered.
Essential Prep: Setting Yourself Up for Success
Creating Your Perfect Practice Space
You don’t need a dedicated yoga studio in your home, but you do need a space where you can move freely and feel comfortable. Clear enough floor space to lie down with your arms extended—about the size of a yoga mat. That’s it.
Simple environmental tweaks make a big difference. Minimize distractions by putting your phone on silent (or better yet, in another room). Adjust the temperature so you’re comfortable—not too hot, not too cold. If you’re practicing in the evening, dim the lights or light a candle to signal relaxation time.
Props enhance comfort but aren’t required. A yoga block helps if you can’t quite reach the floor in certain poses. A blanket provides cushioning for your knees and warmth during final relaxation. A bolster (or firm pillow) supports restorative poses. Don’t have these items? No problem. Use a thick book instead of a block, grab any blanket from your closet, and stack pillows for support.
What to Wear and Bring
Wear comfortable, stretchy clothing that moves with you. Yoga pants or leggings work great, but so do soft sweatpants.
Choose a top that won’t ride up when you reach overhead. Avoid anything with buttons, zippers, or restrictive waistbands that dig in when you’re folding forward.
Practice barefoot whenever possible. Your feet need to grip the floor for stability, and shoes or socks create slipping hazards. If you’re on a slippery surface, invest in a basic yoga mat—you can find effective ones for under $20.
Keep water nearby for hydration, but you won’t need to drink during the practice itself. Sipping water is for before and after, not during the flow.
The Mindset Shift That Changes Everything
Here’s what transforms this from just stretching into an actual practice: your intention. Before you begin, take a moment to set an intention. It doesn’t need to be profound or poetic. It might be as simple as “I’m here to relax” or “I’m giving myself this time.”
Let go of perfection right now. This isn’t about achieving Instagram-worthy poses or looking a certain way. Your practice is yours alone, and it looks exactly how it’s supposed to look. Some days you’ll feel flexible and strong. Other days you’ll feel tight and tired. Both are perfect.
The power of showing up for yourself for just 20 minutes cannot be overstated. In a world that constantly demands your attention, energy, and time, claiming 20 minutes for yourself is a radical act of self-care. You deserve this time. Your body needs this time. Everything else can wait.
Your Complete 20-Minute Slow Flow Sequence
Grounding & Centering (Minutes 1-4)
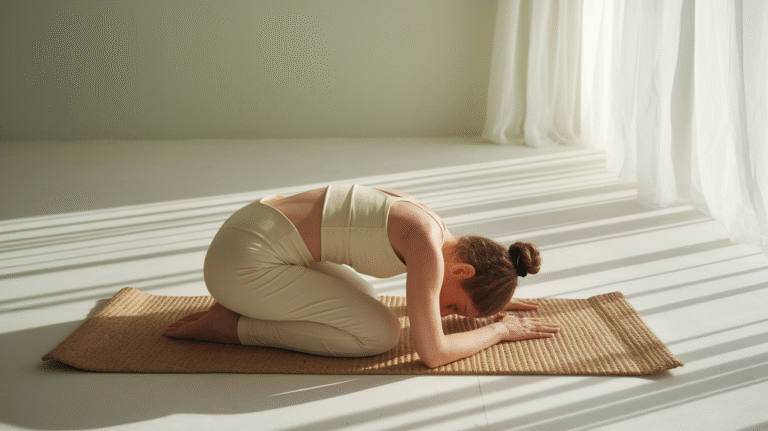
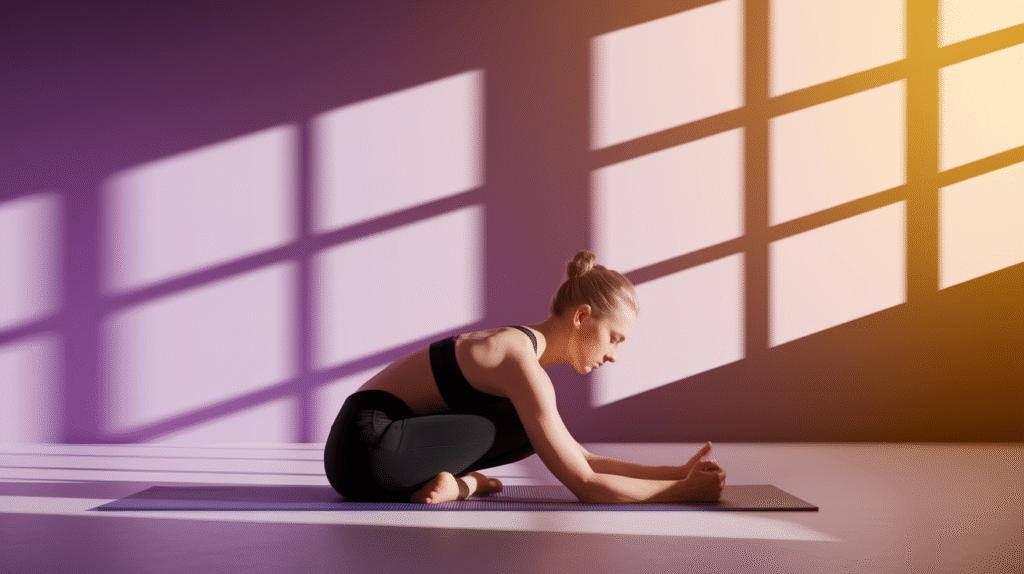
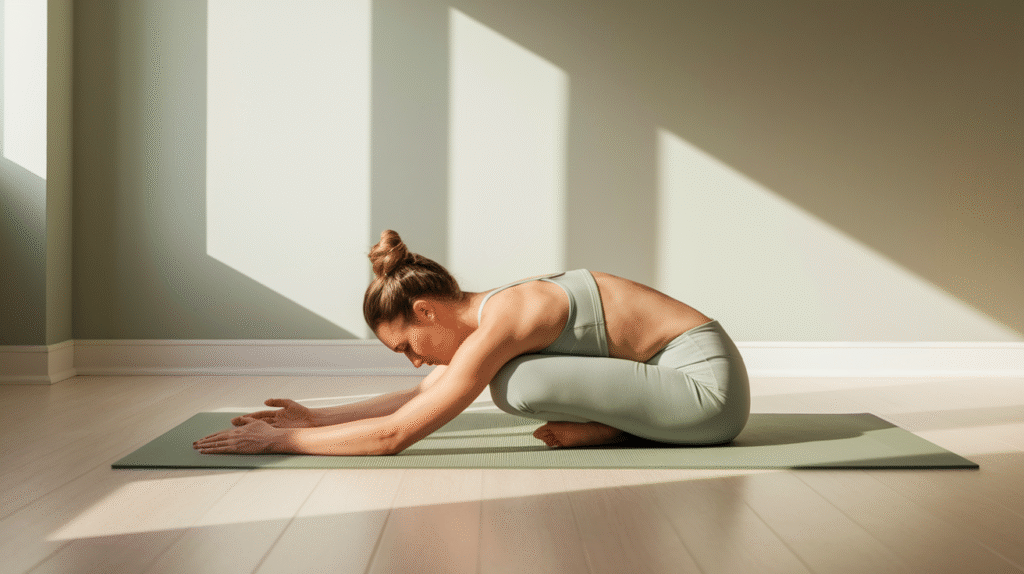
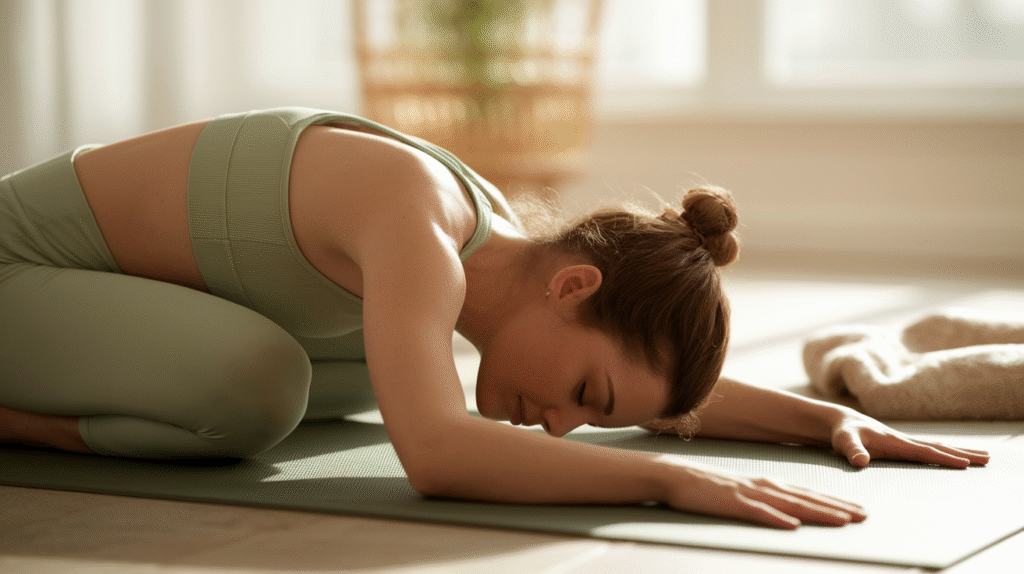
Child’s Pose (2 minutes): Start on your hands and knees, then sit your hips back toward your heels. Extend your arms forward or rest them alongside your body—whichever feels better. Let your forehead rest on the mat or on a folded blanket if the floor feels too far away.
This is where you arrive. Close your eyes and notice your breath. You’re not trying to change it yet, just observing. Feel your belly expand against your thighs with each inhale. Notice where you’re holding tension. Set your intention for the next 20 minutes.
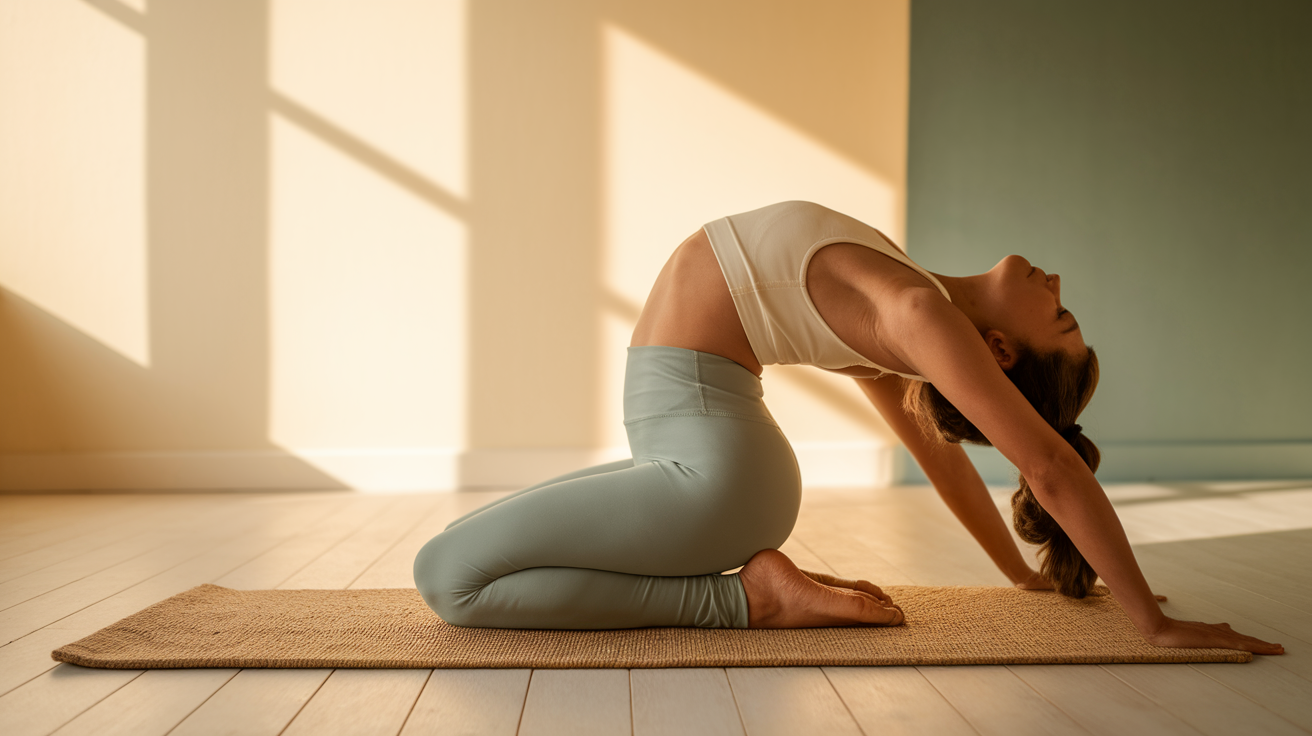
Seated Cat-Cow (2 minutes): Come up to a comfortable seated position with your legs crossed. Place your hands on your knees. Inhale as you arch your spine, lifting your chest and looking slightly upward. Exhale as you round your spine, tucking your chin and drawing your belly in.
Move slowly, letting each breath guide each movement. Inhale to arch, exhale to round. This gentle spinal warmup prepares your body for the flowing movements ahead. You’re coordinating breath and movement, which is the foundation of the entire practice.
Opening Flow (Minutes 5-10)
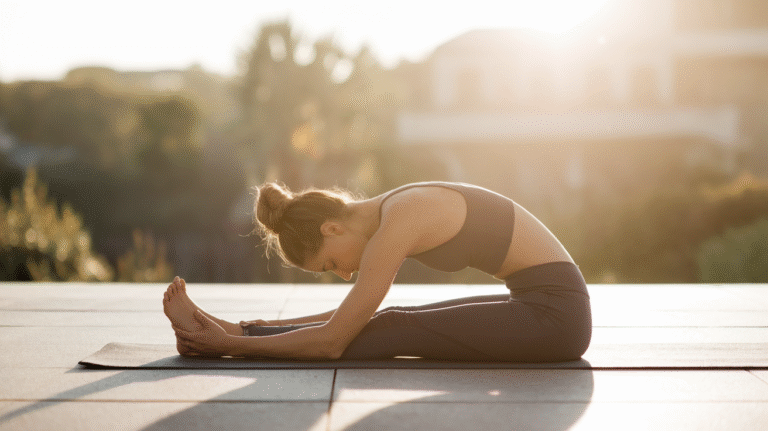
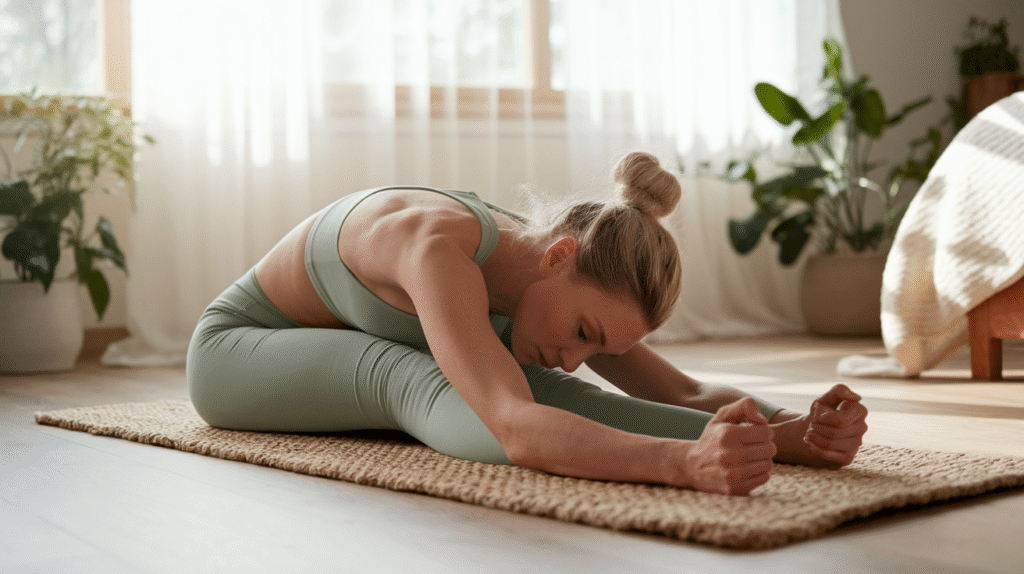
Gentle Standing Flow: Mountain Pose to Forward Fold (2 minutes): Stand at the front of your mat with your feet hip-width apart. This is Mountain Pose—simple but powerful. Feel your feet firmly planted. Inhale and sweep your arms overhead, lengthening through your spine. Exhale and fold forward, hinging at your hips. Let your head hang heavy, knees slightly bent.
Inhale to lift halfway up with a flat back, hands on your shins. Exhale to fold again. Repeat this flow four to five times, moving with your breath. Don’t rush. Each movement deserves a full, complete breath.
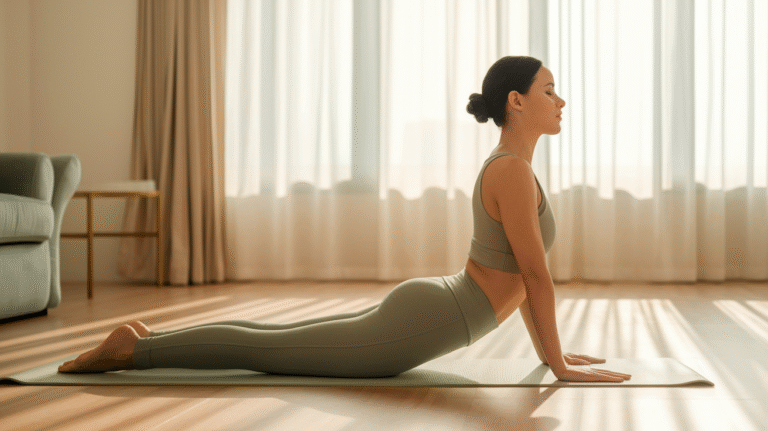
Low Lunge Series (3 minutes): From your forward fold, step your right foot back into a low lunge. Lower your right knee to the mat and sink your hips forward, feeling the stretch through your right hip flexor. Raise your arms overhead if that feels good, or keep your hands on your front knee.
Breathe into the tight spots. Hip flexors hold tremendous tension from sitting, and this pose releases it. Stay for five deep breaths, then switch sides. Step your left foot back, lower your left knee, and hold for five breaths. This is where you might feel emotions surface—that’s completely normal and actually therapeutic.
Warrior II to Extended Side Angle (2 minutes): From your low lunge on the left side, tuck your back toes, lift your back knee, and open into Warrior II. Your front knee bends over your ankle, back leg straight and strong, arms extended at shoulder height. Gaze over your front fingertips.
Take three breaths here, building gentle strength. Then extend into Extended Side Angle by lowering your front forearm to your front thigh and reaching your top arm overhead. This creates a beautiful line of energy from your back foot through your fingertips. Hold for three breaths, then return to center and switch sides. Repeat the entire sequence on the right side.
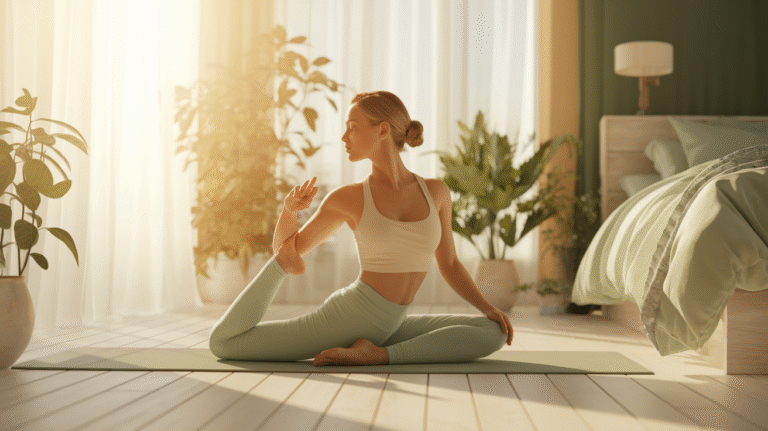
Deep Release Poses (Minutes 11-17)
Reclined Pigeon Pose (3 minutes each side): Lie on your back and cross your right ankle over your left knee, creating a figure-four shape with your legs. Thread your right arm through the space between your legs and clasp your hands behind your left thigh. Gently draw your left knee toward your chest.
This is the ultimate hip opener, and it’s where deep emotional release often happens. Hips store stress and unprocessed emotions, and this pose creates space for them to move through. Stay for a full three minutes on this side, breathing deeply. If you feel tears or unexpected emotions, let them come. That’s the release working.
Switch sides and hold for three minutes on the left. Use a strap or towel around your thigh if you can’t quite reach with your hands. The goal isn’t to pull aggressively—it’s to find a sustainable stretch and breathe into it.
Supine Twist (2 minutes total): Hug both knees into your chest, then let them fall to the right side. Extend your arms out to the sides in a T-shape and turn your head to the left. This gentle twist releases tension through your spine and lower back.
Stay for one minute, breathing into your back body. Then bring your knees back to center and twist to the left side for one minute. Let gravity do the work—you’re not forcing anything.
Legs-Up-the-Wall or Happy Baby (2 minutes): For Legs-Up-the-Wall, scoot your hips close to a wall and extend your legs up against it. This inversion calms your nervous system and reduces swelling in your legs and feet. If you don’t have wall space, try Happy Baby instead: lying on your back, grab the outsides of your feet and draw your knees toward your armpits, keeping your lower back on the mat.
Either pose signals deep relaxation to your body. Stay for two full minutes, focusing on slow, steady breathing.
Final Relaxation (Minutes 18-20)
Savasana Setup: Lie on your back with your legs extended and arms resting alongside your body, palms facing up. Place a folded blanket under your head if that’s more comfortable. You can also place a bolster or rolled blanket under your knees to support your lower back.
This is Savasana, the most important pose in any yoga practice. It’s where your body integrates everything you’ve just done.
Body Scan Technique: Starting at the crown of your head, mentally scan down through your body. Notice your forehead, jaw, neck, shoulders. Release any lingering tension with each exhale. Move down through your chest, belly, hips, legs, all the way to your toes. This progressive relaxation technique deepens your rest.
Gratitude Practice: As you rest, thank yourself for showing up today. Thank your body for moving with you, for breathing with you, for carrying you through your life. This isn’t selfish—it’s essential recognition of your own worth and effort.
Stay in Savasana for the full two minutes. When you’re ready to transition out, start by wiggling your fingers and toes, then roll to one side and slowly press yourself up to a seated position.
Simple Tips to Deepen Your Practice
Breathing Techniques That Enhance Relaxation
Your breath is everything in this practice. The proven 4-7-8 breathing pattern delivers instant calm: inhale for a count of four, hold for seven, exhale for eight. This pattern activates your relaxation response and can be used during any pose where you’re holding still.
Ujjayi breath, also called ocean breath, helps maintain focus throughout your flow. Breathe in and out through your nose while slightly constricting the back of your throat, creating a soft ocean-like sound. This audible breath keeps you present and rhythmic.
Remember this simple rule: inhale when you’re expanding or opening, exhale when you’re folding or twisting. Inhale to reach your arms up, exhale to fold forward. Inhale to extend your spine, exhale to deepen into a twist. Your breath guides your movement.
Common Mistakes to Avoid
The biggest mistake people make is rushing through poses. Slower is actually more effective for deep relaxation. If you’re moving quickly, you’re activating your sympathetic nervous system (stress response) instead of your parasympathetic nervous system (relaxation response). Take your time.
Don’t hold your breath. It sounds obvious, but when poses feel challenging, we instinctively hold our breath. Keep breathing, even if that means backing off the intensity of the pose. Breath is more important than depth.
Stop comparing yourself to others or to images you see on social media. Those pictures show a single moment, not someone’s entire practice or reality. Your body is unique, your practice is unique, and that’s exactly how it should be.
Making This Routine Work for Your Life
Some days you won’t have the full 20 minutes, and that’s okay. You can shorten the sequence by spending less time in each section or skipping the standing flow and focusing on deep release poses and final relaxation. Even 10 minutes of intentional practice makes a difference.
When you have more time, extend the sequence by holding poses longer or adding extra rounds of the standing flow. You can also extend Savasana to five or even 10 minutes for deeper rest.
Creating a consistent practice habit doesn’t require daily commitment. Start with twice a week and build from there. Choose specific days and times that work for your schedule, and treat that time as a non-negotiable appointment with yourself.
Listening to Your Body’s Wisdom
Learn to distinguish between “good” stretch and pain. Good stretch feels intense but sustainable, like you’re working at about 60-70% of your maximum. You can breathe through it. Pain feels sharp, shooting, or makes you want to hold your breath. That’s your body’s clear signal to back off.
Use props or modify poses whenever you need to. Bending your knees in forward folds isn’t “cheating”—it’s intelligent practice. Using a block to bring the floor closer isn’t weakness—it’s meeting yourself where you are today.
Honor where you are each day. Your body changes day to day based on sleep, stress, hydration, and countless other factors. What felt easy yesterday might feel challenging today. That’s normal, not failure.
Embrace Your 20 Minutes of Peace
Slow flow yoga offers an accessible, effective path to deep relaxation in just 20 minutes. This proven sequence works for any fitness level and requires minimal equipment—just you, your breath, and your willingness to slow down. You’ve learned a complete routine you can practice anywhere, anytime you need to release stress and reconnect with yourself.
Consistency matters more than perfection. You don’t need to practice every single day or execute every pose flawlessly. You just need to show up for yourself regularly and move with intention. Even 10 minutes makes a measurable difference in your stress levels, sleep quality, and overall wellbeing.
Here’s your challenge: try this sequence today, right now if possible. Don’t wait for the perfect time, the perfect outfit, or the perfect mood. Roll out your mat (or just clear some floor space), set a timer for 20 minutes, and move through the sequence. Notice how you feel afterward compared to how you felt before.
Self-care isn’t selfish—it’s essential. You can’t pour from an empty cup, and you can’t show up fully for others when you’re running on stress and exhaustion. These 20 minutes are an investment in your health, your relationships, and your ability to handle whatever life throws at you.
Save this routine for easy reference. Bookmark this page, screenshot the sequence, or write down the poses in a notebook you keep by your mat. Make it as simple as possible to return to this practice whenever you need it.
Your body is asking for this. Your mind needs this. Everything else can wait for 20 minutes. Take a deep breath, step onto your mat, and give yourself the gift of deep relaxation. You deserve it.