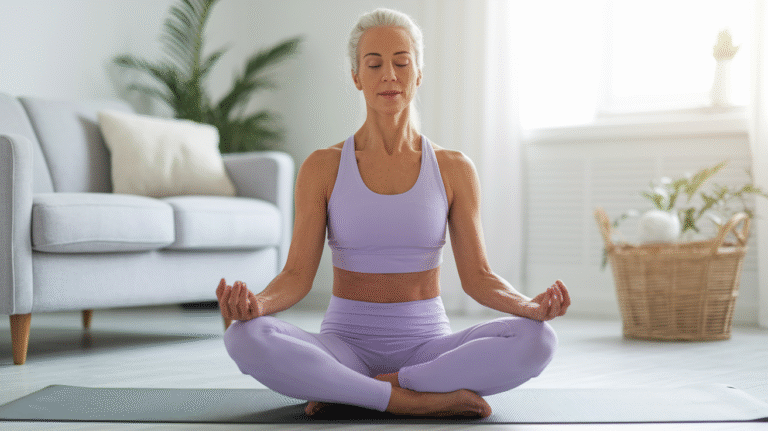
Postpartum Pelvic Tilt Exercises
Your giving birth—an incredible feat that deserves celebration. But now, as you look in the mirror or try to pick up your baby without that nagging lower back pain, you’re wondering: “Will my body ever feel strong again?”
Here’s the truth no one tells you: Your postpartum body isn’t broken; it’s recovering from one of the most physically demanding experiences imaginable. Those core muscles, your pelvic floor, and your entire midsection have been stretched, shifted, and transformed over nine months. They need intentional, gentle rebuilding—and that’s exactly where pelvic tilt exercises come in.
When I started my postpartum recovery journey after my first child, I made the mistake so many moms make—I jumped back into crunches and planks at six weeks postpartum, thinking that’s what it would take to “get my body back.” The result? Worsening diastasis recti, pelvic floor dysfunction, and a lower back that screamed every time I bent down to change a diaper. It wasn’t until I stripped everything back to the basics—starting with simple pelvic tilts—that I finally began to feel strong and functional again.
Pelvic tilts are the unsung heroes of postpartum recovery. These simple yet powerful movements can help you rebuild deep core strength, alleviate lower back pain, restore pelvic floor function, and create a stable foundation for everything else—from holding your baby to eventually returning to more intense workouts. Research consistently shows that targeted core rehabilitation in the postpartum period significantly reduces long-term pelvic floor dysfunction and chronic lower back pain.
In this guide, you’ll discover exactly how to perform effective pelvic tilt exercises from the comfort of your home, when it’s safe to start, how to progress without risking injury, and how these movements fit into your overall postpartum recovery journey. No gym membership required, no intimidating equipment needed—just you, a comfortable space, and a commitment to rebuilding your strength from the inside out.
Why Pelvic Tilt Exercises Are Essential for Postpartum Recovery
Understanding What Pregnancy Did to Your Core
Let’s get real about what happened during those nine months. Your abdominal muscles didn’t just stretch—they separated. Diastasis recti, the separation of your rectus abdominis muscles (your six-pack muscles), affects up to 60% of women during pregnancy and postpartum. That gap down the middle of your belly isn’t just cosmetic—it represents a fundamental loss of core stability that affects everything from your posture to your ability to lift groceries without pain.
Your pelvic floor—the hammock of muscles that supports your bladder, uterus, and bowels—has been under sustained pressure for months. Whether you had a vaginal delivery or C-section, these muscles have been stretched and weakened. The transverse abdominis, your deepest core muscle that acts like a natural corset, has been inhibited and needs to be “woken up” again. Your multifidus muscles, the small but crucial stabilizers along your spine, often shut down during pregnancy and don’t automatically turn back on after delivery.
Here’s what most postpartum workout plans get dangerously wrong: They jump straight into traditional ab exercises like crunches, sit-ups, or even planks. These movements create intra-abdominal pressure that pushes outward—exactly the opposite of what your healing core needs. Doing crunches with an unhealed diastasis is like trying to close a wound by pulling the edges apart. You’re not weak for struggling with these exercises; they’re simply the wrong tool for this stage of recovery.
The connection between your core and daily function is immediate and unavoidable. Every time you lift your baby (which you do dozens of times a day), your core stabilizes your spine. When you stand up from sitting while holding that 15-pound infant, your deep core muscles should fire first to protect your back. When you’re hunched over for the tenth feeding session of the day, a strong, functional core maintains proper alignment and prevents that burning pain between your shoulder blades.
The Science-Backed Benefits of Pelvic Tilts
Pelvic tilts work because they target the exact muscles that need rebuilding: your transverse abdominis and multifidus. Unlike crunches that train the superficial six-pack muscles, pelvic tilts create deep core activation that pulls your abdominal wall inward and stabilizes your spine. When performed correctly with coordinated breathing, they engage up to 30% more of your deep core fibers than traditional ab exercises.
The magic of pelvic tilts lies in their ability to create coordination between your abdominal muscles and pelvic floor. Physical therapists call this the “core canister”—when you exhale and tilt your pelvis posteriorly (pressing your lower back into the floor), your pelvic floor naturally lifts and your transverse abdominis engages. This synchronized activation is precisely what your body needs to rebuild functional strength, not just aesthetic muscle.
For alleviating postpartum pain, pelvic tilts are remarkably effective. Studies on postpartum women show that consistent pelvic tilt exercises reduce lower back pain intensity by an average of 40% within four weeks. They address the root cause of most postpartum back pain: anterior pelvic tilt (excessive lower back arch) combined with weak deep core muscles. By teaching your body to find and maintain neutral spine position, you’re not just treating symptoms—you’re correcting the underlying dysfunction.
The postural benefits extend beyond your workout time. That “mom hunch” you develop from constantly feeding, holding, and looking down at your baby creates chronic upper back and neck tension. Pelvic tilts improve your awareness of pelvic positioning, which directly influences your entire spinal alignment. When you can control your pelvis, you can maintain better posture while nursing at 2 AM or carrying your baby through the grocery store.
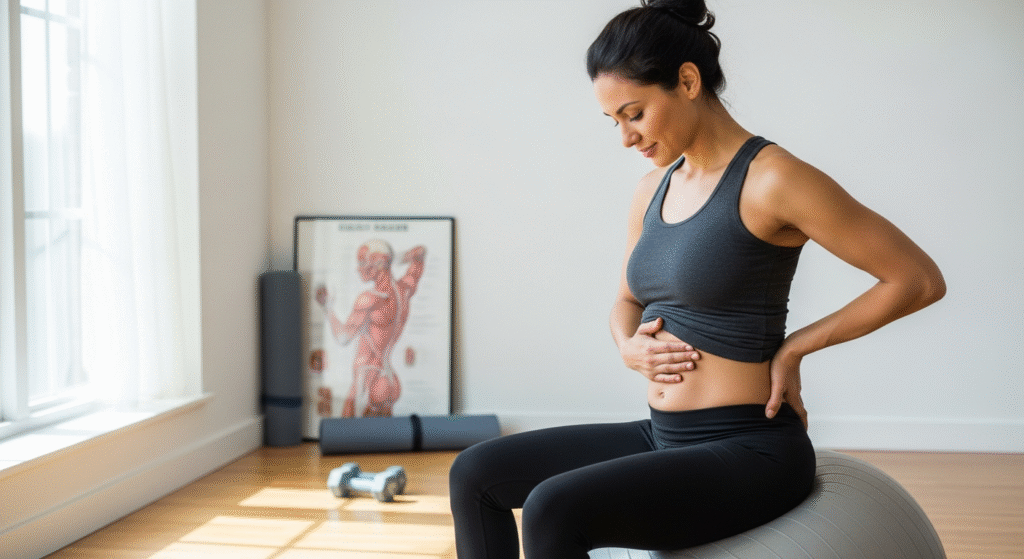
When You Can Safely Start (And When to Wait)
Here’s where individual variation matters enormously. For uncomplicated vaginal deliveries, most women can begin gentle supine pelvic tilts within the first week postpartum—sometimes even within days—once cleared by their healthcare provider. These early, gentle movements help reduce swelling, improve circulation, and begin the reconnection process with your core muscles. The key word is *gentle*. You’re not trying to build strength yet; you’re simply reminding your nervous system that these muscles exist.
C-section recovery requires a modified approach and timeline. You’ve had major abdominal surgery with incisions through multiple layers of tissue, including your abdominal muscles. Most obstetricians recommend waiting at least two weeks before beginning any pelvic tilt movements, and even then, you’ll start in positions that don’t create tension across your incision. Seated and standing pelvic tilts often feel more comfortable than supine positions initially. I started with standing tilts against a wall at three weeks post-cesarean, and the gentle movement actually helped reduce the tight, pulling sensation around my incision.
Watch for these red flags that mean you need to pause and consult your healthcare provider immediately: Heavy bleeding that soaks through a pad in an hour or returns after it had slowed down. Sharp, severe pain (not just discomfort) during the exercise. A bulging sensation in your vagina or rectum that suggests pelvic organ prolapse. Urinary leakage that worsens rather than improves with exercise. These aren’t signs of weakness—they’re signals that your body needs professional assessment before continuing.
The standard six-week postpartum checkup exists for a reason. Use that appointment to discuss your exercise plans specifically. Don’t assume your provider’s generic “you’re cleared for exercise” means you should jump into high-intensity workouts. Ask specifically about pelvic tilts, diastasis recti assessment, and pelvic floor function. If your provider dismisses your concerns with “just do some Kegels,” consider seeking a pelvic floor physical therapist who specializes in postpartum recovery. Your body deserves expert guidance during this critical rebuilding phase.
The Foundation: Mastering the Basic Pelvic Tilt
Step-by-Step Guide to the Supine Pelvic Tilt
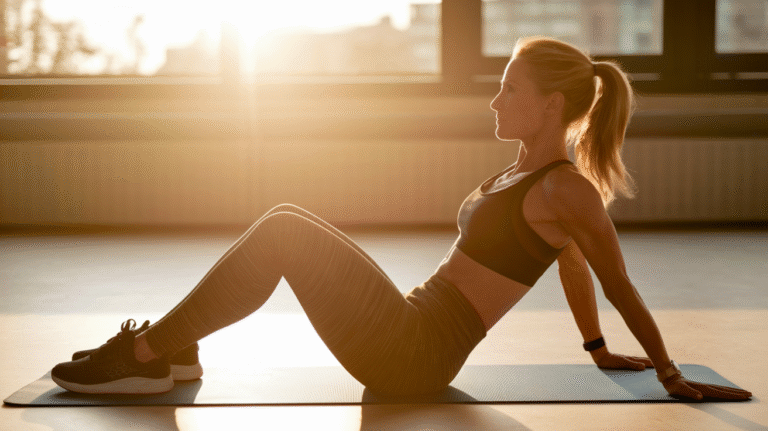
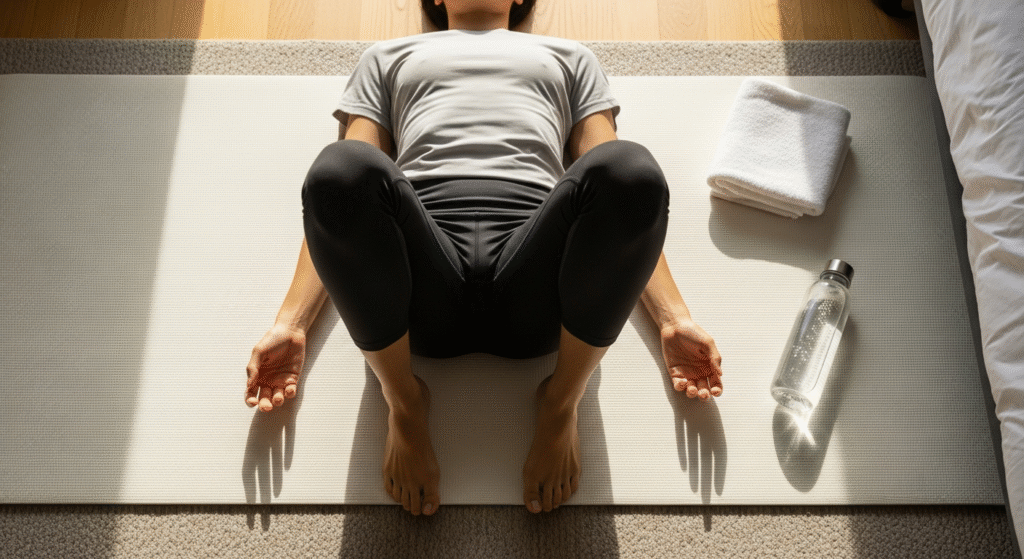
Lie on your back on a comfortable but firm surface—a yoga mat on the floor is ideal, but your bed works if you need the softer surface initially. Bend your knees and place your feet flat on the floor, hip-width apart. Your arms rest relaxed at your sides, palms down. This is your starting position, and getting it right matters. Your feet shouldn’t be too close to your glutes or too far away—aim for a position where your shins are roughly perpendicular to the floor.
Begin with an anterior tilt to establish your range of motion. Gently arch your lower back away from the floor, creating a visible space between your lumbar spine and the ground. You should feel your belly relax slightly and your tailbone tilt backward. This isn’t about creating an extreme arch—think of it as finding one end of your natural pelvic range. Hold this position for two seconds while breathing naturally.
Return to neutral spine, where your pelvis is in its natural, unstressed position. There should be a slight, natural curve in your lower back—not pressed flat, not extremely arched. This is the position your spine should maintain during most daily activities, and learning to find it consciously is half the battle of postpartum recovery.
Now for the posterior tilt—the position that builds strength. Exhale slowly and engage your abdominal muscles to press your lower back into the floor. Imagine you’re trying to flatten a piece of paper between your lower back and the ground. Your tailbone will naturally lift slightly (about an inch), and you should feel your lower abs engage deeply. This is where the transformation happens. Hold this posterior tilt for three to five seconds while maintaining steady breathing—don’t hold your breath.
The breathing coordination is non-negotiable for results. Exhale as you tilt your pelvis posteriorly and engage your core. Inhale as you release back to neutral or anterior tilt. This breathing pattern creates powerful intra-abdominal pressure that supports your pelvic floor rather than straining it. The exhale activates your transverse abdominis automatically—it’s a biomechanical connection you can harness for faster recovery.
Common Mistakes That Sabotage Your Results
Holding your breath is the number one mistake I see postpartum moms make, and it’s the most dangerous. When you hold your breath during exertion, you create something called the Valsalva maneuver—a spike in intra-abdominal pressure that pushes down on your pelvic floor. This is exactly what you’re trying to avoid during postpartum recovery. If you find yourself holding your breath, slow down dramatically. Quality matters infinitely more than speed or rep count.
Overarching the back during the anterior tilt phase strains your lower back instead of building awareness. Remember, the anterior tilt is just a reference point to help you find your range of motion—it’s not where you build strength. Some postpartum programs skip the anterior tilt entirely and focus only on the posterior tilt. That’s perfectly fine, especially if you have significant lower back pain or instability.
Rushing through reps destroys the mind-muscle connection you’re trying to build. Your nervous system needs time to relearn these movement patterns. Each pelvic tilt should take at least five to seven seconds: two seconds to move into position, three to five seconds to hold, and a controlled release. If you’re banging out 20 reps in 30 seconds, you’re wasting your time. Slow, deliberate movement with full attention creates neural pathways that translate to better function during daily activities.
Neglecting pelvic floor coordination is like trying to rebuild a house while ignoring the foundation. As you exhale and tilt posteriorly, add a gentle pelvic floor engagement—think of it as a subtle lift and squeeze, similar to stopping urination midstream but much gentler. You’re not doing a full Kegel; you’re creating coordination between your core and pelvic floor. This integration is what prevents issues like stress incontinence and pelvic organ prolapse down the road.
How Many Reps and Sets Actually Work
Start with eight to ten slow, controlled pelvic tilts, performed two to three times daily. This low volume allows your nervous system to learn the pattern without fatiguing muscles that are still in early recovery. Each session should take about three to five minutes. I recommend pairing these sessions with specific daily activities—after your morning feeding, during your baby’s first nap, and before bed. This consistency builds the habit without requiring you to carve out separate workout time.
Progressive overload for postpartum recovery looks different than traditional strength training. Instead of adding weight, you’re adding neural complexity and endurance. After one week of consistent practice, add two to three reps to each session. By week three, you might be doing 12 to 15 reps per session. By week six, aim for 15 to 20 reps with perfect form. This gradual progression respects your body’s healing timeline while steadily building capacity.
Quality indicators tell you if you’re doing this right: You should feel a deep, pulling sensation in your lower abs—not a burning in your hip flexors or neck tension. Your lower back should feel supported, not strained. Your pelvic floor should feel engaged and lifted, not pushed down or strained. If you’re feeling it primarily in your glutes or hamstrings, you’re compensating—slow down and focus on initiating the movement from your deep core.
Proven Pelvic Tilt Variations to Sculpt Deeper Strength
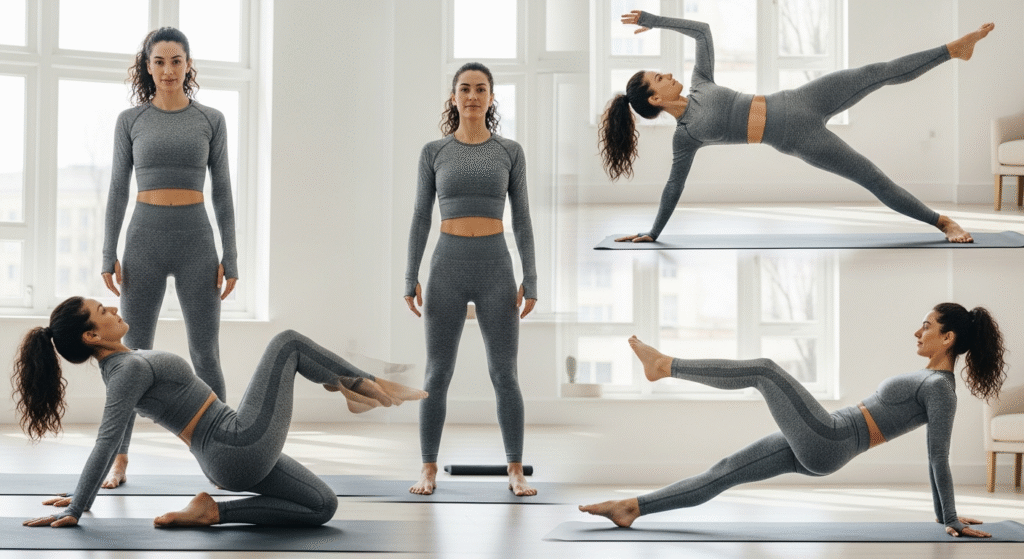
Standing Pelvic Tilts for Busy Moms
Standing pelvic tilts are perfect for multitasking while holding your baby, waiting for a bottle to warm, or during those endless diaper changes. They’re also ideal for moms who find lying on the floor difficult due to C-section recovery, pelvic pain, or simply because getting up and down from the floor twenty times a day isn’t realistic with a newborn.
Stand with your back against a wall, feet hip-width apart and about six inches away from the wall. Your head, upper back, and glutes should touch the wall. Place one hand on your lower belly and one on your lower back to feel the movement. Perform the same anterior-to-posterior tilt pattern: arch your back away from the wall, then engage your abs to flatten your lower back against the wall. The wall provides immediate feedback—you can feel exactly when you’ve achieved the posterior tilt.
The bonus benefit of standing pelvic tilts is improved posture awareness throughout your day. After a few weeks of practice, you’ll start noticing when you’re standing in anterior pelvic tilt (swayback posture) and can correct it automatically. This combats the “mom hunch” that develops from constantly feeding, holding, and looking down at your baby. I found that doing standing tilts while warming bottles became an automatic habit, and within a month, my chronic upper back pain had significantly decreased.
Hands-and-Knees (Quadruped) Pelvic Tilts
This variation is powerful because it removes downward pressure from your pelvic floor while building core stability in a functional position. If you’re experiencing pelvic heaviness, prolapse symptoms, or significant diastasis recti, quadruped tilts often feel more comfortable and effective than supine variations.
Start on your hands and knees with your wrists directly under your shoulders and knees under your hips. Your spine should be in neutral—not sagging toward the floor or rounded upward. This is where the yoga-inspired cat-cow movement enhances the basic pelvic tilt. Inhale and allow your belly to gently drop toward the floor while lifting your chest and tailbone—this is cow position, or anterior pelvic tilt. Your spine creates a gentle curve, and you should feel a stretch through your abdominals.
Exhale and round your spine toward the ceiling, tucking your tailbone under and drawing your belly button toward your spine—this is cat position, or posterior pelvic tilt. Your head drops naturally, and you should feel your deep core muscles engage powerfully. This is the strength-building position. Hold for three to five seconds while maintaining your breath, then flow back to neutral.
The quadruped position is perfect for moms with pelvic floor heaviness or prolapse symptoms because gravity works with you instead of against you. The pelvic organs move toward your diaphragm, reducing pressure on the pelvic floor while you build the strength needed to support them properly. Perform 10 to 12 slow, controlled cat-cow pelvic tilts once or twice daily, especially if supine exercises feel uncomfortable.
Seated Pelvic Tilts for On-the-Go Recovery
Seated pelvic tilts are ideal for feeding sessions, sitting at your desk if you’re back at work, or even during car rides. They build awareness of pelvic positioning that translates to better posture throughout your day—and let’s be honest, you spend a lot of time sitting with a new baby.
Sit on the edge of a firm chair with your feet flat on the floor, hip-width apart. Sit tall with your shoulders over your hips. Place your hands on your thighs or rest them at your sides. Rock your pelvis forward, creating an arch in your lower back (anterior tilt). Then rock backward, rounding your lower back and tucking your tailbone under (posterior tilt). The movement is subtle—you’re not dramatically rocking your whole torso, just your pelvis.
The hidden advantage of seated tilts is that they improve your feeding posture. Most moms develop significant neck and upper back pain from hunching over during endless feeding sessions. By practicing pelvic tilts while seated, you become more aware of your pelvic position, which directly influences your spinal alignment. Sit in a slight posterior tilt during feedings—it naturally brings your shoulders back and reduces upper body strain.
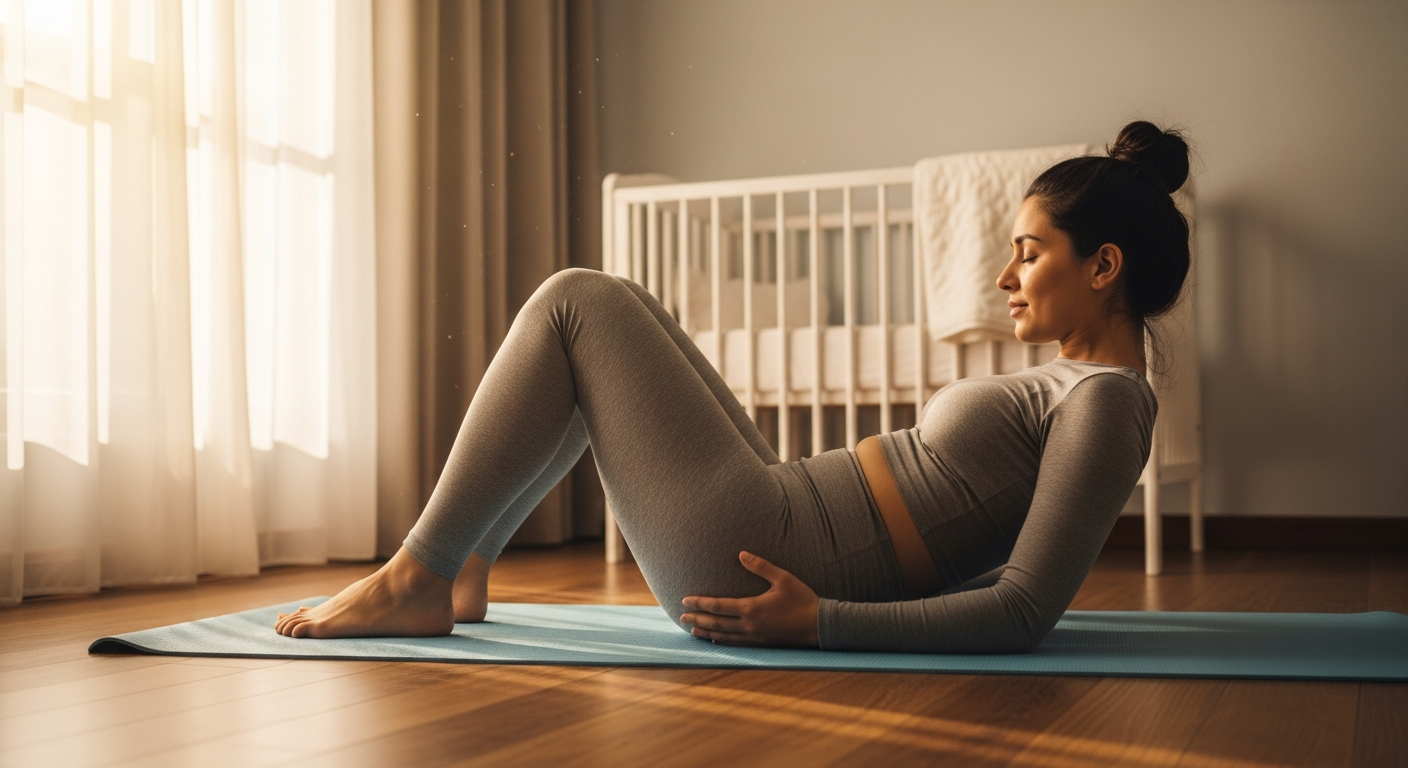
Bridge Pose with Pelvic Tilt Integration
Progress to bridge pose after four to six weeks of basic pelvic tilts and only after receiving clearance from your healthcare provider. This variation adds glute activation and increased core challenge while maintaining the protective posterior pelvic tilt.
Lie on your back with knees bent and feet flat, hip-width apart. Start with a posterior pelvic tilt—press your lower back into the floor and engage your abs. While maintaining this posterior tilt, slowly lift your hips off the ground. Press through your heels and squeeze your glutes to lift until your body forms a straight line from shoulders to knees.