Anterior Pelvic Tilt Fixing Exercises
You’ve noticed it in the mirror—that exaggerated curve in your lower back, the way your belly seems to stick out no matter how many crunches you do, the persistent ache at the base of your spine after sitting at your desk.
I remember the first time a physical therapist pointed out my anterior pelvic tilt. I’d been blaming my “stubborn belly fat” and “weak core” for years, doing endless planks and sit-ups that never seemed to help. Turns out, I was fighting the wrong battle entirely.
Here’s the truth: anterior pelvic tilt isn’t a fitness problem—it’s a structural imbalance. And unlike what most fitness influencers will tell you, you can’t crunch your way out of it.
But here’s the powerful news: with the right combination of stretching and strengthening exercises done consistently for just 15-20 minutes daily, most people see visible improvements within 4-6 weeks. No gym membership required. No fancy equipment. Just proven movements that address the root cause.
This guide will transform how you approach posture correction, giving you a realistic, science-backed roadmap to fix anterior pelvic tilt from home—even if previous workout plans have failed you.
What Is Anterior Pelvic Tilt? (And Why You Should Care)

Understanding the Pelvic Tilt Problem
Imagine your pelvis as a bowl filled with water. In a neutral position, the bowl sits level—the water doesn’t spill forward or backwards.
With anterior pelvic tilt (APT), the bowl tips forward, spilling water out the front. Anatomically, this means your pelvis rotates anteriorly (forward), creating an exaggerated arch in your lower back.
Visual cues you have APT: – Your lower back has a pronounced curve (lordosis) – Your belly protrudes forward, even if you’re relatively lean – Your butt appears more prominent or “sticks out” – When standing relaxed, your belt line tilts down in front
Here’s what catches most people off guard: anterior pelvic tilt affects everyone from sedentary desk workers to dedicated athletes. I’ve seen marathon runners with severe APT and stay-at-home parents who developed it during pregnancy. It’s not about how fit you are—it’s about muscle imbalances that develop from how you move (or don’t move) throughout your day.
Research consistently shows that prolonged sitting—which most of us do for 8-12 hours daily—is the primary culprit. Your hip flexors adapt to that shortened position, your glutes essentially “turn off,” and your pelvis gradually shifts forward. It’s not laziness. It’s a biomechanical adaptation to your environment.
The Real Impact on Your Body
Let’s talk about what APT actually does to your body, because understanding this will keep you motivated when the exercises feel tedious.
Lower back pain is the number one complaint. When your pelvis tilts forward, your lumbar spine hyperextends to compensate. Those small vertebrae and surrounding muscles aren’t designed to maintain that position all day. The result? Chronic compression, muscle tension, and that deep ache that ibuprofen barely touches. A 2019 study in the Journal of Physical Therapy Science found that individuals with APT showed significantly higher incidence of chronic lower back pain compared to those with neutral pelvic alignment.
Hip flexor tightness and reduced mobility create a vicious cycle. Your iliopsoas muscle (the major hip flexor) shortens from constant sitting. When you stand, it pulls your pelvis forward. When you try to extend your hip—like when running or climbing stairs—that tight muscle restricts your range of motion. You compensate with your lower back, which worsens the tilt.
Weakened glutes and core muscles are both cause and effect. Your glutes should counterbalance hip flexor tension, pulling your pelvis into neutral. But when you sit all day, they’re not engaged. They literally forget how to fire properly—a phenomenon called gluteal amnesia. Your core, meanwhile, can’t stabilize a pelvis that’s already tilted, so those muscles weaken from ineffective positioning.
Here’s the part that frustrates people most: APT makes your midsection appear larger regardless of body fat percentage. That forward pelvic tilt pushes your belly forward and down. I’ve worked with clients who lost 20 pounds but still felt their stomach “stuck out”—because they never addressed the underlying postural issue.
Long-term, untreated APT can lead to hip impingement, knee problems, and accelerated spinal degeneration. When your pelvis isn’t neutral, every joint down the kinetic chain compensates. Your knees track improperly during squats. Your hips develop uneven wear patterns. It’s not dramatic or immediate, but over years, these compensations accumulate into chronic issues.
The Good News About Fixing It
After all that doom and gloom, here’s why I’m genuinely optimistic about your ability to correct this: anterior pelvic tilt is highly responsive to targeted exercise.
Unlike structural spine issues or joint damage, APT is fundamentally a soft tissue problem. Tight muscles can be stretched. Weak muscles can be strengthened. Motor patterns can be retrained. I’ve seen clients in their 50s reverse tilt patterns they’d had for decades.
Realistic timeline: Most people notice reduced lower back pain within 2-3 weeks of consistent daily exercise. Visible postural changes—a flatter lower back, reduced belly protrusion—typically appear around weeks 4-6. Full correction, where neutral pelvis becomes your default position, usually takes 8-12 weeks.
The effective dose is surprisingly manageable: 15-20 minutes daily beats hour-long sessions twice weekly. Motor pattern retraining requires frequency, not duration. Your nervous system needs daily reminders to maintain new positioning.
And you need exactly zero equipment for the most effective APT correction exercises. Your body weight, a wall, and floor space are sufficient. This isn’t about expensive gym memberships or intimidating machines—it’s about consistent, intelligent movement.
What Causes Anterior Pelvic Tilt? (Spoiler: It’s Probably Your Lifestyle)

The Sitting Epidemic
Let’s be blunt: modern life is structurally designed to give you anterior pelvic tilt. The average American sits 6.5 hours per day—and that’s just waking hours. Add sleep position (often curled), and your hip flexors spend 14-16 hours in a shortened position daily.
When you sit, your hip flexors aren’t just relaxed—they’re actively shortened. Hold any muscle in a shortened position long enough, and it adapts. The muscle fibers literally remodel, reducing the number of sarcomeres (contractile units) in series. This process, called adaptive shortening, means your hip flexors physically can’t lengthen to their full range anymore.
Common sitting scenarios that accelerate APT: – Desk work with poor ergonomics (monitor too low, chair too high) – Long commutes—60+ minutes daily in a car seat – Couch time with hips flexed and lower back unsupported – Working on a laptop while sitting in bed
Here’s what I tell clients who protest they “can’t sit less” because of their job: I’m not asking you to quit your career. I’m asking you to counteract the effects with targeted daily movement. Fifteen minutes of corrective exercise can offset hours of sitting—if you’re strategic about which exercises you choose.
Muscle Imbalances That Sabotage Your Posture
APT isn’t caused by one muscle—it’s a tug-of-war between multiple muscle groups, and the wrong side is winning.
The tight muscles pulling your pelvis forward: – Hip flexors (iliopsoas, rectus femoris): These are the primary culprits, shortened from sitting and pulling the front of your pelvis downward – Lower back muscles (erector spinae, quadratus lumborum): These tighten to support the exaggerated arch, creating a feedback loop – Quadriceps (specifically rectus femoris): This crosses both hip and knee, pulling on the pelvis when tight
The weak muscles failing to counterbalance: – Glutes (maximus, medius): Should extend your hip and pull the pelvis into posterior tilt, but they’re inhibited from disuse – Core (transverse abdominis, obliques): Should stabilize the pelvis, but can’t when it’s already tilted – Hamstrings: Play a supporting role in posterior pelvic tilt, often weak relative to quads
Pregnancy deserves special mention. The weight of a growing belly pulls the pelvis forward, and the hormone relaxin loosens ligaments, reducing structural support. Many women develop APT during pregnancy and never correct it postpartum because they don’t know these specific exercises.
I’ve also seen APT develop from unbalanced workout programs—tons of quad work (leg extensions, front squats) without adequate glute and hamstring development. You can literally exercise your way into worse posture if you’re not thoughtful about muscle balance.
Common Mistakes That Make It Worse
Let’s address what doesn’t work, because you’ve probably already tried some of these:
Endless crunches and sit-ups. These flex your spine, which can actually worsen APT if you’re not simultaneously addressing the hip flexor tightness. You’re strengthening muscles in a disadvantaged position. I wasted months on this approach before learning better.
Stretching without strengthening (or vice versa). You need both. Stretch tight hip flexors all you want—if your glutes can’t pull your pelvis back into neutral, the tightness returns within hours. Strengthen your core without stretching hip flexors, and you’re building on a faulty foundation.
High heels. I know this isn’t what anyone wants to hear, but wearing heels regularly pitches your weight forward, forcing your pelvis to tilt anteriorly for balance. Occasional wear isn’t catastrophic, but daily heel-wearing makes correction significantly harder.
Poor squat and deadlift form. If you’re doing these movements with an already-tilted pelvis, you’re reinforcing the exact pattern you’re trying to fix. I see this constantly—people loading weight onto dysfunctional movement patterns.
Ignoring the problem until pain becomes severe. Mild APT is easier to correct than severe APT with years of compensatory patterns. The earlier you address this, the faster you’ll see results.
The 4-Step Strategy to Correct Anterior Pelvic Tilt

Step 1: Stretch What’s Tight
Your hip flexors are almost certainly the primary restriction. These muscles—particularly the iliopsoas—originate on your lumbar spine and insert on your femur. When tight, they literally pull your pelvis forward and your lower back into extension.
Why hip flexor stretching is non-negotiable: Research from the Journal of Strength and Conditioning Research shows that static stretching held for 30-60 seconds can produce measurable increases in muscle length. But here’s the critical part—you need to do this daily. Muscle length adaptations reverse quickly without consistent stretching.
Your lower back muscles also need gentle lengthening. They’ve been working overtime to support that exaggerated arch. Cat-cow movements and gentle flexion stretches help restore normal length-tension relationships.
Don’t forget your quadriceps, specifically the rectus femoris. This muscle crosses both hip and knee joints, and when tight, it contributes to anterior pelvic pull.
Reality check: Stretching alone won’t fix APT. I tried that for three months and saw minimal improvement. Without strengthening the opposing muscles, your tight hip flexors will just pull your pelvis back into tilt as soon as you stand up. But stretching is essential—it creates the space for your pelvis to move into neutral.
Step 2: Strengthen What’s Weak
Your glutes are the MVPs of APT correction. Specifically, you need to rebuild the strength and motor control of your gluteus maximus—the muscle that extends your hip and posteriorly tilts your pelvis.
Why glute strengthening is the game-changer: When your glutes contract forcefully, they pull the back of your pelvis downward, rotating it into a more neutral position. They’re the anatomical counterbalance to tight hip flexors. A 2018 study in Physical Therapy in Sport found that targeted glute strengthening significantly reduced anterior pelvic tilt angle in just six weeks.
Your core needs functional strengthening—not just six-pack work. The transverse abdominis and obliques stabilize your pelvis. Think of them as guy-wires on a tent pole, keeping everything in proper alignment. Dead bugs, planks with posterior pelvic tilt, and bird dogs train these muscles to stabilize effectively.
Hamstrings play a supporting role. They assist in posterior pelvic tilt and hip extension. While not the primary focus, including hamstring work ensures balanced development.
The key is this: you’re not just building strength—you’re teaching your nervous system new movement patterns. Your body has learned to move with an anteriorly tilted pelvis. You’re retraining it to maintain neutral positioning.
Step 3: Retrain Your Posture
This is the step most people skip, and it’s why their APT returns even after seeing initial improvement.
Awareness is genuinely half the battle. Throughout your day, you need to periodically check: Is my pelvis neutral? Am I arching my lower back? Set hourly phone reminders if needed. Stand, place your hands on your hip bones, and consciously tilt your pelvis backward until your lower back flattens slightly. Hold for 10 seconds. This builds the mind-muscle connection.
Proper sitting alignment matters. Sit with your butt all the way back in the chair, feet flat on the floor, and a small lumbar support (even a rolled towel) maintaining your natural curve—not an exaggerated arch. Your hip flexors should be at approximately 90 degrees, not acute.
Standing posture: Imagine a string pulling from the crown of your head upward. Engage your glutes slightly (about 20% contraction), gently pull your lower ribs down, and maintain a neutral spine. This should feel active but not strained.
I practice posterior pelvic tilts against a wall every morning while my coffee brews. It’s become such an ingrained habit that my body naturally seeks that position now.
Step 4: Stay Consistent (This Is Key)
Here’s the truth that no fitness influencer wants to tell you: 15 minutes daily beats two-hour weekend warrior sessions every single time for postural correction.
Motor pattern retraining requires frequency. Your nervous system needs consistent input to establish new default patterns. Doing corrective exercises once or twice weekly gives you temporary relief, but your body reverts to its habitual position the other five days.
Realistic expectations for results: – Weeks 1-2: Increased awareness, mild reduction in lower back pain – Weeks 3-4: Noticeable improvement in posture when consciously correcting – Weeks 5-8: Visible changes in standing posture, reduced belly protrusion – Weeks 9-12: Neutral pelvis becomes more automatic, significant pain reduction
Progress isn’t linear. You’ll have days where your lower back feels tight again, where you catch yourself standing with an arched back. That’s normal. What matters is the overall trend over weeks, not day-to-day fluctuations.
Building the habit matters more than perfection. Do your exercises right after waking up, or immediately after work, or before bed—whatever time you can actually stick to. Missing a day isn’t failure. Missing a week means you need to reassess your approach.
10 Proven Exercises to Fix Anterior Pelvic Tilt at Home

Stretching Exercises (Do These First)
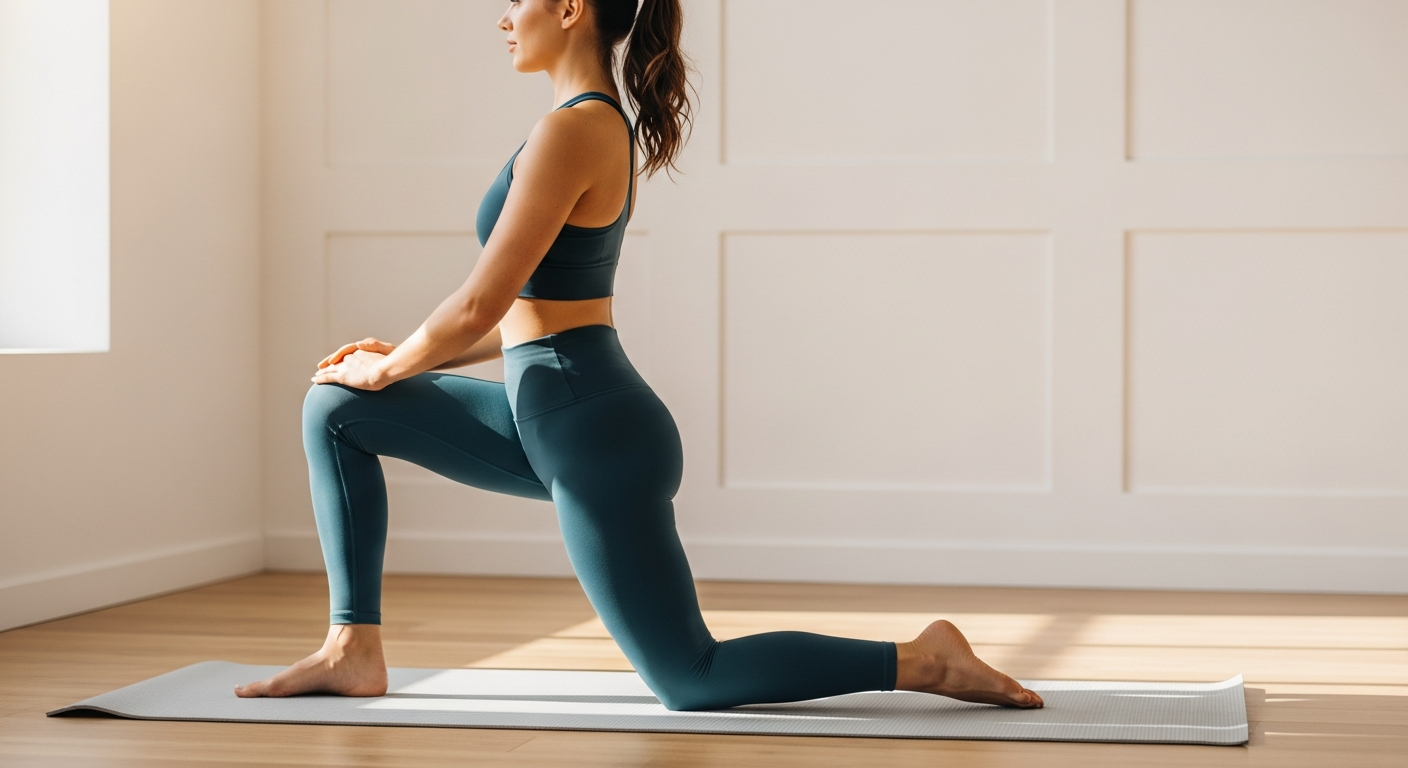
Exercise 1: Kneeling Hip Flexor Stretch
This is the single most effective stretch for APT correction. I do this every morning without exception.
How to perform: 1. Kneel on your right knee with your left foot forward, forming a 90-degree angle 2. Place a pillow or towel under your right knee for comfort 3. Tuck your pelvis under (posterior pelvic tilt) by squeezing your right glute 4. Keeping that posterior tilt, shift your hips forward until you feel a stretch in the front of your right hip 5. Raise your right arm overhead and lean slightly to the left to deepen the stretch 6. Hold for 60 seconds, breathing deeply 7. Switch sides
You’re doing it right if: You feel the stretch deep in the front of your hip, not in your lower back or knee. If you feel it in your back, you’re arching—tuck your pelvis more.
Common mistake: Leaning back or arching your lower back. This defeats the entire purpose. The posterior pelvic tilt position is crucial—it’s what actually lengthens the hip flexor.
Dosage: 60 seconds per side, 2-3 sets. Do this daily, ideally twice daily if you sit more than 6 hours.
Why this works: The iliopsoas attaches to your lumbar spine and femur. By positioning your hip in extension (back leg) while maintaining posterior pelvic tilt, you create maximum lengthening of this chronically shortened muscle.
Exercise 2: Lying Quad Stretch
Your rectus femoris (quad muscle that crosses the hip) needs attention too.
How to perform: 1. Lie on your right side with your right arm extended overhead or supporting your head 2. Bend your left knee, bringing your left heel toward your butt 3. Grasp your left ankle with your left hand 4. Gently pull your heel closer to your butt while simultaneously extending your hip backward 5. Keep your knees together—don’t let the top knee drift forward 6. Hold for 45-60 seconds 7. Switch sides
Beginner modification: If you can’t reach your ankle, loop a towel or yoga strap around your ankle and hold the ends.
You’re doing it right if: You feel the stretch along the front of your thigh and possibly into your hip. Your lower back should remain neutral—don’t arch.
Dosage: 45-60 seconds per side, 2 sets.
Why this complements hip flexor work: The rectus femoris crosses both hip and knee joints. Tight quads contribute to anterior pelvic pull, especially if you do a lot of running or cycling.
Exercise 3: Cat-Cow Stretch
This mobilizes your entire spine and teaches pelvic control.
How to perform: 1. Start on hands and knees, wrists under shoulders, knees under hips 2. Cow position: Inhale, drop your belly toward the floor, lift your chest and tailbone—this is anterior pelvic tilt 3. Cat position: Exhale, round your spine toward the ceiling, tuck your tailbone under, drop your head—this is posterior pelvic tilt 4. Move slowly between positions, taking 3-4 seconds for each transition 5. Focus on initiating the movement from your pelvis, not just your upper back
Dosage: 10-15 slow, controlled repetitions, emphasizing the cat (posterior tilt) position.
Why this matters: You’re training voluntary control of pelvic position. Many people with APT have lost the ability to consciously posteriorly tilt their pelvis. This exercise rebuilds that motor control.
Breathing pattern: Inhale during cow (anterior tilt), exhale during cat (posterior tilt). This coordinates diaphragm movement with pelvic positioning.
Strengthening Exercises (Build Your Foundation)
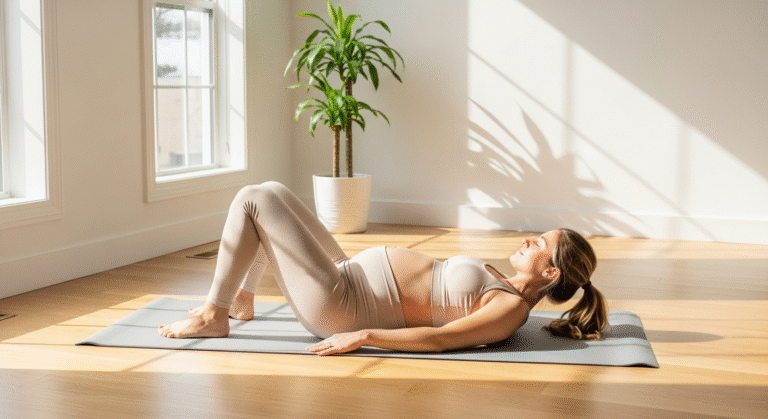
Exercise 4: Glute Bridges
This is the king of APT correction exercises. I cannot overstate how important glute bridges are.
How to perform: 1. Lie on your back, knees bent, feet flat on the floor hip-width apart 2. Position your feet close enough that you can barely touch your heels with your fingertips 3.