Chair Fitness For Older Adults
You don’t need to get on the floor or step into a gym to build real, functional strength that keeps you independent and steady on your feet.
Your doctor mentioned low-impact exercise, but most “senior workouts” still require balance or mobility you don’t have right now. You’re recovering from surgery, managing arthritis, or dealing with balance concerns that make traditional exercise intimidating.
You’ve tried workout videos before, but they moved too fast or assumed you could do movements that just aren’t realistic for your body.
The gym environment feels overwhelming, and you need something you can do today with what you already have at home.
Here’s what changes: You’ll discover proven chair exercises that build genuine strength in your legs, core, and upper body—no floor work required.
You’ll learn the exact form cues and safety guidelines that make each movement effective and joint-friendly. You’ll get a practical 10-minute routine you can start immediately with just a sturdy kitchen chair. And you’ll understand how to progress at your own pace, adding challenge when you’re ready without risking injury.
Why Chair Exercises For Seniors Build Real Results
The Science Behind Seated Strength Training
Chair-based resistance training activates the same muscle groups as standing exercises while protecting your joints and reducing fall risk.
Research from the National Institute on Aging shows seated exercise programs improve balance scores by 20-30% over 8 weeks. This isn’t a compromise—it’s a smarter approach to building strength when your body needs protection.
The key principle: “low-impact” doesn’t mean “less effective.” You’re working smarter, not easier. When you sit, you eliminate the balance demand that often derails beginners, allowing you to focus entirely on muscle engagement and form.
Your joints experience less compression than standing exercises demand, yet your muscles work against gravity and resistance just as hard.
The quadriceps fire equally whether you’re standing or seated during a leg extension. The difference is safety and sustainability.
Who Benefits Most From Chair-Based Workouts
Post-surgical recovery periods benefit enormously from chair exercises when standing isn’t cleared yet. Arthritis management improves because seated positions reduce joint compression while maintaining muscle engagement—you’re protecting the joint while strengthening the muscles that stabilize it.
Balance or vertigo concerns that make unsupported standing movements risky become manageable. Anyone rebuilding foundational strength before progressing to standing routines finds chair exercises the logical starting point.
But here’s what gets overlooked: even if you have no mobility limitations, seated exercises for seniors remain valuable. They’re efficient. They’re low-risk.
They build the exact functional capacity—hip flexor strength, quad power, core stability—that research proves prevents falls and maintains independence.
If you’ve tried standing workouts and felt unstable or afraid, chair exercises for seniors offer the same results with zero intimidation.
What You’ll Gain Beyond Muscle Tone
Functional strength for daily tasks emerges first: getting out of chairs, climbing stairs, carrying groceries. You’ll notice these changes before you see muscle definition.
Improved circulation in your legs reduces swelling from extended sitting. Better posture and reduced back pain follow from targeted core stabilization—your spine stops rounding forward when you sit because your core muscles now support it.
Increased confidence in your body’s capabilities compounds over weeks. You stop hesitating before standing up. You stop gripping railings as tightly. You move through your home with a steadiness that feels earned and real.
The psychological shift matters as much as the physical one. Consistency builds momentum. Small wins accumulate. Three weeks in, you’ll do 12 reps where you started with 6. That’s not coincidence—that’s adaptation. That’s proof your body still responds to challenge. That matters.
Getting Started Safely With Seated Exercises For Seniors

Choosing the Right Chair for Exercise
Your chair must be sturdy—no rolling desk chairs, recliners, or anything unstable. Test it: push down on the seat firmly. It shouldn’t flex or rock.
Armless chairs work best (or chairs where arms don’t interfere with leg movement). The seat should be firm, not soft or sinking. Flat cushions are fine; deep, memory-foam-style seats make it harder to sit forward where you need to be.
Ideal height: when you sit with feet flat on the floor, your knees should bend at roughly 90 degrees. If your chair is too deep and your back doesn’t touch the backrest, use a firm cushion to bring you forward.
If your feet don’t reach the floor, use a small stool or phone book under your feet so your legs aren’t dangling—this changes the entire exercise mechanics and you’ll feel the difference immediately.
Proper Seated Posture Fundamentals
Sit toward the front half of the seat with feet hip-width apart, flat on the floor. Your spine should feel neutral—imagine a string pulling the crown of your head toward the ceiling.
This isn’t “standing tall while sitting.” It’s a gentle, sustainable lengthening that protects your lower back and engages your core automatically.
Shoulders relax down and back, chest open. Your hands rest on your thighs unless the exercise directs otherwise. Your chin stays level—not jutting forward, not tucking down.
This head position prevents neck strain and keeps your spine aligned. Breathe naturally. Your abdomen should be soft, not braced.
Most people over-brace their core, which creates tension and limits the range where muscles actually work. Let your belly be present. Tighten it when you’re doing the actual movement, not as a permanent posture.
Essential Safety Guidelines Before You Begin
Warm up with 2-3 minutes of seated marching or arm circles to increase blood flow. This isn’t optional. Cold muscles don’t respond well and feel stiffer. Three minutes of easy movement changes everything about how your body feels during the actual exercises.
Breathe continuously throughout every movement. Exhale during the effort phase (when you’re pushing or pulling), inhale as you return.
Never hold your breath. Breath-holding raises your blood pressure and makes you dizzy. If you catch yourself holding your breath, pause, breathe normally for a few seconds, then continue.
Start with 5-8 repetitions and build gradually over weeks. This isn’t wimpy—it’s smart. Your nervous system needs time to learn the movement pattern.
Your connective tissue needs time to adapt. Rushing this phase causes soreness that discourages continuation. Build from 5-8 reps to 10-12 reps over your first two weeks, then add a second set if you want.
Stop immediately if you feel sharp pain, dizziness, or shortness of breath beyond normal exertion. Muscle fatigue feels like a burn or heaviness—that’s fine.
Sharp pain means stop. Dizziness means stop and sit quietly. Consult your doctor before beginning if you have specific health conditions, recent surgeries, or concerns about which movements are appropriate for you.
Easy Chair Exercises For Upper Body Strength

Seated Shoulder Rolls and Arm Circles
Starting position: Sit tall with arms relaxed at your sides, feet flat on the floor.
Movement: Roll your shoulders backward in slow, controlled circles. Move them up toward your ears, then back and down. Complete 8-10 full rotations, then reverse direction for 8-10 more. This single movement wakes up your entire shoulder complex and improves posture by engaging the muscles between your shoulder blades.
Progression: Add arm circles once shoulders feel loose. Extend both arms out to your sides at shoulder height. Make small circles forward for 10 rotations, then reverse for 10 backward circles. Gradually increase the size of your circles over weeks. This engages your deltoids and improves shoulder mobility in all directions.
Common mistake: Rushing the movement. Slow, deliberate circles build better control and create more muscle engagement than quick, jerky ones. You’ll feel a deeper burn with slower tempo. Hold each rep for a full second at the top of the movement.
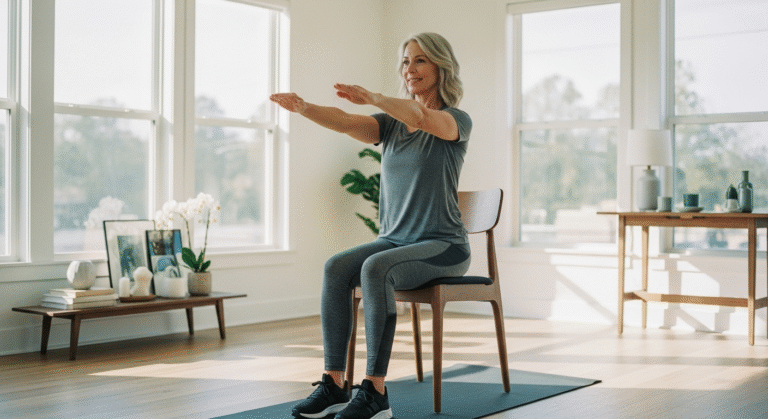
Seated Chest Press (With or Without Weights)
Starting position: Hold light weights (water bottles work perfectly) at chest level, elbows bent at 90 degrees. Weights should be at the height of your mid-chest, not your neck.
Movement: Press both arms forward until nearly straight (don’t lock your elbows). Squeeze your chest muscles at full extension, hold for 1 second, then return slowly to chest level. The return phase should take 2-3 seconds—this eccentric (lengthening) phase builds strength faster than the push.
Breathing cue: Exhale as you press forward, inhale as you return. This timing helps you generate force and keeps pressure steady.
You’ll feel this: In your chest and front shoulders, NOT in your neck or lower back. If your neck tenses up, you’re pressing too hard or using weights that are too heavy. Drop back to bodyweight (no weights) and focus on form. Reps: 8-12 per set, 2-3 sets, 60 seconds rest between sets.
Seated Rows for Back Strength
Starting position: Extend both arms forward at shoulder height, thumbs pointing up. Imagine you’re holding invisible handles in front of you.
Movement: Pull your elbows straight back, squeezing your shoulder blades together. Your hands move toward your ribcage, not your hips. Hold the squeeze for 2 seconds at the back of the movement—this is where the strength builds. Return with control, extending arms forward again.
Reps: 10-12 repetitions, focusing on the squeeze at the back of the movement. Quality beats quantity here. One slow, controlled row with a 2-second squeeze beats three fast, jerky ones.
Why it matters: Rows counteract the forward-slouch posture that develops from sitting and desk work. They strengthen the muscles that support your spine and keep your shoulders back and open. After 3-4 weeks of consistent rows, you’ll notice your upper back feels less fatigued by the end of the day. Progression: Add light resistance with a band looped around your hands or hold light weights.
Powerful Chair Exercises For Seniors Lower Body

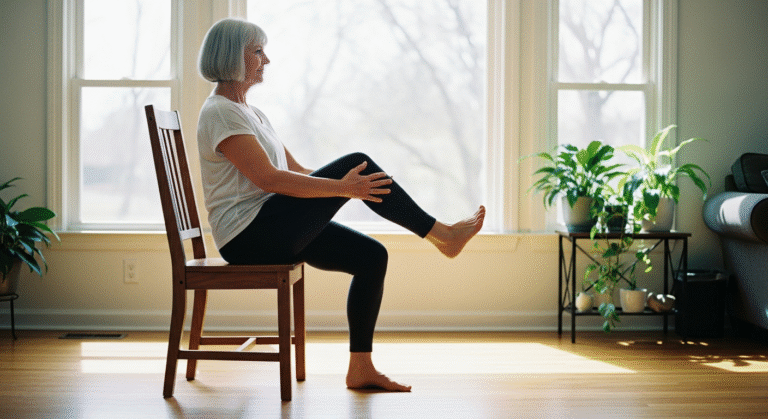
Seated Leg Extensions for Quad Strength
Starting position: Sit tall with your hands gripping the edge of the seat for stability. Feet flat on the floor, hip-width apart.
Movement: Straighten your right leg until it’s parallel to the floor. Flex your foot (toes pointing toward your shin) to engage your shin muscles too. Hold this position for 3-5 seconds, then lower with control. Alternate legs. The hold at the top is crucial—it’s where the quadriceps work hardest.
Target: Front thigh (quadriceps)—essential for stair climbing and standing from seated positions. Strong quads mean you push yourself up with your legs instead of straining your back and knees. This single movement improves daily function more than most people realize.
Progression tip: Add ankle weights once you can complete 12 reps per leg easily. Start with 1-2 pounds and increase slowly. You can buy ankle weights, or use a backpack with books inside, or tie a resistance band around your ankle.
Common fix: If your back rounds or your lower back arches, you’re lifting too high. Don’t lift as high—maintain spine position over your full range of motion. A rounded back means your core isn’t supporting you properly. Reduce the height and focus on keeping your spine neutral throughout.
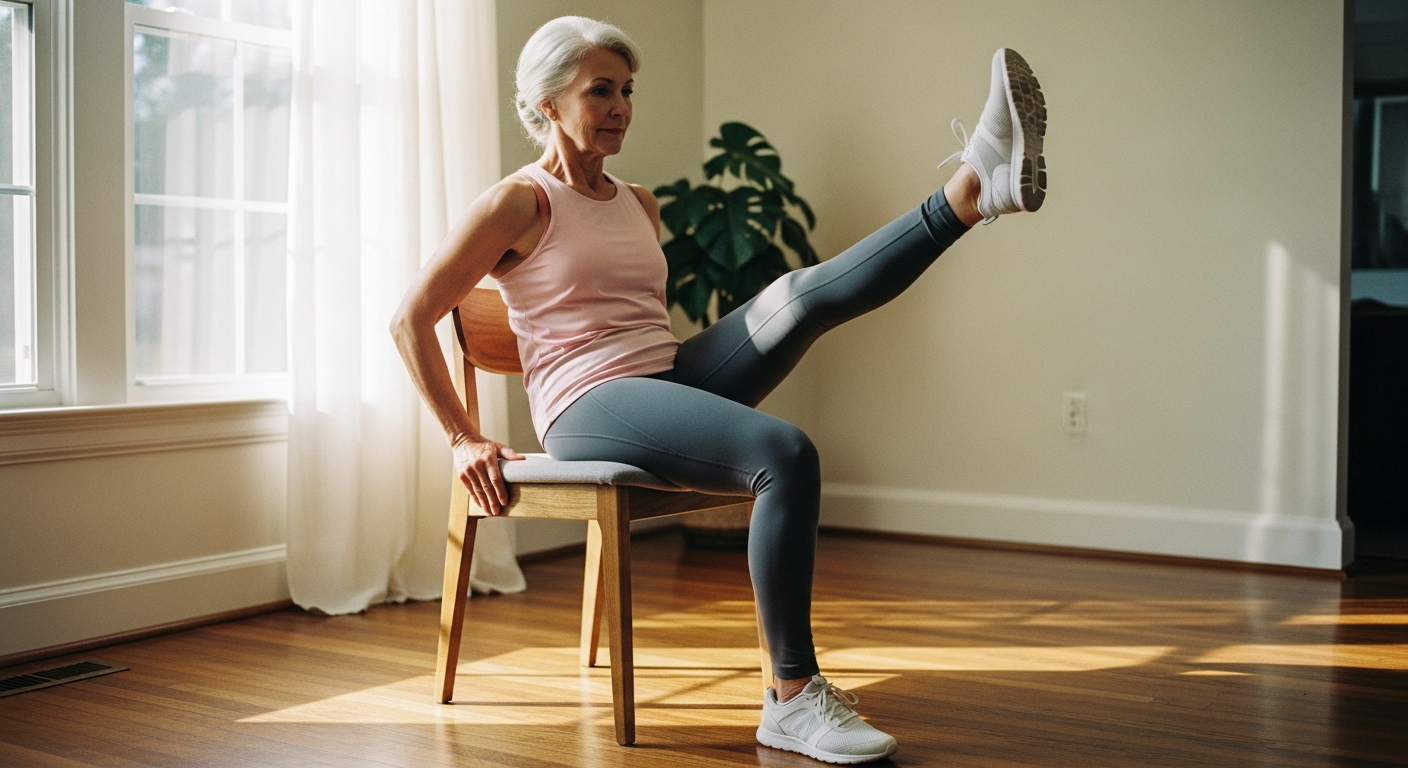
Seated Marches for Hip Flexor Activation
Starting position: Sit tall, feet flat, hands on your thighs or gripping the chair arms for balance if needed.
Movement: Lift your right knee 3-4 inches off the seat, lower it, then lift your left knee. Continue alternating in a marching rhythm. Think of it as marching in place while sitting. Keep the movement controlled—don’t bounce or jerk.
Duration: 30-60 seconds initially, building to 2 minutes as your endurance improves. This is cardiovascular work mixed with strength, so your heart rate will climb.
You’ll feel this: Deep in the front of your hip and lower abdomen, NOT in your lower back. If your lower back feels strained, you’re lifting your knees too high. Keep them low and controlled. Hip flexors control leg lift during walking—strengthening them improves gait stability and prevents tripping.
Seated Ankle Circles and Toe Raises
Ankle circles: Extend your right leg slightly forward. Rotate your ankle clockwise 10 times, then counterclockwise 10 times. Switch legs. These small movements improve circulation and reduce ankle stiffness—especially valuable if you spend a lot of time sitting.
Toe raises: Both feet flat on the floor. Lift your toes toward the ceiling while your heels stay grounded. Lower your toes back down. Repeat 15-20 times. This strengthens the small stabilizer muscles in your shins and ankles that prevent ankle rolling and improve proprioception (your body’s sense of where it is in space).
Why these matter: Most people skip ankle work, but ankle strength and mobility are foundational for balance and fall prevention. Your ankles are your first line of defense when you start to slip or lose balance. Strengthening them pays dividends.
When to do them: Perfect warm-up exercises or standalone movements during TV commercial breaks. No equipment needed, no sweat, no excuses.
Core-Strengthening Seated Exercises For Older Adults

Seated Torso Twists for Obliques and Spine Mobility
Starting position: Sit tall, hands behind your head or crossed at your chest. Hips stay square and facing forward throughout the movement.
Movement: Rotate your upper body to the right, hold for 2 seconds, return to center. Rotate left, hold, return. Movement comes from your waist up—your hips don’t move. This is crucial. If your hips rotate with your torso, you’re not engaging your obliques (the side abdominal muscles).
Reps: 8-10 per side, controlled pace. No bouncing at the end of the rotation. The hold at the end of each twist is where the strength builds.
Benefit: Strengthens the obliques that support side-to-side balance and makes turning to look behind you easier. This translates directly to safer driving and safer movement in crowds. Your spine also gets mobility work—rotation becomes less stiff over time.
Seated Pelvic Tilts for Lower Core
Starting position: Sit tall, hands on your thighs, feet flat on the floor.
Movement: Tilt your pelvis forward (arch your lower back slightly), then tilt back (round your lower back). Movement comes only from your hips—your upper body stays still. This is subtle, which is why people skip it. Don’t. The subtlety is the point.
Breathing: Exhale as you tilt back, inhale as you arch forward. This rhythm helps you engage your core at the right moment.
Reps: 10-12 slow, focused repetitions. You’ll feel this deep in your lower abdomen and lower back—this is subtle but powerful for spinal stability. This movement trains the deepest core muscles that support your spine, not the surface abs you see in mirrors.
Seated Knee Lifts with Hold
Starting position: Sit tall, hands gripping the seat edge for stability.
Movement: Lift both knees 2-3 inches off the seat simultaneously. Hold this position for 5-10 seconds. Lower with control. Rest for 5 seconds, then repeat for 5-8 total holds.
Progression: Start with single-leg holds if double-leg is too challenging. Lift one knee, hold 5 seconds, lower, rest, switch legs. This builds the strength you need for the double-leg version.
Target: Deep core stabilizers and hip flexors working together. The hold is where the work happens—you’re teaching your core to maintain tension under load.
Common mistake: Holding your breath. Keep breathing steadily throughout the hold. If you can’t breathe, you’re working too hard. Reduce the hold time or switch to single-leg holds.
Free Chair Exercises For Seniors: Your Complete 10-Minute Routine

This routine combines upper body, lower body, and core work into one efficient session. Do it 2-3 times per week with at least one rest day between sessions. Your muscles build during rest, not during the workout itself.
The Proven Beginner Sequence
Warm-up (2 minutes): Seated marching for 60 seconds, then shoulder rolls and arm circles for 60 seconds.
Main set (8 minutes):
- Seated leg extensions: 10 reps per leg, rest 30 seconds
- Seated chest press: 10 reps, rest 30 seconds
- Seated marches: 45 seconds, rest 30 seconds
- Seated rows: 10 reps, rest 30 seconds
- Seated torso twists: 8 reps per side, rest 30 seconds
- Seated knee lifts with hold: 5 holds of 5 seconds each, rest 30 seconds
- Ankle circles and toe raises: 10 circles per ankle, 15 toe raises, rest 30 seconds
- Repeat the main set one more time if energy allows
This sequence hits every major muscle group. The order alternates upper and lower body to let muscles recover while you work different areas. Total time: 10 minutes for one full round, 18-20 minutes for two rounds.
How to Track Your Progress
Week 1-2: Focus on form, completing the routine without pain. Write down how many reps you actually complete. Don’t aim for the numbers I listed—do what you can with perfect form.
Week 3-4: Increase reps by 2-3 or add a second set of each exercise. If you did 8 reps of leg extensions last week, do 10-11 this week. Small increments compound.
Week 5-6: Add light resistance (1-2 lb weights, resistance band, or water bottles). You’re not starting over—you’re adding load to the same movements you’ve been doing.
Week 7-8: Increase hold times (hold leg extensions for 5 seconds instead of 3) or slow down the tempo (take 3 seconds to lower instead of 2). These changes increase difficulty without adding weight.
When to Add Resistance and Challenge
You’re ready to progress when: You can complete all exercises with good form for 12+ reps. The last 2-3 reps feel challenging but not impossible. You’re no longer sore the day after workouts. You finish the routine and feel like you could do more.
Add resistance gradually: water bottles (1-2 lbs) → light dumbbells (2-3 lbs) → medium dumbbells (3-5 lbs) over months, not weeks. Rushing this phase causes injury and discourages continuation. The goal is sustainable progress, not impressive weight.
Alternative progressions if you don’t want to use weights: Increase reps from 10 to 15 to 20. Decrease rest periods from 30 seconds to 20 seconds. Add a third set to any exercise. Slow down the tempo (take 4 seconds to lower instead of 2). All of these create challenge without equipment.
CONCLUSION

Chair exercises deliver real, measurable strength gains and fall prevention benefits—they’re not “beginner” workouts, they’re smart, joint-protective training that actually works.
Research from the National Institute on Aging consistently shows that seated exercise programs improve balance and functional capacity in older adults.
You can transform your functional strength, balance, and independence with just 10 minutes, 2-3 times per week, using a sturdy chair you already own.
Proper form and gradual progression matter more than speed or intensity. Listen to your body and build on small wins. The exercises in this guide target the exact muscle groups—hip flexors, quads, core stabilizers—that research proves reduce fall risk and maintain mobility.
Every rep builds strength. Every session builds confidence. Consistency over weeks creates the lasting results you’re looking for.
Your next step: Choose your chair and test your seated posture today. Don’t wait for perfect conditions or the right time.
Start with the 10-minute routine twice this week, focusing on 2-3 exercises you can do confidently. Track your reps in a simple notebook so you can see your progress over the next month.
Consult your doctor before beginning if you have specific health conditions, recent surgeries, or concerns about which movements are appropriate for you. The chair you’re sitting in right now is enough. The time is now. Begin.