Hip Mobility Exercises For Women Over 40
Remember when getting up from the floor was effortless? When you could sit cross-legged without your hips screaming in protest? If you’re over 40 and nodding your head right now, you’re not alone—and more importantly, you’re not stuck with stiff, achy hips forever.
I’ll be honest with you: when I hit 42, I couldn’t even put on my socks without sitting down. The clicking sound my hips made as I got out of the car was embarrassing.
My lower back hurt constantly, and I blamed everything from my mattress to my desk chair. Then a physical therapist asked me to sit cross-legged on the floor. I couldn’t do it. That’s when I realized my hip mobility had vanished while I was busy living my life.
Here’s what nobody tells you: your hips don’t suddenly “go bad” at 40. They’ve been slowly losing mobility for years, and the hormonal changes that come with perimenopause and menopause just accelerate what was already happening.
But research consistently shows that targeted mobility work can reverse these changes—and it doesn’t require hours at the gym or fancy equipment.
What you’ll discover in this guide: – Why hip mobility becomes crucial after 40 (and the hormonal connection most articles ignore) – The exact exercises that target women’s specific needs, with beginner modifications – A simple 15-minute routine you can do at home in your pajamas – How to progress safely without triggering pain or injury – Real solutions for common hip problems like bursitis, tight hip flexors, and weak glutes
The best part? You’ll start feeling results within a week. Not transformation-level changes—that takes 4-6 weeks—but you’ll notice less stiffness when you wake up and more ease getting in and out of your car. That’s the realistic timeline, and it’s worth every minute.
Why Hip Mobility Matters More After 40
The Hormonal Connection: What’s Really Happening to Your Hips
Let’s talk about what’s actually happening in your body, because understanding this changes everything. As estrogen levels decline during perimenopause and menopause, your joints lose natural lubrication. Synovial fluid—the slippery substance that keeps your hip joint moving smoothly—decreases in both quantity and quality. This isn’t in your head; it’s measurable physiology.
But here’s what most articles miss: estrogen also regulates collagen production. Collagen makes up your tendons, ligaments, and the joint capsule surrounding your hip. Less estrogen means less collagen, which means these structures become less elastic and more prone to stiffness. A 2019 study in the Journal of Women’s Health found that women experience a 30% reduction in connective tissue elasticity within the first five years of menopause.
The inflammation connection matters too. Declining estrogen increases systemic inflammation, which shows up first in your joints—especially weight-bearing ones like your hips. You might notice more morning stiffness or that your hips feel “rusty” after sitting for a while. This isn’t weakness; it’s your body responding to hormonal changes.
Here’s the empowering part: mobility work directly counteracts all of this. When you move your hip through its full range of motion, you stimulate synovial fluid production. When you hold stretches, you signal your body to maintain collagen elasticity. When you activate weak muscles, you reduce compensatory stress on joints. You’re not fighting against your body—you’re working with it.
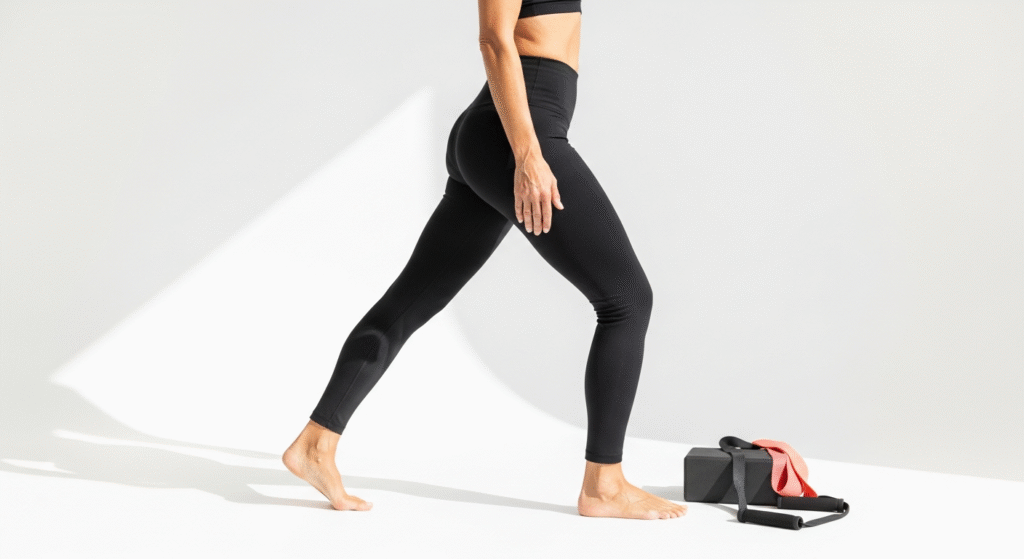
The Sitting Epidemic and Your Hip Flexors
Your hip flexors—the muscles that lift your knee toward your chest—spend most of the day in a shortened position if you sit for work, drive, or watch TV. When a muscle stays shortened for hours daily, it adapts by literally becoming shorter. The technical term is “adaptive shortening,” and it’s reversible, but only with consistent stretching and strengthening.
Here’s the domino effect nobody explains clearly: tight hip flexors pull your pelvis forward (anterior pelvic tilt), which forces your lower back into excessive arch (hyperlordosis), which compresses your lumbar discs and strains your back muscles. Meanwhile, your glutes—which oppose your hip flexors—become inhibited and weak from disuse. Weak glutes mean your body recruits other muscles for tasks they weren’t designed for, leading to knee pain, IT band issues, and even ankle problems.
Women over 40 are particularly vulnerable because we’re often juggling desk work, driving kids around, and dealing with the hormonal changes I mentioned earlier. It’s a perfect storm for hip dysfunction. But here’s what I learned the hard way: even 10 minutes of targeted hip mobility work daily creates noticeable improvements within two weeks. Your nervous system starts remembering that your hips can move, and movement becomes easier.
Beyond Pain Relief: The Hidden Benefits of Mobile Hips
Yes, reducing pain matters. But the research on hip mobility and aging reveals benefits that go far beyond comfort. A 2020 study published in the Journal of Aging and Physical Activity found that hip mobility directly correlates with balance and fall prevention in women over 40. Better hip mobility means better weight shifting, which means you’re less likely to lose your balance when you step on an uneven surface or reach for something.
Your athletic performance improves too—whether that means running faster, lifting heavier, or just keeping up with your kids or grandkids. When your hips move freely, you generate more power from your lower body. Squats feel easier. Deadlifts don’t strain your back. Even walking becomes more efficient because your stride can lengthen naturally.
The posture and confidence connection is real but hard to quantify. When your hips are mobile and your glutes are strong, you naturally stand taller. You don’t have to think about “pulling your shoulders back”—your body finds better alignment automatically. I’ve watched clients transform not just their movement but how they carry themselves in the world.
Finally, improved circulation throughout your lower body reduces inflammation and speeds recovery from workouts. Mobile hips mean better blood flow, which means nutrients reach your tissues more efficiently and waste products get cleared faster. This matters more as we age because our circulation naturally becomes less efficient.
Understanding Your Hip Anatomy (A Simple Guide)
The Hip Joint: Your Body’s Mobility Powerhouse
Your hip is a ball-and-socket joint—the ball is the top of your femur (thigh bone), and the socket is part of your pelvis. This design allows for incredible range of motion in multiple directions: forward and back (flexion and extension), side to side (abduction and adduction), and rotation (internal and external). When everything works properly, your hip can move through all these planes simultaneously, which is what makes complex movements like running or dancing possible.
Four key muscle groups control this movement. Your hip flexors (primarily iliopsoas and rectus femoris) lift your leg forward. Your glutes (maximus, medius, and minimus) extend your leg backward and stabilize your pelvis. Your adductors (inner thigh muscles) pull your leg toward midline and help with stability. Your external rotators (including piriformis) turn your leg outward and are crucial for activities like squatting.
Here’s what matters: these muscles should work as a coordinated team. When one group becomes tight or weak, the others compensate, creating imbalances that eventually cause pain or injury. The most common pattern I see in women over 40 is tight hip flexors, weak glutes, and limited hip rotation. This combination creates lower back pain, knee stress, and that feeling of being “stuck” when you try to move certain ways.
Common Hip Issues Women Over 40 Face
Hip bursitis—inflammation of the fluid-filled sacs that cushion your hip joint—causes sharp pain on the outer hip, especially when lying on that side or climbing stairs. It’s often triggered by weak hip abductors (glutes) that can’t stabilize your pelvis properly, causing friction and inflammation.
Hip flexor tightness is the hidden culprit behind most lower back pain. When your hip flexors are chronically shortened, they pull your pelvis forward and compress your lumbar spine. You might feel this as a deep ache in your lower back that gets worse when you stand for a long time or try to arch backward.
Weak glutes—what I call “sleeping muscles”—happen when you sit too much. Your glutes literally forget how to activate properly, a phenomenon called gluteal amnesia. This forces other muscles to pick up the slack, leading to compensatory patterns that cause pain throughout your lower body.
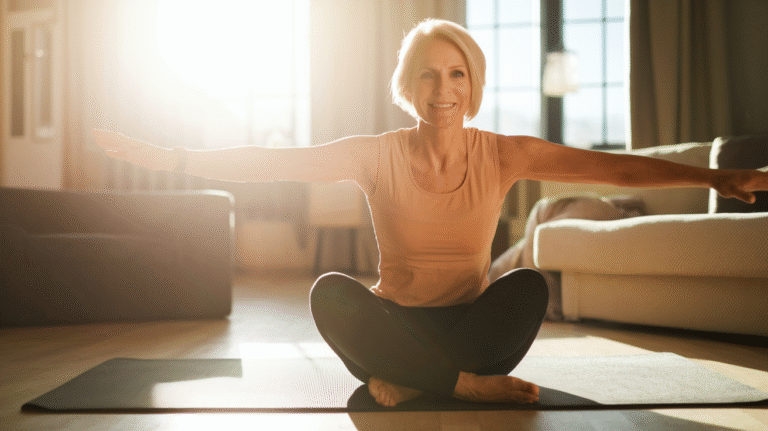
Limited internal and external rotation shows up when you can’t comfortably sit cross-legged, struggle to get into a deep squat, or feel pinching in the front of your hip during certain movements. This restriction often indicates tight joint capsules and weak rotator muscles—both highly responsive to targeted mobility work.
IT band syndrome, while technically a knee issue, almost always originates from hip dysfunction. When your hip abductors are weak, your IT band compensates, becoming tight and inflamed.
Signs Your Hips Need Attention Now
If putting on shoes or socks requires sitting down or balancing awkwardly, your hip flexion and rotation are limited. This is often the first sign people notice, and it’s a clear indicator that mobility work should start immediately.
Pain when walking up stairs or getting out of the car suggests weak glutes and tight hip flexors working against each other. Your body is compensating for lost mobility with force, which creates inflammation and discomfort.
Clicking, popping, or grinding sensations aren’t always problematic—joints make noise—but if accompanied by pain or stiffness, they indicate friction within the joint that shouldn’t be happening. This often means your hip isn’t tracking properly through its range of motion.
Lower back pain that won’t quit despite stretching your back is usually a hip problem in disguise. I spent months focusing on my lower back before realizing my tight hip flexors were the actual issue.
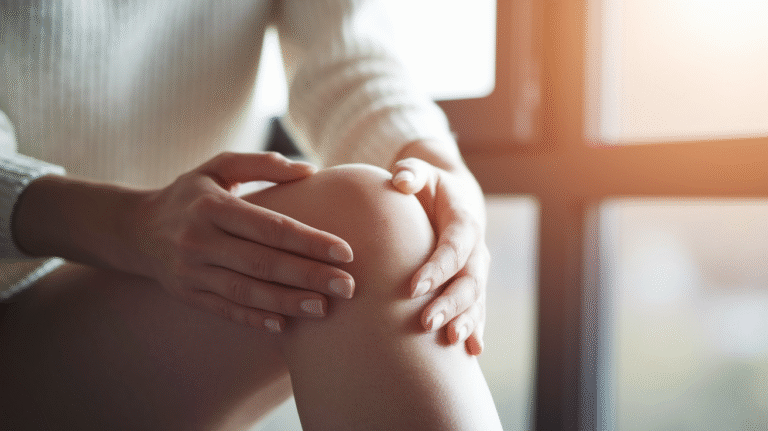
Knee pain without a knee injury often stems from hip weakness or immobility forcing your knee into poor alignment during movement. Your knee is the middle child—it suffers when the hip and ankle aren’t doing their jobs.
Feeling “stuck” when trying to move certain ways—whether that’s reaching down to pick something up or rolling over in bed—indicates restricted joint mobility that responds incredibly well to the exercises I’m about to share.
The 7 Most Effective Hip Mobility Exercises for Women Over 40
Exercise 1: The 90/90 Hip Stretch (The Ultimate Hip Opener)
What it targets: Internal rotation of your front leg and external rotation of your back leg simultaneously, plus the hip joint capsule—the thick connective tissue surrounding your hip that gets stiff first.
Why it’s powerful for women over 40: This position addresses the exact rotational limitations that make sitting cross-legged impossible and create that pinching sensation in your hip. Research on hip mobility consistently identifies rotational deficits as the primary limitation in aging adults.
How to do it: 1. Sit on the floor with both knees bent at 90 degrees—your front shin parallel to your body, your back shin perpendicular to your body 2. Keep both sit bones grounded on the floor (this is crucial) 3. Sit tall through your spine, imagining a string pulling the crown of your head toward the ceiling 4. Gently press your front knee toward the floor using your hand, never forcing the movement 5. Breathe deeply into the stretch, exhaling as you relax deeper 6. Hold the position, then switch sides
What you should feel: A deep stretch in the outer hip of your front leg and the inner groin of your back leg. You might feel tightness, but never sharp pain or pinching.
Modifications: If you can’t sit upright without falling backward, place a yoga block or folded towel under your opposite hip. If your front knee is far from the floor, that’s normal—don’t force it. You can also perform this against a wall for back support.
Common mistakes to avoid: Leaning to one side instead of keeping both sit bones grounded, rounding your back forward (which reduces the stretch’s effectiveness), and forcing your knee down with too much pressure.
Reps/duration: Hold 30-60 seconds each side, repeat for 2-3 rounds. If you’re very tight, start with 20 seconds and build up.
Pro tip: The side that feels dramatically tighter is your dominant limitation. Spend an extra 30 seconds on that side daily. I discovered my left hip had 50% less rotation than my right—addressing this imbalance eliminated my chronic lower back pain within three weeks.
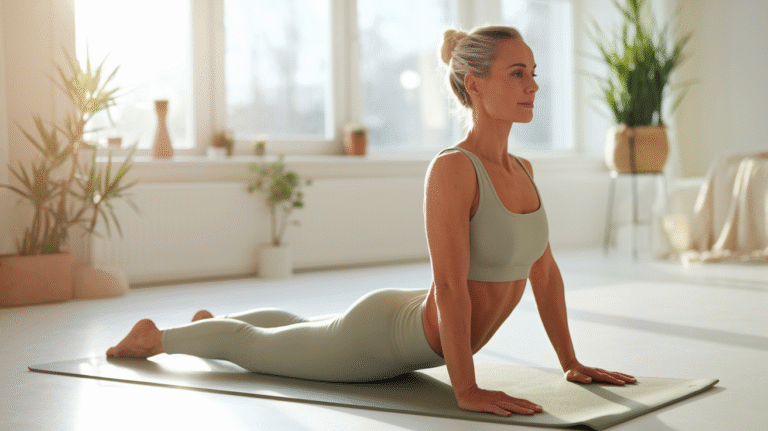
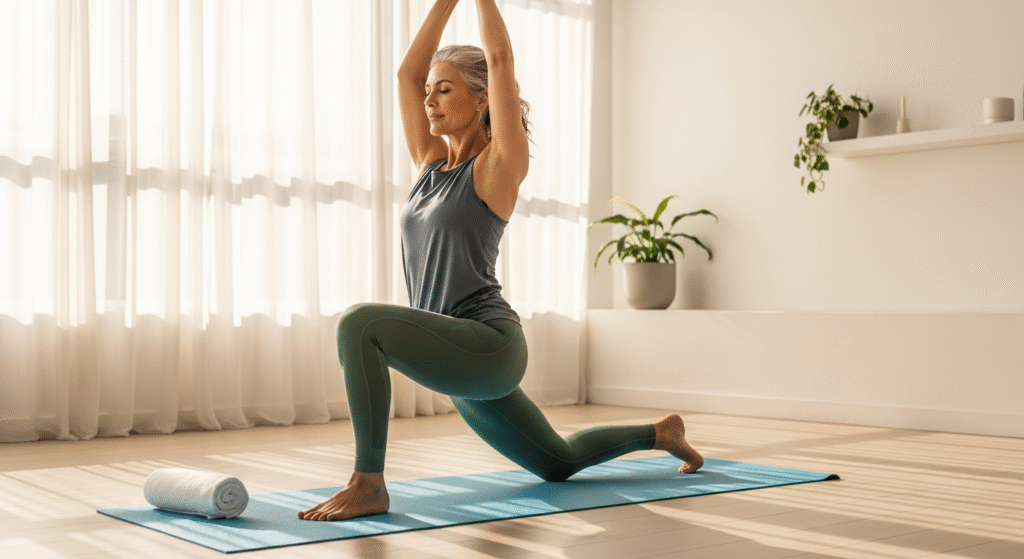
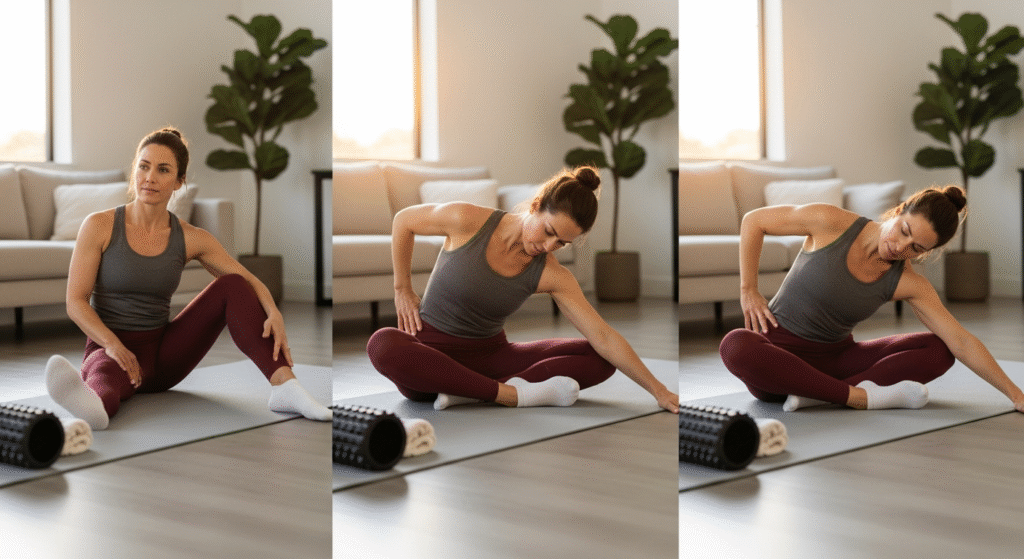
Exercise 2: Kneeling Hip Flexor Stretch with Reach
What it targets: Hip flexors (psoas and rectus femoris), anterior hip capsule, and when you add the reach, your thoracic spine and lat muscles that connect to your hip through fascial chains.
Why it works: Static stretching alone provides temporary relief, but combining stretch with activation creates lasting neuromuscular changes. The reach component engages muscles while they’re lengthened, teaching your nervous system that this new range is safe and usable.
How to do it: 1. Start in a half-kneeling position with your right knee on a cushion or folded mat, left foot forward with knee bent at 90 degrees 2. Tuck your pelvis under slightly (posterior pelvic tilt)—imagine pulling your belt buckle toward your ribs 3. Shift your weight forward until you feel a stretch in the front of your right hip 4. Reach your right arm overhead and slightly to the left, creating a side-bend 5. Take a deep breath, then exhale as you reach farther 6. Pulse gently for 8-10 reaches, then hold the final reach for 20 seconds 7. Switch sides
What you should feel: A strong but comfortable stretch through the front of your hip and up into your side body. You might feel this all the way to your ribcage—that’s the fascial connection at work.
Modifications: Hold onto a chair with your non-reaching arm for balance. If kneeling bothers your knee even with padding, perform this in a low lunge position with your back knee elevated on a couch or bench.
Common mistakes: Arching your lower back instead of tucking your pelvis (this completely negates the hip flexor stretch), letting your front knee drift past your toes (which stresses your knee), and holding your breath instead of breathing deeply.
Reps/duration: 8-10 reaches per side with a 20-second hold on the final reach, 2 sets per side.
Pro tip: Squeeze your glute on the kneeling-leg side while you stretch. This technique, called reciprocal inhibition, tells your hip flexors to relax more deeply because their opposing muscle (glute) is contracting. It sounds like bro-science, but the neuromuscular research is solid—and it works noticeably better.
Exercise 3: Pigeon Pose (Modified for Real Bodies)
What it targets: External rotators (piriformis, gemelli, obturators), glute medius and minimus, and the posterior hip capsule. This is the single most effective stretch for addressing sciatic nerve irritation caused by tight hip muscles.
Why it’s essential: The piriformis muscle sits directly over your sciatic nerve in most people. When it’s tight—which it almost always is if you sit a lot—it can compress the nerve, causing pain that radiates down your leg. A 2018 study in the Journal of Physical Therapy Science found that pigeon pose significantly reduced piriformis-related pain within four weeks.
How to do it: 1. Start on all fours, then bring your right knee forward between your hands 2. Angle your right shin so your foot is near your left hip (beginners) or more parallel to the front of your mat (advanced) 3. Extend your left leg straight behind you, keeping your hips as square as possible 4. Support your upper body on your forearms or fold forward onto a bolster or stacked pillows 5. Breathe deeply, allowing gravity to do the work 6. Hold, then switch sides
What you should feel: Deep pressure in your right glute and outer hip. If you feel sharp pain in your knee or pinching in the front of your hip, adjust your shin angle or use more support under your hips.
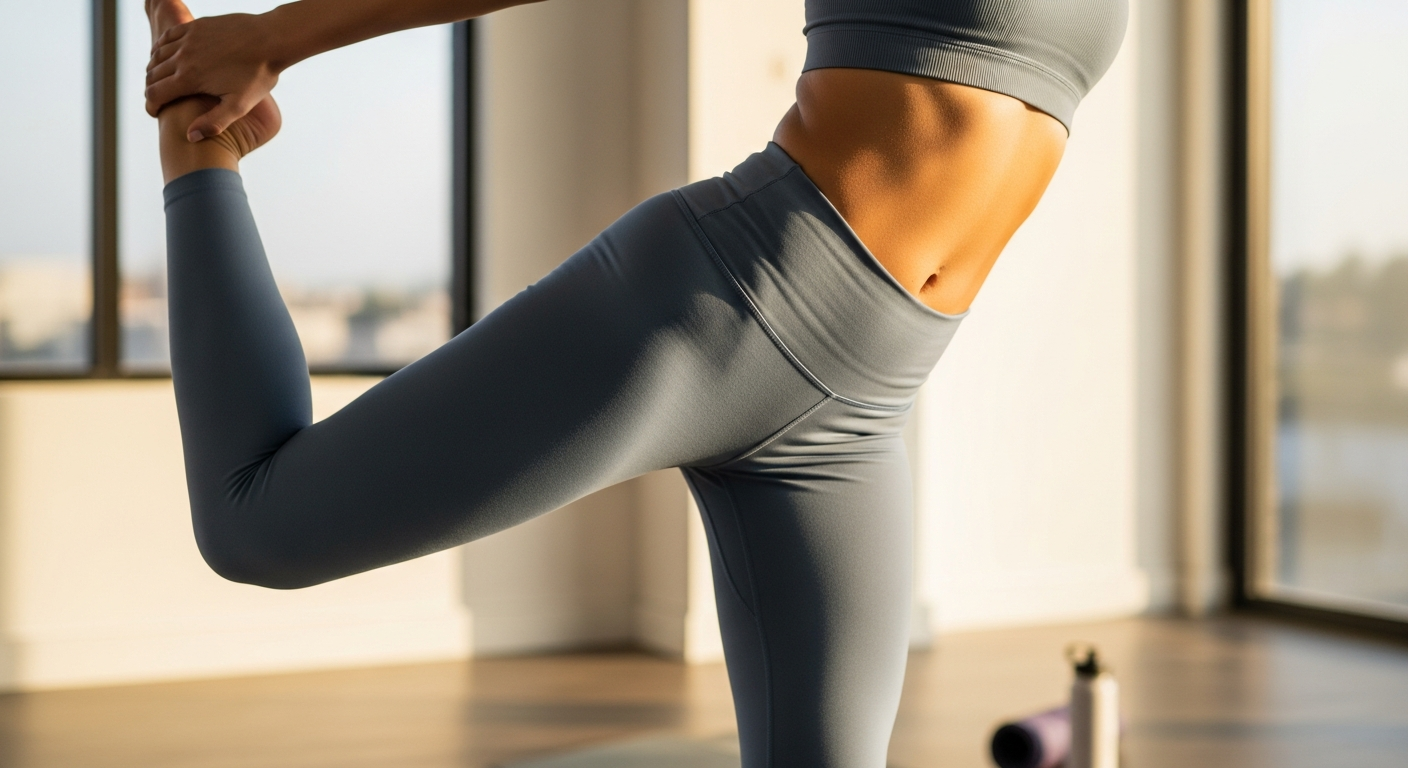
Modifications: If the floor version is too intense, start with figure-4 stretch (lying on your back, right ankle crossed over left knee, pulling left thigh toward chest). You can also place a yoga block or folded blanket under your front hip to reduce the stretch intensity.
Progression pathway: Start with your shin at a 45-degree angle. As you gain mobility over weeks, gradually work toward shin parallel to the front of your mat. Don’t rush this—I spent two months at the beginner angle before progressing.
Reps/duration: Hold 60-90 seconds each side, one time through is enough if you’re also doing other exercises.
Pro tip: Most people hold their breath in pigeon pose because it’s intense. Instead, practice this breathing pattern: inhale for 4 counts, hold for 2, exhale for 6. The extended exhale activates your parasympathetic nervous system, telling your muscles it’s safe to release. This technique doubled my stretch tolerance within a week.
Exercise 4: Hip CARs (Controlled Articular Rotations)
What it targets: Full hip range of motion in all planes, joint capsule health, synovial fluid production, and neuromuscular control throughout your entire hip range.
Why it’s transformative: Unlike passive stretching, CARs actively strengthen your muscles at end-range positions while mapping your full hip mobility. This builds usable, functional range rather than just flexibility you can’t control. Dr. Andreo Spina, who developed the Functional Range Conditioning system, explains that CARs are the single most important daily practice for joint longevity.
How to do it (standing version): 1. Stand on your left leg, using a wall for light balance support if needed 2. Lift your right knee toward your chest with control 3. Open your knee out to the side (external rotation) as far as possible 4. Extend your leg behind you, maintaining hip height 5. Internally rotate to bring your leg back to center, then lower with control 6. Reverse direction: lift, internally rotate, extend back, externally rotate, lower 7. Complete all reps on one side before switching
What makes this different from regular leg circles: Tension. You’re actively contracting muscles throughout the entire movement, not just swinging your leg passively. Every inch of the rotation should feel controlled and deliberate.
Modifications: Perform in quadruped (hands and knees) position for more stability. Reduce your range of motion to where you can maintain control—small, perfect circles beat large, slop