Somatic Exercises for Hips: 14 Moves to Release Stored Trauma

You’ve stretched your hips religiously. You’ve done yoga. You’ve foam rolled until you couldn’t take it anymore. Yet somehow, your hips still feel locked up, tight, and uncomfortable. Sound familiar?
Here’s what most people don’t realize: that persistent hip tension isn’t just about tight muscles. Your hips are actually holding onto something deeper—emotional stress, unprocessed experiences, and yes, even trauma that your body has been storing for months or years.
Think about it. When you’re stressed, where do your shoulders go? Up toward your ears, right? Your body has a similar response to emotional stress, except it often tucks that tension away in your hips. These large, complex joints become a storage facility for everything you haven’t fully processed.
In this complete guide, you’ll discover exactly why your hips hold onto emotional weight, how somatic exercises work differently than regular stretching, and most importantly, 14 powerful movements that can help you release what you’ve been carrying.
Understanding the Mind-Body Connection
Your body doesn’t distinguish between physical and emotional stress—it responds to both the same way. When you experience something overwhelming, your nervous system kicks into survival mode. Sometimes, especially when you can’t fully process or escape a stressful situation, your body literally holds onto that tension in your muscles.
The hips are particularly vulnerable to this storage system. As the largest joint in your body and the center of your physical stability, your hip flexors, glutes, and surrounding muscles tighten protectively when you’re under stress. Over time, this creates chronic tension that traditional stretching simply can’t touch.
Here’s the difference: regular stretching works on muscle length. Somatic exercises work on your nervous system. They teach your brain to release the unconscious holding patterns that keep your muscles locked up. Instead of forcing a stretch, somatic movements use gentle, mindful techniques that help your nervous system feel safe enough to let go.
This approach is more effective because it addresses the root cause—not just the symptom. When you combine slow, intentional movement with focused awareness and breath, you’re essentially having a conversation with your nervous system, permitting it to release what it’s been holding onto for protection.
What Are Somatic Exercises and Why Your Hips Need Them
The Science Behind Somatic Movement
Somatic exercises work through a process called sensory-motor amnesia reversal. Basically, your muscles have “forgotten” how to relax because your nervous system has been sending constant tension signals for so long. These gentle, mindful movements retrain your brain-body connection.
When you perform somatic exercises, you’re activating something called pandiculation—a natural process your body uses to reset muscle length. You’ve seen cats and dogs do this when they wake up and stretch. Humans do it too, but we’ve largely lost touch with this instinctive movement pattern.
The proven benefits are remarkable: significant pain relief, improved emotional regulation, enhanced mobility, better sleep quality, and a deeper sense of body awareness. Research shows that somatic practices can reduce chronic pain by up to 50% when practiced consistently. More importantly, people report feeling emotionally lighter, less anxious, and more capable of processing stress.
Signs You’re Holding Tension in Your Hips
Your body sends clear signals when your hips are storing tension. Physically, you might experience lower back pain that won’t quit, hip flexors that feel perpetually tight, difficulty getting comfortable when sitting, or a restricted range of motion that makes simple movements challenging.
The emotional indicators are equally telling. You might feel “stuck” in certain areas of your life, experience anxiety that seems to live in your body, have difficulty processing or releasing stress, or notice that you hold your breath without realizing it.
Chronic sitting compounds these issues dramatically. When you sit for hours daily, your hip flexors remain shortened while your glutes essentially “turn off.” Add emotional stress to this physical pattern, and you’ve created the perfect environment for deep-seated tension.
The Amazing Benefits of Somatic Hip Work
The immediate relief from hip and lower back pain is often the first benefit people notice. Within just a few sessions, you’ll likely feel more space and ease in movements that previously felt restricted.
Beyond pain relief, somatic hip work enhances your emotional regulation. As you release physical tension, you often process and release emotional stress simultaneously. Many people describe feeling lighter, clearer, and more emotionally balanced after consistent practice.
Your posture improves naturally as your hips find better alignment. Breathing becomes deeper and easier when your hip flexors aren’t pulling your pelvis forward and compressing your diaphragm. You’ll sleep better because your body finally feels safe enough to fully relax. Energy levels increase because you’re no longer expending constant effort to maintain those unconscious holding patterns.
Essential Preparation for Your Somatic Hip Practice
Creating the Perfect Environment
Your practice space matters more than you might think. Find a quiet area where you won’t be interrupted for at least 10-15 minutes. The floor should be comfortable—use a yoga mat, thick blanket, or carpet. Harsh lighting can keep your nervous system on alert, so dim the lights or use natural light if possible.
For equipment, you’ll need minimal gear for maximum results: a yoga mat or soft surface, 1-2 pillows or cushions for support, a yoga block or thick book (optional), and a blanket for warmth and comfort. That’s it. Somatic work doesn’t require fancy equipment because it’s about internal awareness, not external resistance.
Temperature matters too. Make sure you’re warm enough—your muscles won’t release if you’re cold. Have a blanket nearby to cover yourself during resting positions.
Key Principles for Effective Somatic Practice
The power of mindful awareness during movement cannot be overstated. This isn’t about going through the motions. You’re cultivating a conversation between your conscious mind and your nervous system. Pay attention to every sensation, no matter how subtle.
Breathing techniques enhance release significantly. Use slow, deep belly breaths throughout your practice. When you encounter tension, breathe into that area. Imagine your breath creating space and softness. Never hold your breath—this signals danger to your nervous system.
Here’s a counterintuitive truth: smaller, slower movements create bigger changes. You’re not trying to force anything. Move at about 10-20% of your maximum range. This gentle approach keeps your nervous system feeling safe, which is essential for release.
Learn to recognize the difference between “good” sensation and pain. Good sensation feels like gentle stretching, mild discomfort that eases with breath, or emotional release (which might include tears or sighs). Pain feels sharp, shooting, or like something is being damaged. If you feel pain, back off immediately.
When to Practice for Best Results
Morning practice works beautifully for awakening your hips after sleep. Even 5-10 minutes can set a positive tone for your entire day. Your body is naturally stiff in the morning, making it the perfect time to practice gentle mobilization.
Midday sessions provide quick tension relief, especially if you sit for work. A simple 5-minute hip release can prevent tension from accumulating throughout the day.
Evening practice promotes better sleep. Practicing 30-60 minutes before bed signals your nervous system to shift into rest mode. This is when deeper emotional releases often occur because you’re already winding down.
For frequency, even 5-10 minutes daily creates amazing results. Consistency matters more than duration. Three 10-minute sessions weekly will serve you better than one 60-minute session. If you can practice daily, you’ll notice changes within 1-2 weeks.
14 Powerful Somatic Exercises to Release Hip Tension
Foundational Hip Release Movements (Exercises 1-5)
1. Pelvic Tilts with Breath Awareness
Lie on your back with knees bent and feet flat. This is the ultimate starter movement for hip-spine connection. Inhale and gently arch your lower back, tilting your pelvis forward. Exhale and press your lower back toward the floor, tilting your pelvis back. Move slowly—take 3-4 seconds for each direction. Repeat 10-15 times, focusing on the smooth transition between movements. This simple exercise wakes up your entire pelvic region and establishes the mind-body connection.
2. Gentle Hip Circles
From the same position, lift one foot off the ground and draw small circles with your knee. These easy, flowing movements awaken hip mobility in all directions. Start with 5 circles clockwise, then 5 counterclockwise. Gradually make the circles larger only if it feels comfortable. Switch legs. Notice which direction feels easier—this reveals your body’s holding patterns.
3. Supported Figure-4 Stretch
Keep lying on your back. Cross your right ankle over your left knee, creating a figure-4 shape. Thread your hands through and clasp behind your left thigh. Gently draw your left knee toward your chest until you feel a stretch in your right outer hip.
This simple yet effective outer hip release targets your piriformis and deep hip rotators. Hold for 60-90 seconds, breathing deeply. Switch sides. Never force—let gravity and breath do the work.
4. Somatic Cat-Cow Variations
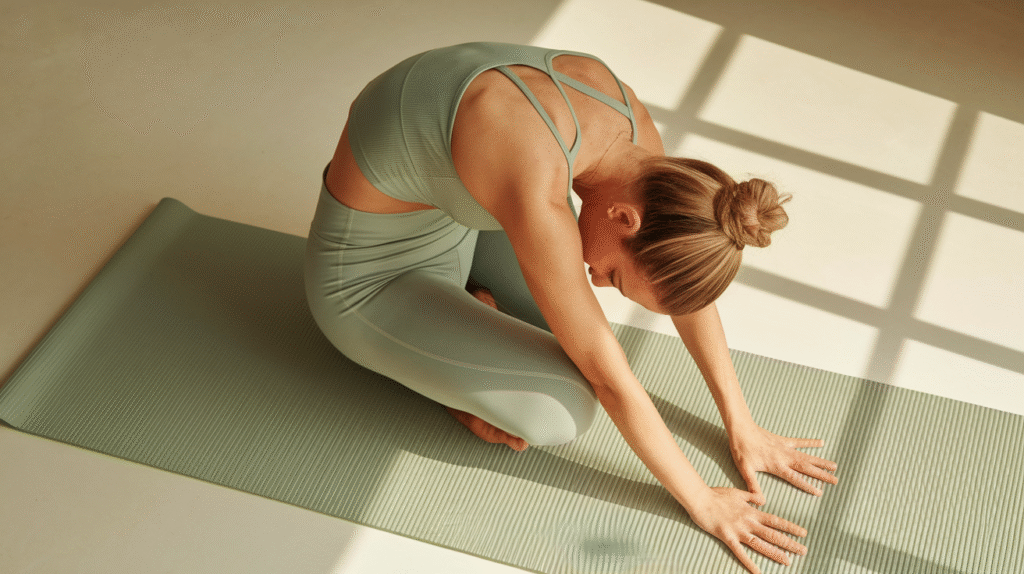
Move to hands and knees. This proven spinal and hip integration technique coordinates your entire core. Inhale as you drop your belly and lift your gaze (cow). Exhale as you round your spine and tuck your tailbone (cat). The key difference from traditional cat-cow: move even slower and pause at each end to notice the sensations. Perform 8-10 rounds, letting each movement flow from your pelvis rather than your shoulders.
5. Constructive Rest Position
Lie on your back with knees bent and feet wider than hip-width. Let your knees fall together and rest against each other. Place your hands on your belly or by your sides. This is the perfect passive release for deep relaxation. Stay here for 3-5 minutes, simply breathing and noticing any shifts in tension. Your hip flexors and lower back will naturally release without any active effort.
Intermediate Hip Opening Exercises (Exercises 6-10)
6. Windshield Wipers
Lie on your back with knees bent and feet mat-width apart. This amazing internal/external hip rotation release works both sides of your hips. Slowly drop both knees to the right, pause, then bring them back to center and drop to the left. Move at a pace where you can feel every degree of rotation. Perform 6-8 rounds on each side. Notice if one side feels tighter—this is valuable information about your holding patterns.
7. Knee-to-Chest Embrace
Bring both knees toward your chest and wrap your arms around your shins. This provides essential lower back and hip flexor relief. Gently rock side to side, massaging your lower back and sacrum. Then make small circles, letting your knees draw circles in the air while you hold them. This mobilizes your hip joints and releases tension in your lower back simultaneously. Continue for 60-90 seconds.
8. Supine Hip Rotations
Lying on your back with one knee bent and one leg extended, rotate the bent knee in and out slowly. This complete hip socket mobilization helps release deep tension in your hip capsule. Focus on the quality of movement rather than range. Perform 8-10 rotations, then switch legs. Pay attention to any clicking, popping, or areas that feel sticky—these are areas where your nervous system is holding tension.
9. Bridge with Somatic Awareness
Lie on your back with knees bent. Slowly peel your spine off the floor, vertebra by vertebra, lifting into a bridge. This exercise strengthens and releases simultaneously. Hold at the top for 3 breaths, then slowly lower down with the same vertebra-by-vertebra control. The key is moving slowly enough to feel each segment of your spine. Repeat 5-6 times. This integrates hip strength with release.
10. Side-Lying Hip Releases
Lie on your right side with both knees bent. Keeping your feet together, lift your left knee away from the right (like a clamshell). This provides targeted outer hip and IT band tension relief. Move slowly and pause at the top. Perform 8-10 repetitions, then stay with the knee lifted and make small circles. Switch sides. This targets the often-tight gluteus medius and tensor fasciae latae.
Advanced Somatic Hip Sequences (Exercises 11-14)
11. Psoas Release with Bolster
Lie on your back with a bolster or firm pillow under your knees. This is the quick path to deep hip flexor freedom. Let your legs completely relax over the support. Place one hand on your belly and one on your chest. Breathe deeply for 3-5 minutes, imagining your psoas muscles (deep hip flexors) softening with each exhale. This passive position allows your psoas to release without stretching.
12. Somatic Pigeon Variations
From hands and knees, bring your right shin forward at whatever angle feels comfortable. This allows emotional release through mindful hip opening. Instead of pushing into a deep stretch, find a moderate sensation and breathe there for 2-3 minutes. Focus on softening rather than deepening. Notice any emotions that arise—this is normal and healthy. Switch sides. Many people experience emotional releases in this position because the hips store so much.
13. Pelvic Floor Integration
Lie on your back in constructive rest position. This exercise provides complete pelvic stability and release. As you inhale, gently relax your pelvic floor. As you exhale, gently engage it (like stopping the flow of urine). Don’t force—use only 20-30% effort. Perform 10-12 rounds. This integrates your pelvic floor with your hip function, creating stability and release simultaneously.
14. Full-Body Hip Integration Flow
Combine movements from exercises 1, 4, 6, and 9 into a flowing sequence. This connects everything you’ve learned. Start with pelvic tilts, flow into cat-cow, add windshield wipers, then finish with bridges. Move slowly and continuously for 5-10 minutes, letting each exercise blend into the next. This integration helps your nervous system understand how your hips connect to your entire body.
Creating Your Personal Somatic Hip Practice
Building Your Easy Daily Routine
Your simple 5-minute morning hip wake-up sequence might include: 1 minute of pelvic tilts, 2 minutes of gentle hip circles (both legs), and 2 minutes in the constructive rest position. This quick routine wakes up your hips without overwhelming your schedule.
For quick midday tension relief you can do anywhere, try seated hip circles. Sit on the edge of your chair and make small circles with your hips, 10 each direction. Follow with seated figure-4 stretches, 60 seconds per side. These exercises release accumulated tension from sitting.
Your perfect evening wind-down routine for better sleep includes: 2 minutes of windshield wipers, 2 minutes of knee-to-chest embrace, 3 minutes of psoas release with bolster, and 3 minutes in constructive rest. This 10-minute sequence signals your nervous system to shift into rest mode.
Weekend deeper practice suggestions (15-30 minutes) allow you to work through the complete 14-exercise sequence. Choose 6-8 exercises and spend 2-4 minutes on each. This deeper work facilitates more significant releases.
Tracking Your Progress and Emotional Releases
Physical sensations you might experience include warmth, tingling, trembling, or spontaneous sighs and yawns. These are signs your nervous system is releasing. Emotional responses can range from tears to laughter to feelings of relief or sadness. All of these are completely normal and healthy.
Journaling your experience maximizes benefits. After each practice, write 2-3 sentences about what you noticed physically and emotionally. Track which exercises feel most effective. Note any changes in your daily hip comfort, sleep quality, or emotional state.
Breakthrough moments often feel subtle at first. You might notice you can sit comfortably for longer periods, your lower back pain has decreased, or you feel more emotionally balanced. Celebrate these small wins—they’re evidence of real change.
When emotions surface during practice, breathe through them. Allow tears or sighs to flow naturally. Place a hand on your heart or belly for comfort. Remember that emotions stored in your body need to move through you to release. This is effective processing, not something to fear.
Troubleshooting Common Challenges
If you “don’t feel anything,” slow down even more. Reduce your range of motion by half. Close your eyes and focus on subtle sensations. Sometimes we’re so disconnected from our bodies that we need to rebuild sensitivity gradually. This is normal and will improve with practice.
Managing overwhelming emotional releases requires self-compassion. If emotions feel too intense, open your eyes, sit up, and take a few grounding breaths. You can always pause and return later. Consider working with a somatic therapist if releases consistently feel unmanageable.
Adapting exercises for different body types and limitations is essential. Use more props for support. Reduce range of motion. Skip any exercise that causes pain. Somatic work should always feel safe and manageable. Modify freely to honor your unique body.
Combining somatic work with other healing modalities creates powerful results. Somatic exercises pair beautifully with therapy, massage, acupuncture, or meditation. Each modality supports the others, creating comprehensive healing.
Conclusion
Your Journey to Hip Freedom Starts Now
The essential benefits of somatic hip exercises extend far beyond physical relief. Yes, you’ll experience less pain, better mobility, and improved posture. But you’ll also discover emotional freedom, enhanced stress management, and a deeper connection to your body’s wisdom.
The proven power of consistency over intensity cannot be overstated. Ten minutes daily creates more lasting change than one intense hour weekly. Your nervous system needs regular, gentle reminders that it’s safe to release. This happens through consistent practice, not forceful effort.
Start small and build gradually. Choose just two or three exercises from this guide. Practice them for one week. Notice what changes. Then add another exercise or two. This gradual approach prevents overwhelm and allows real integration.
Quick Action Steps to Begin Today
First, choose 2-3 exercises from the foundational or intermediate sections that appeal to you. Don’t overthink this—trust your intuition about what your body needs.
Second, set a realistic practice schedule that fits your lifestyle. Maybe it’s 5 minutes every morning before coffee. Perhaps it’s 10 minutes before bed three times weekly. The best schedule is one you’ll actually follow.
Third, remember that even simple, short sessions create amazing results. You don’t need to be perfect. You don’t need to do all 14 exercises. You just need to show up for your body with gentle, consistent attention.
Final Thoughts on Releasing What No Longer Serves You
The transformative potential of this gentle practice extends into every area of your life. As you release physical tension, you create space for emotional healing. As your hips open, you might find yourself more open to new experiences, relationships, and possibilities.
This is an invitation to embrace both physical and emotional healing simultaneously. Your body has been holding onto stress and trauma because it was trying to protect you. Now you’re permitting it to let go, to soften, to release what no longer serves you.
Your hips—and your whole body—will thank you. Start today with just one exercise. Notice what shifts. Trust the process. Your journey to hip freedom begins with this single, gentle choice to listen to what your body has been trying to tell you all along.