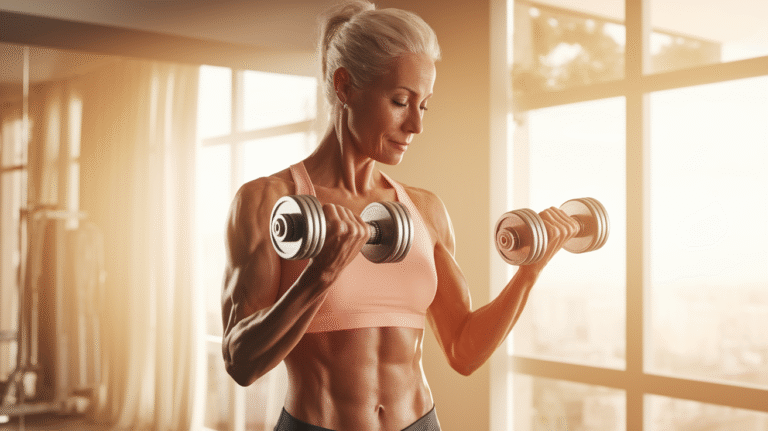
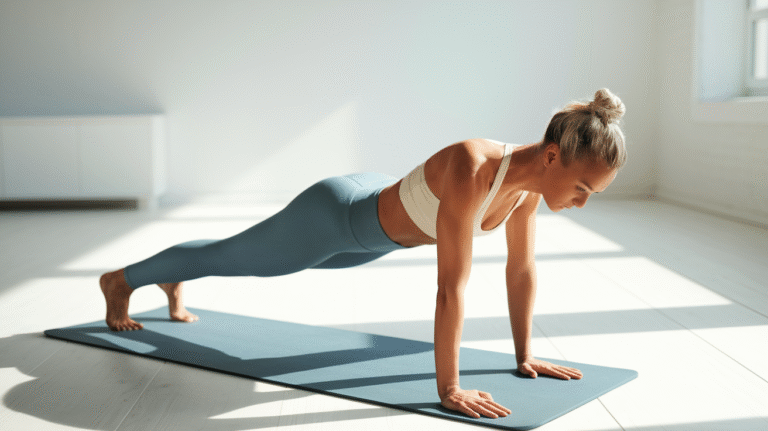
7 Pilates Moves for Women Over 40 With Osteoporosis
If you’ve been diagnosed with osteoporosis or osteopenia, you might feel like your body has betrayed you—and that exercise is now off-limits. I get it. The fear is real. You’re thinking, “What if I do it wrong? What if I fall? What if exercise actually makes things worse?”
Here’s the empowering truth: the right movements can actually help you build stronger bones, even after 40.
You don’t need to wrap yourself in bubble wrap or avoid movement. In fact, that’s the worst thing you can do. Your bones are living tissue that responds to strategic exercise. They’re designed to get stronger when you challenge them correctly.
Many women tell me they’re overwhelmed by conflicting advice. Your doctor says “exercise more,” but doesn’t specify what’s safe. The gym feels intimidating.
YouTube videos show exercises that look risky. Meanwhile, you’re juggling work, family, and a hundred other responsibilities. The last thing you need is complicated workout routines that require expensive equipment or hours of your time.
That’s where Pilates becomes your secret weapon. These low-impact yet incredibly effective exercises can be done at home, on your own schedule, with minimal equipment.
No gym membership required. No intimidating weight rooms. Just you, a mat, and movements specifically modified for osteoporosis.
In this article, you’ll discover 7 proven Pilates exercises designed specifically for women over 40 with osteoporosis. Each exercise is carefully modified to protect your bones while building the strength, balance, and bone density you need.
You’ll learn exactly how to perform each movement safely, which modifications work for your fitness level, and how to progress without risking injury.
The results? Improved bone density, stronger muscles that protect vulnerable bones, enhanced balance that prevents falls, and the confidence to move through your day without fear.
Science backs this up: research shows that targeted Pilates can slow or even reverse bone loss when performed consistently and correctly.
Your body hasn’t betrayed you. It’s simply asking for the right kind of movement. Let’s give it exactly what it needs.
Understanding Osteoporosis and Why Pilates Works

What Happens to Your Bones After 40
Your bones aren’t static structures—they’re constantly breaking down and rebuilding. Before age 30, you build bone faster than you lose it.
After 40, especially post-menopause, that equation flips. The breakdown accelerates while rebuilding slows down. For women, estrogen decline after menopause dramatically speeds up bone loss.
An osteoporosis diagnosis means your bone density has dropped significantly below normal levels. Your bones have become porous and fragile, like a sponge instead of solid rock.
The statistics are sobering: 1 in 2 women over 50 will break a bone due to osteoporosis. Hip fractures, spinal compression fractures, and wrist breaks become real threats.
But here’s the good news that changes everything: bone is living tissue that responds to exercise. When you apply the right kind of stress to your bones, they adapt by becoming stronger and denser.
Your body literally builds new bone in response to strategic movement. You’re not stuck with the bone density you have today.
The Science Behind Pilates for Bone Health
Bone responds to three specific types of exercise: weight-bearing movement, resistance training, and balance work. Here’s why each matters and how Pilates delivers all three.
Weight-bearing exercises force your bones to support your body weight against gravity. This mechanical stress signals your bones to strengthen. Standing, walking, and exercises where you support your own body weight all qualify. Pilates incorporates weight-bearing positions throughout each workout.
Resistance training builds both muscle and bone density simultaneously. When muscles pull on bones during resistance exercises, it stimulates bone formation at the attachment points. Pilates uses your body weight, resistance bands, and controlled movements to create this muscle-bone strengthening effect.
Balance training reduces your fall risk by up to 23%—and falls are the number one cause of fractures in women with osteoporosis. Pilates emphasizes controlled, precise movements that challenge your balance and build the stabilizer muscles that keep you upright.
The powerful combination is what makes Pilates uniquely effective. You’re not just doing one type of bone-building exercise—you’re doing all three in a single, efficient workout. Research published in multiple studies shows that women who practice Pilates consistently can slow bone loss and, in some cases, actually increase bone density in the spine and hips.
What Makes Pilates Different (and Safer)
Pilates is low-impact but high-effectiveness. Unlike running or jumping, which can jar vulnerable bones, Pilates uses controlled, flowing movements that build strength without shock. You get the bone-building benefits without the fracture risk.
The emphasis on alignment protects your vulnerable spine. Every exercise focuses on maintaining proper posture and spinal positioning.
This is crucial because forward flexion (excessive rounding of the spine) is one of the most dangerous movements for osteoporotic bones.
Modifications make Pilates accessible for all fitness levels. Whether you’re just starting your fitness journey or you’ve been active for years, each exercise can be adjusted to meet you where you are. You progress at your own pace, building strength safely.
Best of all? You don’t need expensive equipment. Your body becomes the gym. A mat, maybe a chair for support, and you’re ready to transform your bone health from your living room.
Critical Safety Guidelines Before You Start
Movements to Avoid with Osteoporosis
Not all exercise is safe when you have osteoporosis. Three specific movement patterns significantly increase your fracture risk, and you need to know them before you begin any exercise program.
Forward flexion—excessive rounding of your spine—is the most dangerous movement. Think of crunches where you curl your spine forward, or toe touches where you round over.
These movements compress the front of your vertebrae, which are already weakened by osteoporosis. Spinal compression fractures often happen during these exact movements.
Twisting at the waist with resistance creates shearing forces on your spine. Rotating your torso while holding weights or pushing against resistance can fracture weakened vertebrae. The Russian twist and similar exercises are off-limits.
High-impact jumping or jarring movements stress bones beyond their capacity. Box jumps, running on hard surfaces, and plyometric exercises create forces your fragile bones can’t handle safely.
The good news? Every effective exercise has a safe modification. You can build strength and bone density without these risky movement patterns. The exercises I’m sharing today are specifically designed to avoid these danger zones while maximizing bone-building benefits.
Your Pre-Exercise Checklist
Get medical clearance from your doctor first. This isn’t optional. Your physician needs to assess your specific bone density, fracture risk, and any other health conditions that might affect your exercise program. Ask about your T-score (your bone density measurement) so you understand your starting point.
Start slowly and progress gradually. Your bones need time to adapt to new stress. Patience delivers results. Rushing the process increases injury risk and can set you back weeks or months.
Listen to your body, but understand the difference between productive challenge and pain. Muscle fatigue and mild discomfort are normal when you’re building strength. Sharp pain, joint pain, or pain that worsens with movement are red flags. Stop immediately if you experience these.
Create a safe workout space at home. Clear clutter that could cause trips or falls. Use a non-slip mat. Keep a sturdy chair nearby for balance support. Wear comfortable, non-restrictive clothing and supportive shoes (or grippy socks if you prefer).
Keep water nearby and stay hydrated throughout your workout. Proper hydration supports muscle function and helps prevent cramping.
How to Progress Safely
Begin with 2-3 sessions per week, allowing rest days between workouts. Your bones need recovery time to rebuild stronger. More isn’t always better—consistency is what transforms bone health.
Master form before adding repetitions or difficulty. Perfect technique protects your bones and maximizes effectiveness. It’s better to do 5 repetitions with flawless form than 20 with sloppy execution.
Gradual progression prevents injury. When an exercise feels easy, and you can complete all repetitions with good form, you’re ready to level up. Add 2-3 repetitions, hold positions slightly longer, or move to the next modification level.
Track your workouts in a simple notebook. Record which exercises you did, how many repetitions, and how you felt. This helps you see progress over time and identify patterns if something causes discomfort.
Exercise 1: The Modified Hundred (Bone-Safe Version)
Why This Exercise Builds Stronger Bones
The Modified Hundred is a Pilates classic that strengthens your deep core muscles—the ones that protect your spine during every daily movement. Strong core muscles act like a natural back brace, supporting your vulnerable vertebrae and maintaining proper alignment.
This exercise improves your posture by activating the muscles that hold you upright. Better posture reduces the forward slouch that increases spinal fracture risk. You’ll notice yourself standing taller within weeks.
The controlled arm movements build bone density in your shoulders and arms through gentle, sustained muscle contraction. Your wrists, often a fracture site, also benefit from supporting the weight of your arms.
Enhanced breathing and circulation deliver oxygen to your muscles and bones, supporting the rebuilding process. The rhythmic breathing pattern also calms your nervous system, reducing stress that can interfere with bone health.
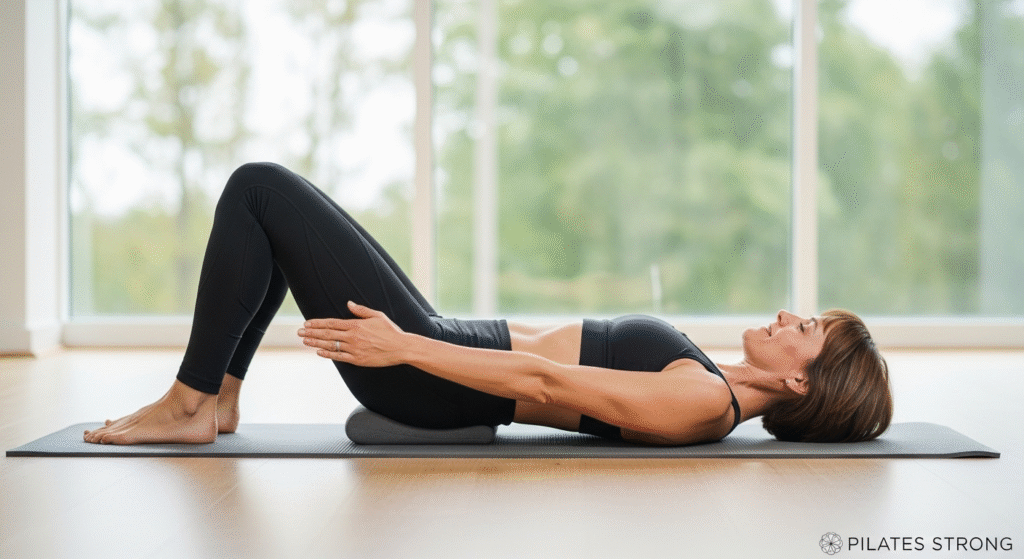
Step-by-Step Instructions
Lie on your back with knees bent and feet flat on the mat, hip-width apart. This is your starting position. Press your lower back gently toward the mat to engage your core.
Here’s the crucial osteoporosis modification: Keep your head down on the mat. Traditional Pilates lifts the head and shoulders, but this creates forward flexion that stresses your spine. You get all the benefits without the risk by keeping your head down.
Extend your arms by your sides, palms facing down, hovering just above the mat. Your arms should be straight but not locked, with your shoulders relaxed away from your ears.
Begin pumping your arms up and down in small, controlled pulses—about 6 inches of movement. The motion comes from your shoulders, not your wrists. Keep the movements precise and deliberate.
Coordinate your breathing: Inhale for 5 pumps, exhale for 5 pumps. This creates a rhythm that helps you maintain control and prevents breath-holding.
Start with 50 pumps (5 breath cycles) and work up to 100 pumps (10 breath cycles) as you build strength. This takes about 1-2 minutes total.
Common Mistakes to Avoid
Don’t lift your head off the mat. This is the most common mistake and the most dangerous for osteoporotic spines. Keep your head heavy and relaxed on the mat throughout the exercise.
Never hold your breath. Holding your breath raises blood pressure and reduces oxygen to your muscles. Keep breathing rhythmically throughout.
Avoid pumping your arms too vigorously or too high. Wild, uncontrolled movements defeat the purpose. Small, precise pulses are far more effective and safer.
If your lower back arches off the mat, you’ve lost core engagement. Press your back down gently or bend your knees more to maintain contact.
Feel the Results
You should feel this exercise in your core—a deep engagement in your abdominal muscles. Your shoulders and arms will also work, feeling warm and slightly fatigued.
If you feel neck strain, check that your head is fully relaxed on the mat. If you feel lower back discomfort, ensure your back stays pressed down, and your knees are bent enough.
Within two weeks of consistent practice, you’ll notice improved posture throughout your day. You’ll find it easier to maintain upright alignment while sitting, standing, and walking. This postural improvement is your first defense against spinal fractures.
Exercise 2: Supported Bridge (Hip and Spine Strengthener)
The Bone-Building Benefits
The bridge targets your hips—one of the most critical fracture sites for women with osteoporosis. Hip fractures are devastating, often leading to loss of independence. Building hip strength is literally life-changing.
This exercise strengthens your glutes and hamstrings, the powerhouse muscles that stabilize your pelvis and support your spine. Strong glutes improve every movement from walking to climbing stairs to getting up from chairs.
Your spinal extensor muscles—the ones that run along your back—work hard to maintain the bridge position. These muscles fight the forward slouch that compresses your spine. Strengthening them is one of the most effective ways to prevent spinal compression fractures.
The bridge is a weight-bearing position where your bones support your body weight. This mechanical stress signals your body to build stronger bones in your hips, spine, and legs.
Perfect Form Breakdown
Lie on your back with knees bent and feet flat on the mat, hip-width apart. Position your feet close enough that you can touch your heels with your fingertips when your arms are by your sides.
Press your arms into the mat by your sides, palms down. This creates stability and helps you lift.
Engage your core by gently drawing your belly button toward your spine. Press through your heels—not your toes—to lift your hips toward the ceiling. Your heels should feel rooted into the mat.
Lift until your body forms a straight line from shoulders to knees. This is your alignment checkpoint. Your hips shouldn’t be too high (arching your back) or too low (not lifting enough).
Hold this position for 3-5 slow breaths. Focus on keeping your hips level and your core engaged.
Lower slowly and with control, rolling down one vertebra at a time. Imagine peeling your spine off the mat from top to bottom. This controlled descent is just as important as the lift.
Complete 8-10 bridges, resting briefly between repetitions if needed.
Power Modifications
If holding the bridge position feels too challenging, place a yoga block or firm pillow under your sacrum (the flat bone at the base of your spine) for support. This allows you to maintain the position longer while building strength.
Ready to progress? At the top of your bridge, extend one leg straight, keeping your hips level. Hold for 3 breaths, then switch legs. This single-leg variation intensifies the challenge for your glutes and balance.
Add resistance by placing a light resistance band around your thighs, just above your knees. Press your knees slightly apart against the band throughout the movement. This activates your hip stabilizers even more powerfully.
What You’ll Notice
Stronger glutes transform your daily movements. Walking feels easier and more powerful. Climbing stairs becomes less taxing. Getting up from low chairs happens smoothly instead of requiring a struggle.
Better hip stability directly reduces your fall risk. Your body can catch itself when you stumble, preventing the falls that lead to fractures.
Many women experience relief from lower back discomfort as their glutes and core strengthen. When these muscles work properly, they take pressure off your spine.
Within a month of consistent practice, you’ll notice improved confidence in your movements. You’ll feel more stable and capable in your body.
Exercise 3 Through 7: Complete Your Bone-Building Routine
Exercise 3: Wall Push-Ups (Upper Body Bone Builder)
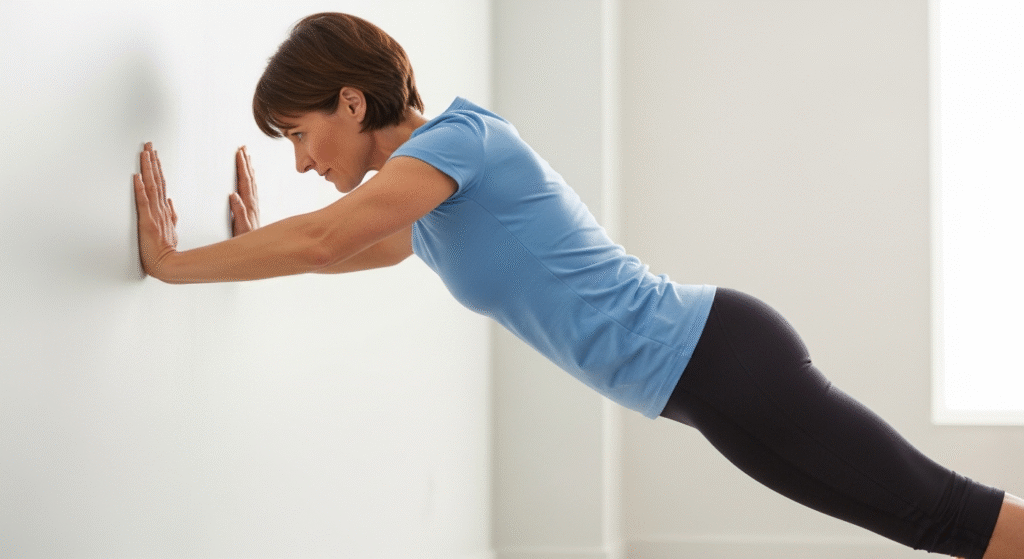
Your wrists, arms, and shoulders benefit tremendously from weight-bearing exercise. Wall push-ups deliver bone-building stress to your upper body while remaining completely safe for osteoporotic bones.
Stand arm’s length from a wall. Place your hands on the wall at shoulder-width and chest height, fingers pointing up. Step your feet back slightly so your body forms a straight line from head to heels.
Engage your core to prevent your hips from sagging. Bend your elbows, bringing your chest toward the wall while keeping your body straight. Your elbows should point down and slightly back, not out to the sides.
Push back to the starting position with control. The tempo matters: take 3 seconds to lower toward the wall, 3 seconds to push back up. This controlled speed maximizes muscle and bone building.
Complete 10-15 repetitions. Rest for 30 seconds, then repeat for a second set.
As you build strength over weeks, progress by moving to a lower surface. Try push-ups against a kitchen counter, then a sturdy table, then a bench. Each lower angle increases the challenge. Never compromise form for difficulty—perfect technique always wins.
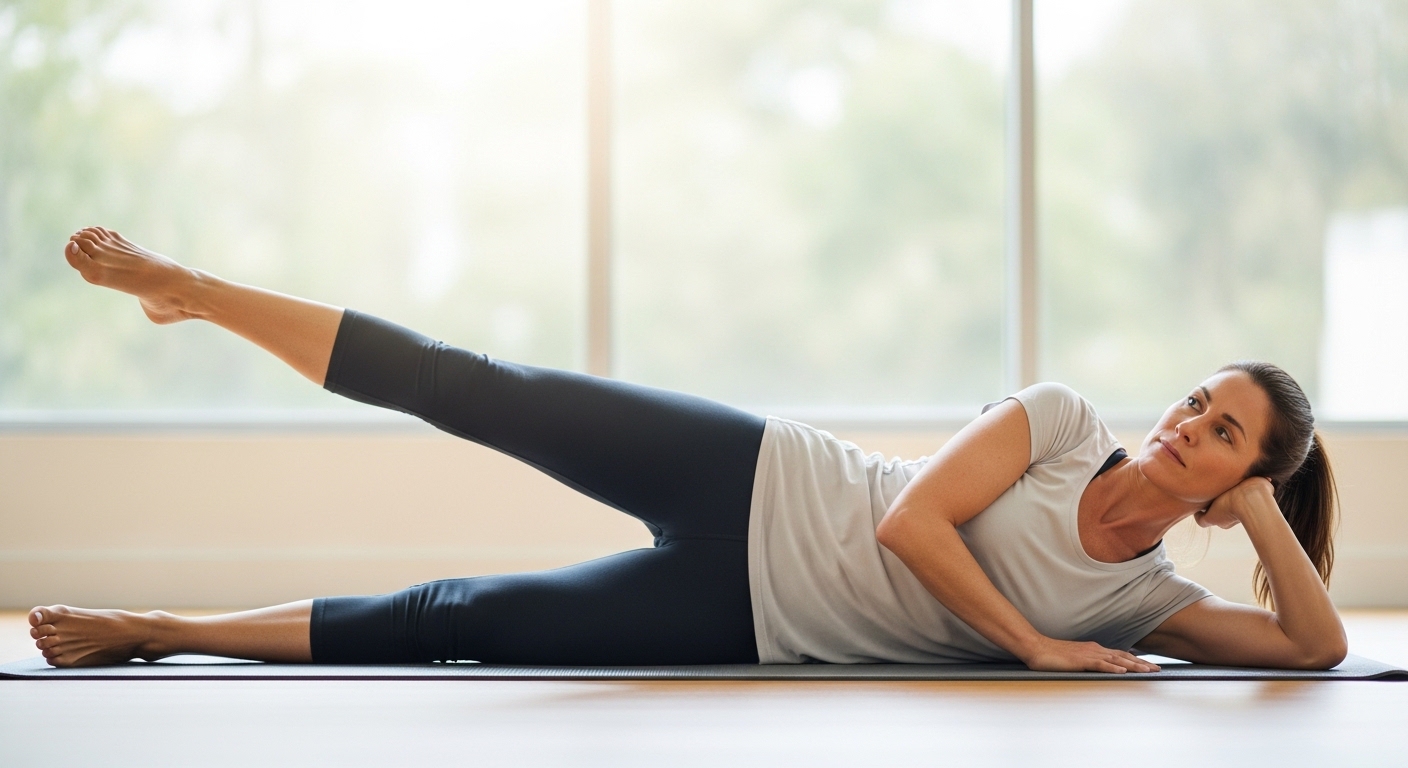
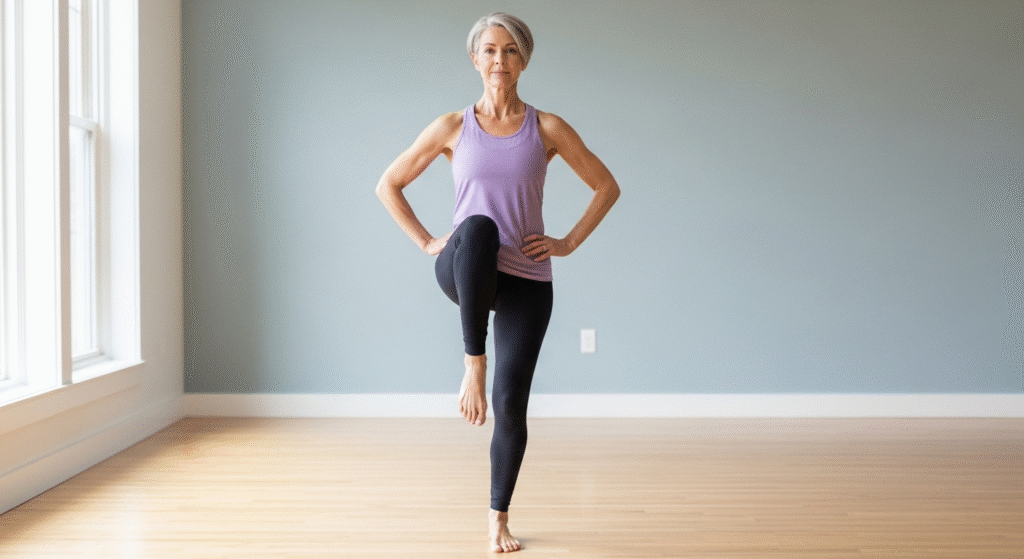
Exercise 4: Standing Leg Lifts (Balance and Hip Strength)
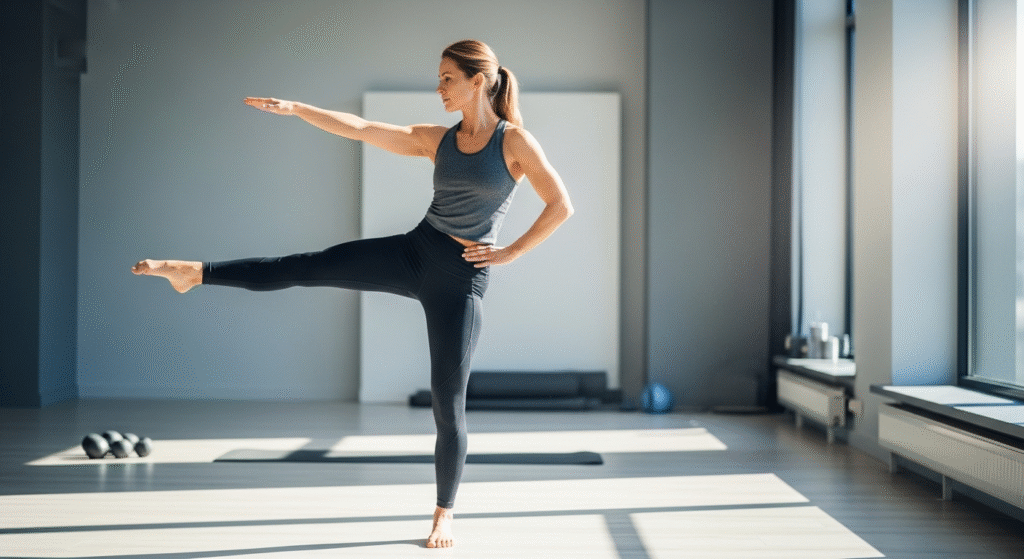
This exercise delivers triple benefits: weight-bearing for your leg bones, balance training that reduces fall risk by 23%, and hip strengthening for daily function.
Stand tall next to a chair or wall, placing one hand on it for support. Stand on your right leg, keeping your posture upright with shoulders back and core engaged.
Front leg lift: Lift your left leg forward with a straight knee, foot flexed. Hold for 3 seconds, then lower with control. The height doesn’t matter—control does. Complete 8-10 lifts.
Side leg lift: Lift your left leg directly to the side, keeping your toes pointing forward (not turned out). Your hips stay square—don’t lean away from the lifting leg. Hold for 3 seconds, lower with control. Complete 8-10 lifts.
Back leg lift: Extend your left leg behind you, keeping your hips square and your torso upright. Don’t arch your back. Hold for 3 seconds, lower with control. Complete 8-10 lifts.
Switch legs and repeat all three directions on your right leg.
Progress your balance over time. Start with two hands on support if needed. After 2 weeks, use one hand. After 4 weeks, try fingertip support only. Eventually, you may not need support at all—but only progress when you feel completely stable.
Better balance prevents the falls that cause fractures. Stronger hips make every daily movement easier and more confident.
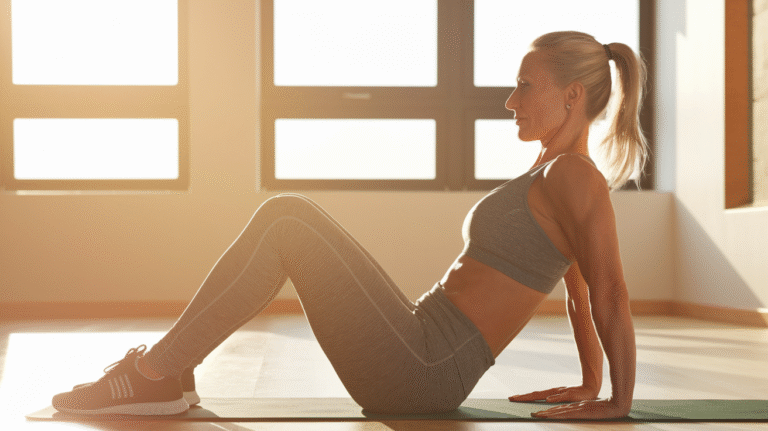
Exercise 5: Seated Spine Extension (Posture Powerhouse)
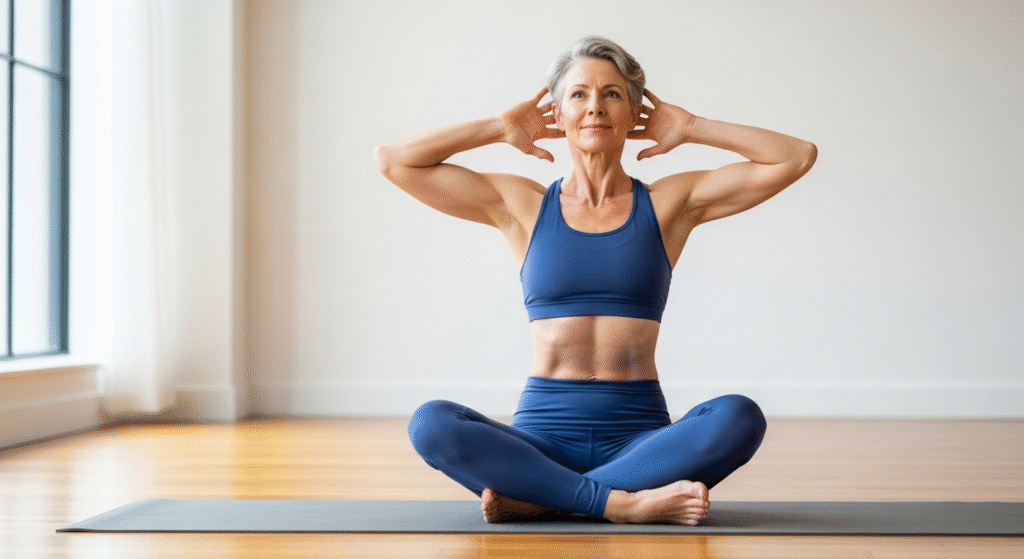
This exercise strengthens your spinal extensor muscles—the anti-osteoporosis muscles that fight forward slouch and protect against compression fractures.
Sit on the edge of a sturdy chair with your feet flat on the floor, hip-width apart. Sit tall with your spine in neutral alignment. Place your fingertips lightly behind your head, elbows wide.
From this upright position, gently arch your upper back, lifting your chest toward the ceiling. Think of creating space between your vertebrae rather than crunching them together. Your head stays in line with your spine—don’t drop it back.
Hold this gentle extension for 3-5 breaths. You should feel your back muscles working between your shoulder blades.
Return to neutral with control. Complete 8-10 repetitions.
This exercise counteracts the forward flexion pattern that causes compression fractures. It builds strength in the exact muscles that maintain upright posture and protect your spine. You’re literally building your body’s natural back brace.
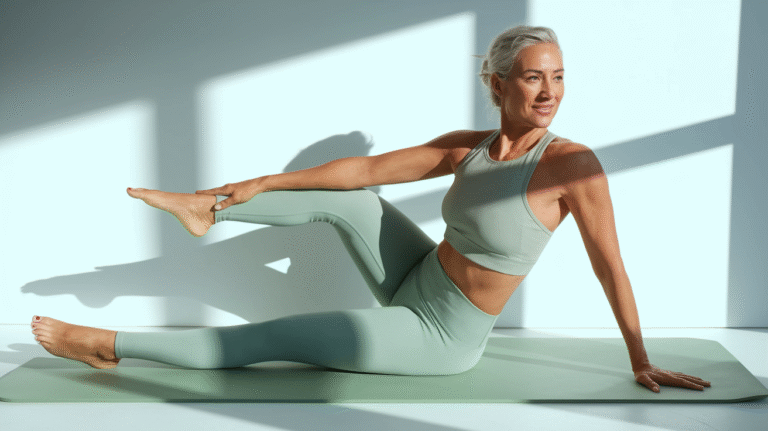
Exercise 6: Side-Lying Leg Lifts (Hip Bone Density)
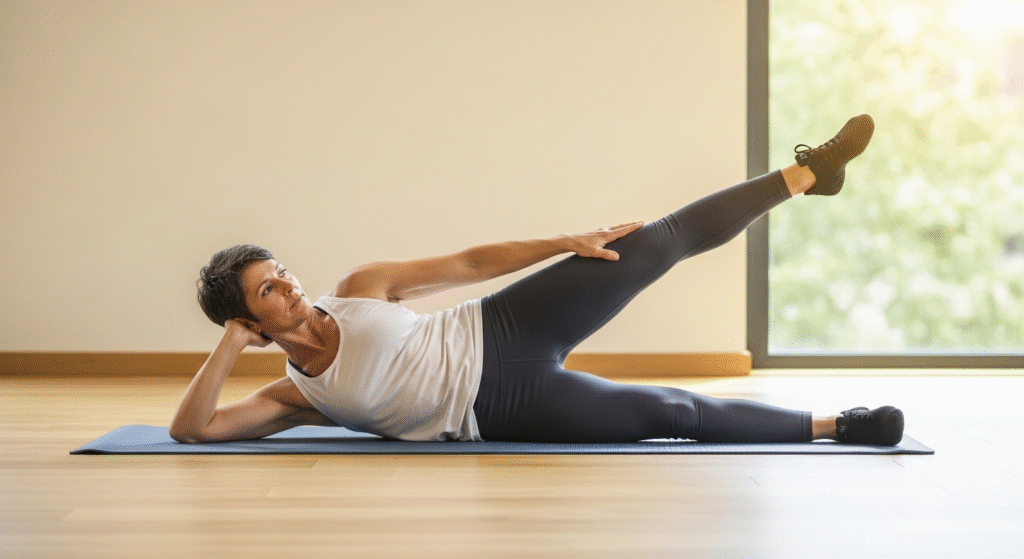
Lie on your right side with your legs straight and stacked, your head resting on your right arm. Place your left hand on the mat in front of your chest for stability.
Engage your core to keep your torso still. Lift your top leg toward the ceiling, keeping your foot flexed and toes pointing forward. Don’t roll your hips back—stay stacked.
Lift to about hip height, hold for 2 seconds, then lower with control. Complete 12-15 repetitions.
Flip to your left side and repeat with your right leg.
This exercise builds bone density in your hip bones through muscle pull and controlled movement. It also strengthens the hip stabilizers that keep you balanced and prevent falls.
Exercise 7: Standing Marches (Functional Strength)
Stand tall with your hand on a chair for support. Lift your right knee toward your chest, keeping your standing leg strong and your posture upright. Hold for 2 seconds, then lower with control.
Immediately lift your left knee. Alternate legs in a slow, controlled marching pattern. Complete 20 total marches (10 per leg).
Focus on lifting your knee as high as comfortably possible while maintaining perfect posture. This weight-bearing exercise builds bone density in your legs and hips while improving the exact movement pattern you use for walking and climbing stairs.
Your Bone-Building Action Plan
You now have seven proven, safe Pilates exercises specifically designed for women over 40 with osteoporosis. These movements build bone density, strengthen the muscles that protect vulnerable bones, improve balance to prevent falls, and boost your confidence in your body.
Start with three sessions per week, performing each exercise with perfect form. Your workout should take about 20-25 minutes. Consistency matters more than intensity—showing up regularly delivers results.
Track your progress in a simple notebook. Record which exercises you completed, how many repetitions, and how you felt. Celebrate small wins: an extra repetition, better balance, less wobbling, improved posture throughout your day.
Remember: your bones are living tissue that responds to the right stimulus. Every time you complete these exercises, you’re sending powerful signals to your body to build stronger, denser bones. You’re not helpless against osteoporosis—you’re actively fighting back with every controlled movement.
Within four weeks, you’ll notice improved posture and balance. Within eight weeks, you’ll feel stronger and more confident in your daily movements. Within six months, you may see measurable improvements in your bone density when you get your next scan.
Your body hasn’t betrayed you. It’s simply asking for the right kind of movement. Give it these seven exercises consistently, and watch how your bones respond. You’re stronger than you think, and you’re getting stronger every day.
Ready to transform your bone health? Start with Exercise 1 today. Just one exercise, done correctly, begins your journey to stronger bones and a more confident you.