7 Back Pain Relief Exercises for Women Over 40
You’re Not Alone in This Journey
If you’re reading this, chances are you’ve experienced that all-too-familiar ache in your lower back—maybe when you’re getting out of bed, sitting at your desk, or just trying to enjoy time with your family. Here’s what you need to know: back pain after 40 isn’t a life sentence, and you’re definitely not alone.
The reality is that hormonal changes during perimenopause and menopause affect muscle mass and joint health. Years of accumulated postural habits finally catch up with us. The natural decrease in core strength that happens as we age means our backs don’t have the support system they once did. But here’s the empowering truth: most back pain is muscular, not structural, which means it’s completely fixable.
I’m going to share 7 gentle yet powerful exercises that target the root causes of back pain in women over 40. These moves don’t require a gym membership or fancy equipment—just you, a yoga mat, and 15 minutes a day. You’ll learn exactly how to strengthen the muscles that support your spine, improve flexibility, and finally get the lasting relief you deserve.
What makes these exercises perfect for you? They’re low-impact and joint-friendly, they focus on core stability and flexibility, and every single one can be modified for your fitness level. Whether you’re just starting your fitness journey or you’ve been active for years, these exercises will meet you where you are.
Why Back Pain Gets Worse After 40 (And Why That’s Actually Good News)

The Physical Changes Working Against You
Let’s talk about what’s really happening in your body. After 40, women lose approximately 3-8% of muscle mass per decade, and this loss accelerates after menopause. Your core muscles—the ones that act like a natural corset supporting your spine—weaken faster than you might realize. This isn’t your fault; it’s biology.
Hormonal shifts play a significant role too. Declining estrogen levels affect collagen production, which impacts the health of your joints, ligaments, and intervertebral discs. You might notice you’re not as flexible as you used to be, or that your joints feel stiffer in the morning. These changes are completely normal, but they do require a response.
Then there’s the accumulation factor. Every time you’ve slouched at your desk, carried a heavy purse on one shoulder, or twisted awkwardly to grab something from the backseat, your body remembered. Years of these small postural habits compound over time, creating muscle imbalances and tension patterns that eventually manifest as chronic pain.
The Empowering Truth About Back Pain Relief
Here’s where the good news comes in: research shows that 85% of back pain is non-specific, meaning it’s related to muscle weakness, tightness, or imbalances rather than serious structural problems. This is actually fantastic news because muscles respond incredibly well to targeted exercise at any age.
Your body has an amazing capacity to strengthen and heal, even if you haven’t exercised in years. Studies demonstrate that women in their 40s, 50s, and beyond can build muscle strength, improve flexibility, and reduce pain through consistent, appropriate exercise. The key word here is “movement”—not rest.
The old advice to rest when your back hurts has been completely debunked. Modern research proves that gentle, targeted movement is your best medicine. When you strengthen the muscles supporting your spine and improve your flexibility, you’re addressing the actual source of your pain rather than just masking symptoms.
What Makes These 7 Exercises Perfect for Women Over 40
These exercises were specifically chosen because they’re low-impact and protect your joints while still delivering powerful results. You won’t find any high-impact jumping or jarring movements here. Instead, you’ll discover controlled, mindful exercises that build strength from the inside out.
Each exercise focuses on core stability—the foundation of a healthy back. Your core isn’t just your abs; it includes all the muscles that stabilize your spine and pelvis. When these muscles work together properly, they take pressure off your back and distribute forces more evenly throughout your body.
The beauty of this routine is its adaptability. Every exercise includes modifications for different fitness levels, so you can start where you are and progress at your own pace. There’s no pressure to perform perfectly; the goal is consistent practice and gradual improvement.
Before You Begin: Essential Tips for Safe and Effective Practice
Creating Your Perfect Exercise Space
You don’t need much to get started. A yoga mat or thick towel provides cushioning for floor exercises. Wear comfortable, stretchy clothes that don’t restrict your movement. Keep a pillow or bolster nearby—these props can make certain positions more accessible and comfortable.
Timing matters more than you might think. If you wake up with stiffness, morning practice helps loosen tight muscles and sets a positive tone for your day. If you accumulate tension throughout the day, evening sessions provide relief and help you sleep better. Experiment to find what works best for your body and schedule.
The most important equipment you have is your body awareness. Learning to listen to your body’s signals—knowing the difference between a good stretch and pain that signals you should stop—is a skill that develops with practice. Start by simply noticing how your back feels before you begin, then check in during and after each exercise.
The Golden Rules of Back Pain Relief
Adopt a “stretch, don’t strain” philosophy. You should feel a gentle pull or mild tension, never sharp pain. If an exercise hurts, back off or skip it for now. Progress happens through consistency, not intensity.
Breathing enhances everything you do. Exhale during the effort phase of each exercise, and never hold your breath. Deep, rhythmic breathing relaxes your nervous system, increases oxygen flow to your muscles, and helps you move more effectively.
Know when to push forward and when to ease back. Some days your body will feel more flexible and strong; other days you’ll need to modify more. Both are perfectly fine. The goal is sustainable, long-term practice, not perfection.
Quick Warning Signs to Watch For
Understand the difference between “good” discomfort and warning pain. A gentle pulling sensation in your muscles is normal and beneficial. Sharp, shooting pain, numbness, tingling, or pain that radiates down your leg requires immediate attention from a healthcare provider.
If you have existing conditions like herniated discs, osteoporosis, or spinal stenosis, consult your doctor before starting any new exercise program. These exercises are generally safe, but your healthcare provider can help you determine which modifications are best for your specific situation.
Red flags that warrant medical attention include: pain that doesn’t improve after a few weeks of consistent exercise, pain accompanied by fever or unexplained weight loss, loss of bladder or bowel control, or progressive weakness in your legs. These symptoms are rare but important to recognize.
The 7 Essential Exercises: Your Complete Step-by-Step Guide
Exercise #1: The Pelvic Tilt (Your Foundation Move)

Why This Simple Move Is So Powerful
The pelvic tilt might look basic, but it’s the foundation of everything else you’ll do. This exercise teaches you how to engage your deep core muscles—the transverse abdominis and multifidus—that directly support your spine. These are the muscles that often “turn off” when you experience back pain, creating a vicious cycle of weakness and discomfort.
By practicing pelvic tilts, you’re essentially retraining your brain-muscle connection. You’re learning what proper pelvic alignment feels like, which helps you maintain better posture throughout your day. This awareness alone can significantly reduce back strain during daily activities.
Step-by-Step Instructions
Lie on your back with your knees bent and feet flat on the floor, hip-width apart. Your arms rest comfortably at your sides. Notice the natural curve in your lower back—there should be a small space between your back and the floor.
Now, gently tilt your pelvis by engaging your lower abdominal muscles and pressing your lower back into the floor. Imagine you’re trying to flatten your back against the mat or push your belly button toward your spine. Your tailbone will lift slightly off the floor.
Hold this position for 5 seconds while breathing normally—don’t hold your breath! Then release and return to the starting position. That’s one repetition. Start with 10-15 reps, focusing on control rather than speed.
Making It Work for You
If you’re having trouble feeling the movement, place one hand under the curve of your lower back. As you tilt your pelvis, you should feel your back pressing into your hand. This tactile feedback helps you understand the movement better.
For an advanced variation, try adding a leg extension: perform the pelvic tilt, then slowly extend one leg along the floor while maintaining the tilt. This challenges your core stability even more. Only progress to this version once you’ve mastered the basic movement.
Throughout your day, you can practice mini pelvic tilts while sitting or standing. This helps reinforce the muscle memory and brings awareness to your posture when you need it most.
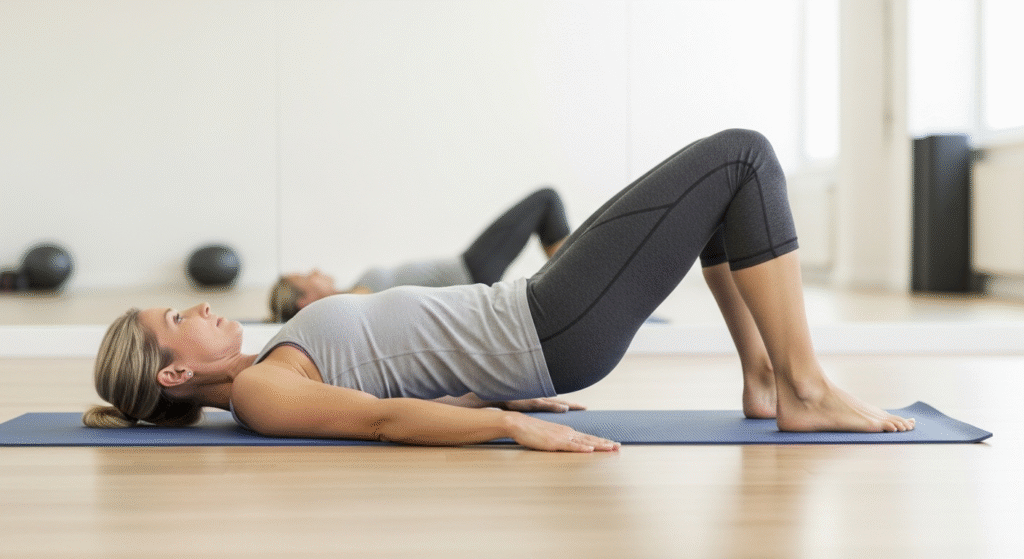
Exercise #2: The Bridge (Building Back Strength the Easy Way)
The Amazing Benefits You’ll Feel
The bridge is a powerhouse exercise that strengthens your glutes, hamstrings, and lower back simultaneously. Strong glutes are essential for back health because they help stabilize your pelvis and take pressure off your lower back during daily activities like walking, climbing stairs, and standing.
This exercise also improves spinal stability by teaching your body how to maintain a neutral spine position while moving. The bonus? You’re also toning your backside and improving hip mobility—benefits that go far beyond back pain relief.
Complete Guide to Perfect Form
Start in the same position as the pelvic tilt: lying on your back with knees bent and feet flat on the floor, hip-width apart. Your arms rest at your sides, palms down for stability.
Engage your core and squeeze your glutes, then press through your heels to lift your hips toward the ceiling. Your body should form a straight line from your shoulders to your knees—avoid arching your back or lifting too high. The movement comes from your hips, not your lower back.
At the top position, hold for 2-3 seconds while keeping your glutes engaged and breathing steadily. Then slowly lower your hips back down with control, vertebra by vertebra, until your tailbone touches the floor.
Start with 10 repetitions, gradually working up to 20 as you build strength. Quality always trumps quantity—one perfect bridge is worth more than ten sloppy ones.
Customizing Your Bridge
If the basic bridge feels challenging, place a pillow or yoga block under your sacrum (the triangular bone at the base of your spine) for support. This reduces the range of motion while still providing strengthening benefits.
For an intermediate challenge, place a small squeeze ball or pillow between your knees and squeeze gently throughout the movement. This activates your inner thighs and further stabilizes your pelvis.
Ready for more? Try the single-leg bridge: perform a regular bridge, then extend one leg straight out at knee height while maintaining your hip position. Hold for 5-10 seconds, then switch legs. This variation dramatically increases core engagement and balance.
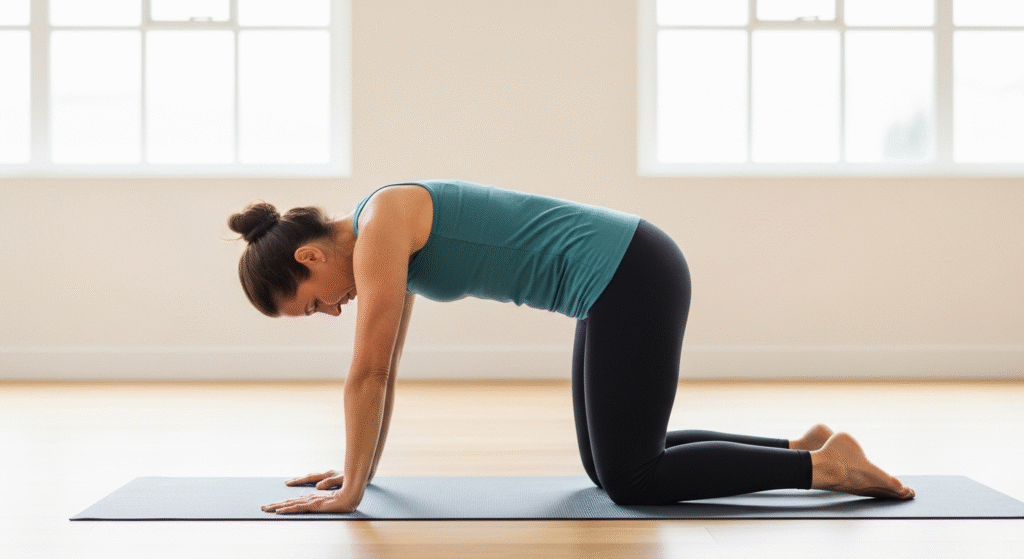
Exercise #3: Cat-Cow Stretch (The Ultimate Spine Mobilizer)
Why This Yoga Classic Works Wonders
Cat-Cow is one of the most effective exercises for spinal mobility because it moves your spine through flexion and extension in a gentle, controlled way. This flowing movement promotes circulation to the intervertebral discs, increases flexibility throughout your entire spine, and helps release tension that accumulates from static postures.
Beyond the physical benefits, Cat-Cow serves as a natural stress reliever. The rhythmic movement combined with coordinated breathing activates your parasympathetic nervous system, which calms your stress response. Many women find this exercise particularly soothing after a long, tense day.
Flowing Through the Movement
Start on your hands and knees in a tabletop position. Place your hands directly under your shoulders and your knees under your hips. Your spine should be in a neutral position, with your head aligned with your spine—not drooping down or craning up.
For the “Cat” portion, exhale as you round your spine toward the ceiling, tucking your chin toward your chest and your tailbone under. Imagine creating a tall arch with your back, like a cat stretching after a nap. Feel the stretch along your entire spine.
For the “Cow” portion, inhale as you arch your back in the opposite direction, lifting your head and tailbone toward the ceiling while letting your belly drop toward the floor. Your shoulder blades should draw together slightly.
Flow smoothly between these two positions 8-10 times, coordinating your breath with the movement. Exhale for Cat, inhale for Cow. The movement should feel fluid and continuous, not choppy or forced.
Pro Tips for Maximum Relief
The breath-movement connection is crucial here. Your breath guides the movement, not the other way around. If you find yourself holding your breath or breathing shallowly, slow down and re-establish the rhythm.
Try focusing on different sections of your spine during different repetitions. Sometimes emphasize the movement in your lower back, other times in your mid-back or neck. This targeted awareness helps you identify and release specific areas of tension.
Morning Cat-Cow can be slightly more vigorous to wake up your body, while evening practice should be slower and more meditative to promote relaxation before bed.
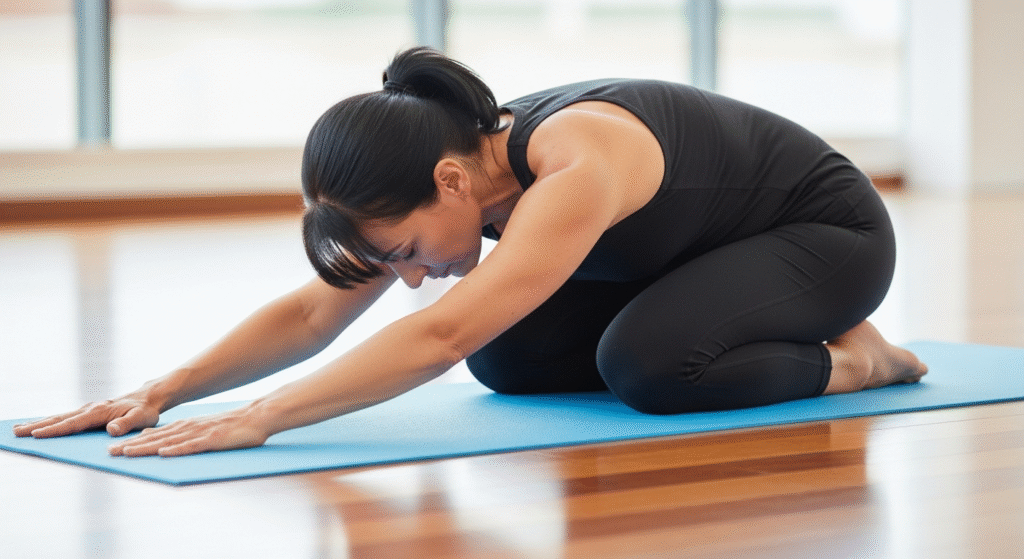
Exercise #4: Child’s Pose (Your Go-To Comfort Position)
The Gentle Power of This Restorative Stretch
Child’s Pose is your safe haven—a position you can return to anytime you need relief. This gentle forward fold releases tension in your lower back, hips, and shoulders simultaneously. It also provides a mild decompression for your spine, creating space between vertebrae that may feel compressed from sitting or standing.
Unlike active exercises, Child’s Pose is restorative. You can hold it as long as you need, making it perfect for those moments when your back feels particularly tight or uncomfortable. Many women use this pose as a reset button during stressful days.
Getting Into Position Correctly
Kneel on your mat with your big toes touching and your knees either together or hip-width apart (wider knees provide more room for your torso and a deeper hip stretch).
Sit back on your heels, then fold forward, extending your arms out in front of you or resting them alongside your body with palms facing up. Your forehead should rest on the mat—if it doesn’t reach comfortably, place a folded towel or pillow under your forehead.
You should feel a gentle stretch in your lower back and hips, but no pain. Your breath should flow easily—if you feel restricted, widen your knees or place a pillow under your chest for support.
Hold this position for 30-60 seconds, or longer if it feels good. Focus on breathing deeply into your lower back, imagining each inhale creating more space in your spine.
Adaptations That Make It Accessible
If your hips don’t reach your heels, place a pillow or folded blanket between your thighs and calves. This support allows you to relax more fully into the pose without straining.
For tight hips, take your knees wider apart—this creates more space for your belly and reduces the hip flexion required. Some women find that knees as wide as the mat edges feels most comfortable.
Add gentle side-to-side movements by walking your hands to the right, holding for a few breaths, then walking them to the left. This variation provides an additional stretch along the sides of your torso and back.
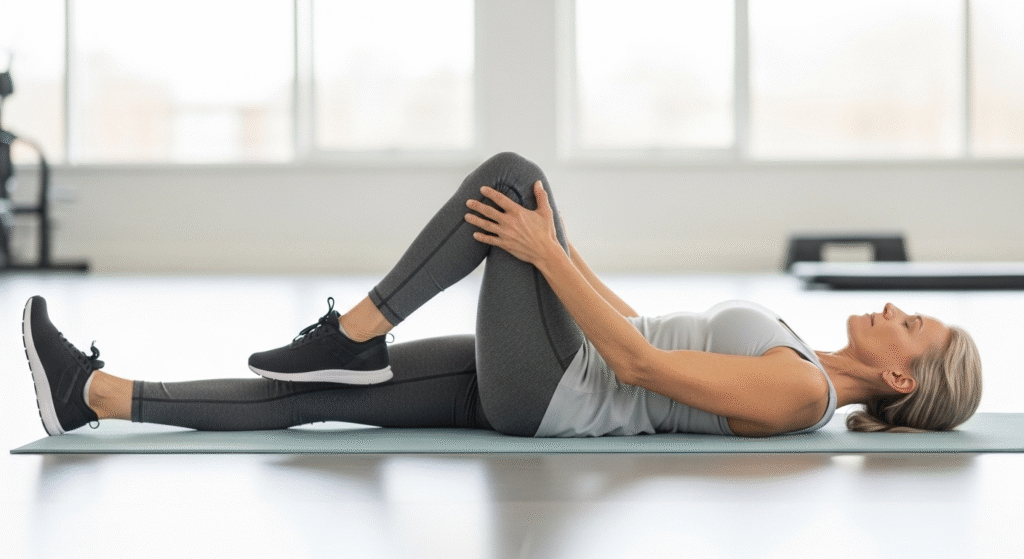
Exercise #5: Knee-to-Chest Stretch (Instant Lower Back Relief)
Why This Simple Stretch Delivers Fast Results
The knee-to-chest stretch directly targets lower back tension by gently flexing your spine and stretching the muscles along your lower back and hips. It also stretches your hip flexors and glutes, which often contribute to back pain when they’re tight.
Many women report feeling immediate relief from this stretch, making it perfect for those mornings when you wake up with a stiff back or after long periods of sitting. The gentle compression also massages your internal organs, promoting better digestion and circulation.
Proper Technique for Both Sides
Lie on your back with both legs extended or with your knees bent and feet flat on the floor—whichever feels more comfortable for your back.
Bring one knee toward your chest, clasping your hands around your shin or behind your thigh (avoid pulling on your knee joint itself). Gently draw your knee closer to your chest until you feel a comfortable stretch in your lower back and hip.
Keep your opposite leg either extended along the floor or bent with the foot flat—experiment to see which position feels better for your back. Your head and shoulders should remain relaxed on the mat.
Hold for 30 seconds, breathing deeply, then switch legs. Repeat 2-3 times on each side.
For a deeper stretch, try the double knee-to-chest variation: bring both knees toward your chest simultaneously and wrap your arms around your shins. This provides a more intense lower back stretch and feels wonderful after the single-leg version.
Getting the Most from This Move
If keeping your opposite leg straight causes your lower back to arch uncomfortably, keep that knee bent with the foot flat on the floor. This maintains better spinal alignment and reduces strain.
Add a gentle rocking motion by slowly rocking side to side or front to back while holding your knee. This creates a massage effect on your lower back muscles and can help release stubborn tension.
For bonus benefits, add ankle circles while holding each knee to your chest. This improves ankle mobility and promotes circulation throughout your lower leg—especially beneficial if you sit for long periods.
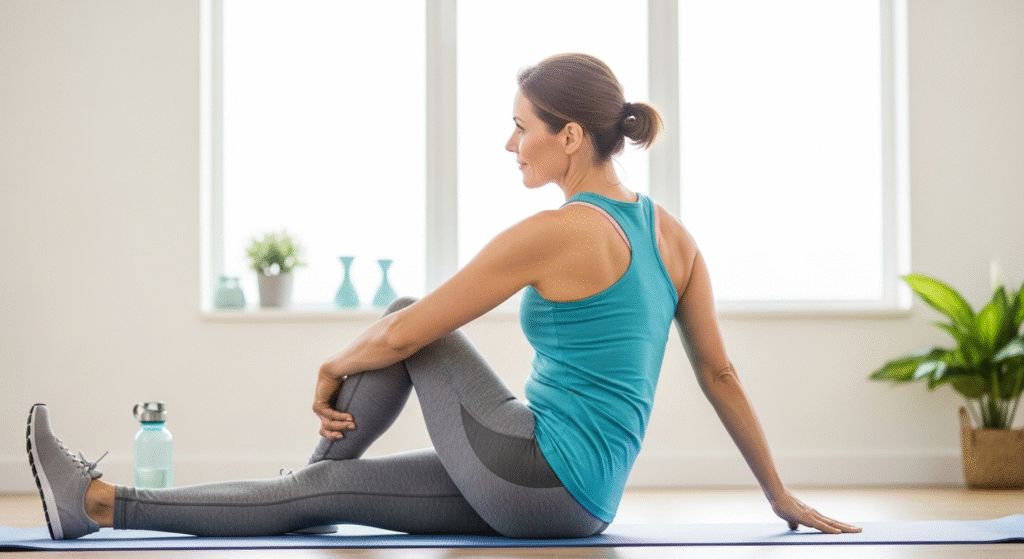
Exercise #6: Seated Spinal Twist (Perfect for Desk Workers)
The Essential Benefits of Rotation
Spinal rotation is often the most neglected movement pattern in our daily lives. We bend forward, we lean back, but we rarely rotate our spine in a controlled, healthy way. This exercise addresses that gap by improving rotational mobility, which is essential for activities like reaching behind you, getting in and out of the car, or simply looking over your shoulder.
Seated twists release tension that accumulates from sitting in one position and repetitive movements. They also energize your body by promoting circulation and stimulating your digestive system. Many women find this exercise particularly refreshing during the afternoon slump.
Executing This Move Safely
Sit tall on a chair with your feet flat on the floor, or sit cross-legged on the floor if that’s comfortable for you. Imagine a string pulling the crown of your head toward the ceiling, lengthening your spine.
Place your right hand on your left knee and your left hand on the chair behind you or on the floor beside your left hip. Inhale to lengthen your spine even more, then exhale as you gently rotate your torso to the left.
The rotation should come from your core, not from pulling with your arms. Your arms simply help you maintain the position—they shouldn’t force the twist deeper. Keep your hips facing forward; the movement happens in your spine and ribcage.
Hold for 20-30 seconds while breathing normally, then return to center and repeat on the other side. Perform 2-3 repetitions on each side.
Variations for Every Body
If sitting on the floor is uncomfortable, the chair version works beautifully. Sit sideways on a chair, then rotate toward the chair back, using it for support. This variation is excellent for office breaks.
Use a pillow or yoga block under your hips if you’re sitting on the floor. This elevation makes it easier to sit with a tall spine and reduces strain on your hips and lower back.
Incorporate gentle neck rotations: as you hold the twist, inhale and look forward, then exhale and turn your gaze in the direction of the twist. Repeat 5-10 times. This adds a beneficial neck stretch and helps release upper back tension.
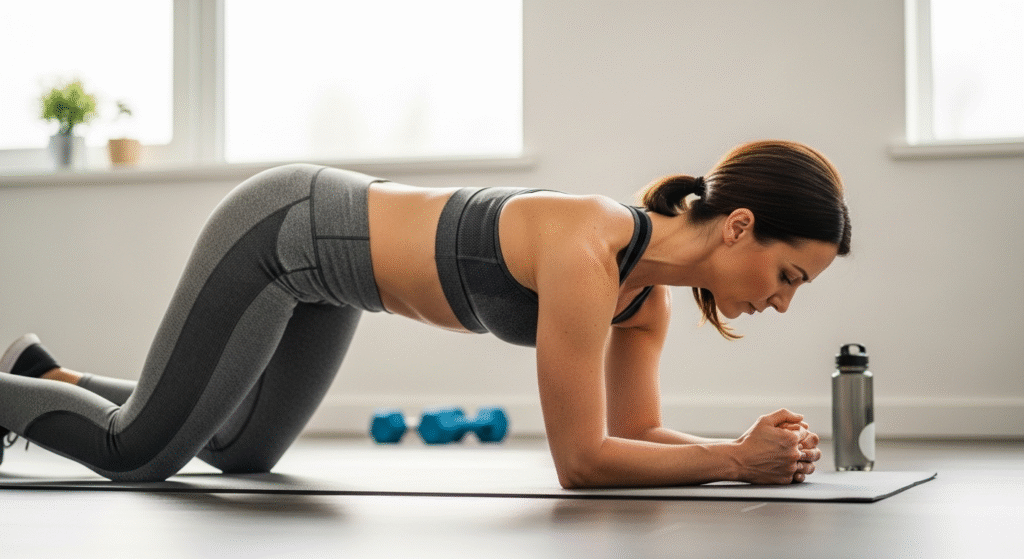
Exercise #7: Modified Plank (Building the Core Strength That Protects Your Back)
Why Core Strength Is Your Back Pain Solution
A strong core is your back’s best friend. Your core muscles—including your deep abdominals, obliques, and back muscles—work together to stabilize your spine during every movement you make. When these muscles are weak, your back has to work overtime, leading to fatigue, strain, and pain.
Building core strength prevents future pain episodes by creating a natural support system for your spine. Strong core muscles also improve your posture throughout the day, reducing the cumulative stress that leads to chronic pain.
Mastering the Knee Plank First
Start on your hands and knees, then lower down to your forearms. Your elbows should be directly under your shoulders, and your forearms parallel to each other. Keep your knees on the floor behind your hips.
Engage your core by gently drawing your belly button toward your spine—but keep breathing! Your body should form a straight line from your head to your knees, without sagging in the middle or hiking your hips up.
Focus on maintaining this position rather than holding it for a long time. Start with 10-20 second holds, rest, then repeat. As you build strength, gradually increase to 30 seconds or longer.
The key form check: imagine balancing a glass of water on your lower back. If your back sags or your hips pike up, the water would spill. Adjust your position to keep that imaginary water level.
Progressive Path to Full Plank
You’re ready to advance to a full plank when you can hold a knee plank for 30 seconds with perfect form, and it feels relatively easy. Don’t rush this progression—building a solid foundation prevents injury and ensures better results.
For the full plank, extend your legs and lift onto your toes while maintaining the same forearm position. Your body should form one straight line from head to heels. Engage your core, squeeze your glutes, and keep your neck neutral by looking at the floor slightly ahead of your hands.
Practice planks 3-4 times per week for best results. Consistency matters more than duration—three 20-second planks with perfect form beat one 60-second plank with sagging form every time.
Your Complete 15-Minute Daily Routine (Putting It All Together)
The Proven Sequence That Works
Start with the gentlest exercises to warm up your body: begin with Pelvic Tilts (10-15 reps) to activate your core, then flow into Cat-Cow (8-10 reps) to mobilize your spine. This warm-up prepares your body for the strengthening work ahead.
Next, perform the Bridge (10-15 reps) to build lower body and back strength. Follow with Child’s Pose (30-60 seconds) to release any tension and give your body a rest.
Move into the Knee-to-Chest Stretch (30 seconds each side, 2-3 reps) for targeted lower back relief, then the Seated Spinal Twist (20-30 seconds each side, 2-3 reps) to improve rotational mobility.
Finish with the Modified Plank (10-30 seconds, 2-3 sets) to build the core strength that will protect your back long-term. End with a final Child’s Pose (60 seconds) for relaxation and integration.
This complete sequence takes just 15 minutes and addresses all the key components of back health: mobility, flexibility, and strength.
Making It a Lasting Habit
The best time to practice is the time you’ll actually do it consistently. Morning sessions energize you for the day and address overnight stiffness. Lunchtime practice breaks up prolonged sitting. Evening sessions release accumulated tension and promote better sleep.
Create a simple reminder system: set a phone alarm, put your yoga mat somewhere visible, or pair your routine with an existing habit like your morning coffee. Consistency builds results, so find a system that works for your lifestyle.
Track your progress in a journal or app. Note how your back feels before and after each session, which exercises feel easier over time, and any improvements in your daily activities. Celebrating these wins—even small ones—keeps you motivated.
Most women notice some improvement within the first week, with significant changes appearing after 3-4 weeks of consistent practice. Remember, you’re reversing years of accumulated tension and weakness, so be patient with your body.
Beyond the Mat: Daily Habits That Support Your Practice
Bring awareness to your posture throughout the day. When sitting, keep both feet flat on the floor, your hips slightly higher than your knees, and your lower back supported. Set hourly reminders to check and adjust your posture.
Incorporate mini-stretches at your desk: gentle seated twists, shoulder rolls, and standing back extensions help prevent tension from building up during long work sessions.
Make ergonomic adjustments to your workspace, car seat, and favorite chair at home. Small changes like monitor height, keyboard position, and lumbar support can significantly reduce daily back strain.
Your Journey to a Stronger, Pain-Free Back Starts Today
You now have a complete toolkit of 7 proven exercises specifically designed to address the unique challenges women over 40 face with back pain. These aren’t complicated gym routines or trendy fitness fads—they’re evidence-based movements that target the root causes of your discomfort.
Remember, your back pain didn’t develop overnight, and lasting relief requires consistent effort. But here’s the beautiful truth: 15 minutes a day is all you need. That’s less time than scrolling through social media or watching one TV show. You’re worth this investment in your health and wellbeing.
Start today with just one or two exercises if the full routine feels overwhelming. The Pelvic Tilt and Child’s Pose alone can provide significant relief. As these become comfortable, gradually add the other exercises. Progress at your own pace, listen to your body, and celebrate every small improvement.
Your body has an incredible capacity to heal and strengthen at any age. These exercises give your body the tools it needs to support your spine, reduce pain, and help you move through life with greater ease and confidence. The power to feel better is literally in your hands—or rather, in your consistent practice.
Ready to reclaim your active, pain-free life? Roll out your mat and start with Exercise #1 right now. Your back will thank you, and your future self will be grateful you began today. You’ve got this!